1 – Waffle Stitch
This project is designed to introduce several aspects of counted canvas.
The Waffle Stitch is in the center of the design, and the other stitches radiate out from the center. In this lesson you’ll learn about anchoring with pin stitches, thread carries, using a laying tool, and reading a diagram.
| Thread Type | As Shown |
| Variegated stranded floss | DMC Coloris 4507 Bougainvillia |
Click here for the master graph
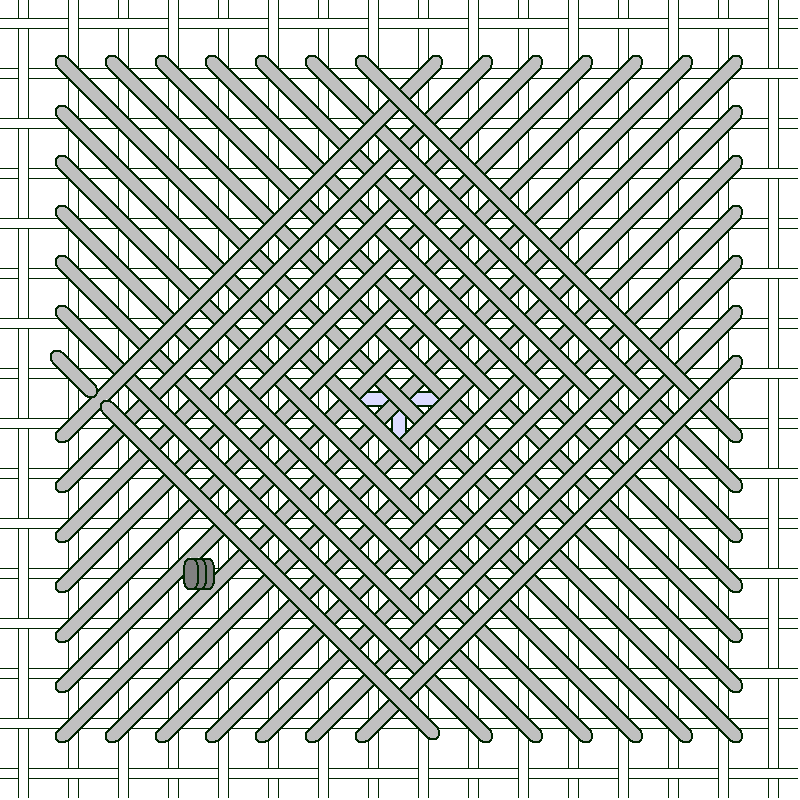
On this chart, the highlighted area shows where the waffle stitch is located. Click here to see where the waffle stitch is located on the master graph.
Find the approximate center of the canvas. You can mark the center lightly with a pencil on the back of the canvas, or use a large needle to slightly enlarge a hole in the center. Also, mark the top of the canvas with an arrow or “T”; if you turn the canvas while stitching it’s helpful to know the orientation, and a mark will help you keep the orientation.
I love waffle stitches in an overdyed or variegated thread, because most of the color changes are on top of the canvas.
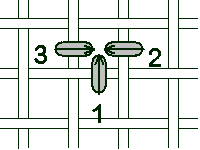
Anchor the thread with a pin stitch in the shape of a “T”, right in the approximate center of the canvas.
The pin stitch will be completely covered by the waffle stitch so it won’t show, and it’s flat so it won’t create a bulge under the waffle stitch.
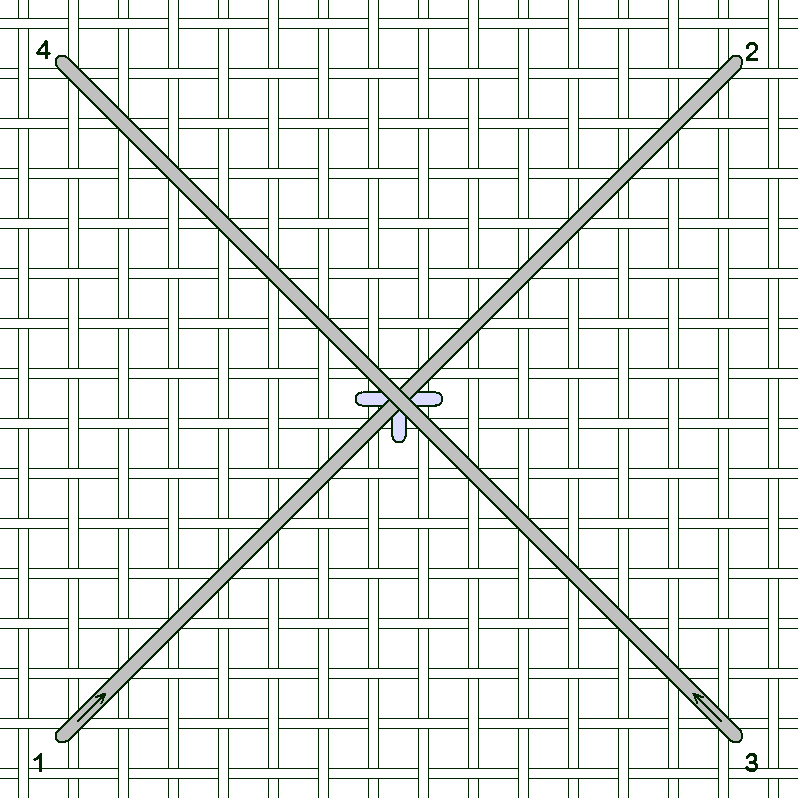
From the “T” stitch count down 7 canvas threads, and 7 canvas threads to the left, and bring the needle up. This is position 1 on the diagram for the waffle stitch. The “T” stitch is shown for reference in the diagram. Bring the needle up at the odd numbers and down at the even numbers.
As you stitch, use a laying tool to keep the strands laying smoothly next to each other and not twisted on each other. To use a laying tool – bring the needle up to begin the stitch, use the laying tool to hold the thread flat against the canvas in the opposite direction you’re stitching, and stroke the threads as you finish the stitch (see video demonstration for more information).
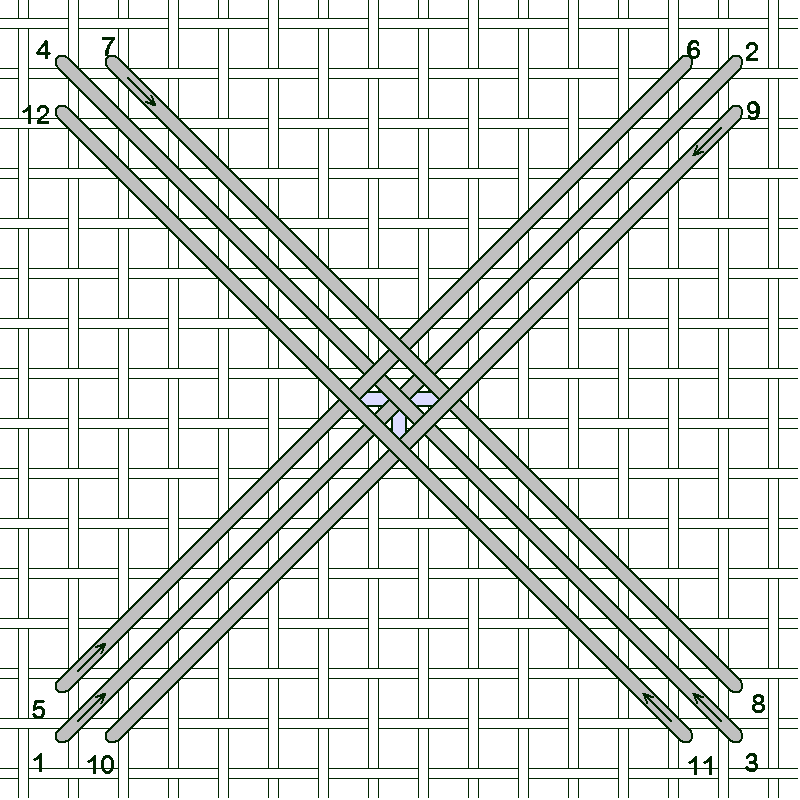
Stitch around as shown in the next diagram. On the back the thread carries form an open square; understanding the nature of the thread carries will help you execute the waffle stitch.
Continue bringing the needle up at the odd numbers and down at the even numbers, until the stitches almost meet in the middle. When completed there will be an open hole in the center of each side.
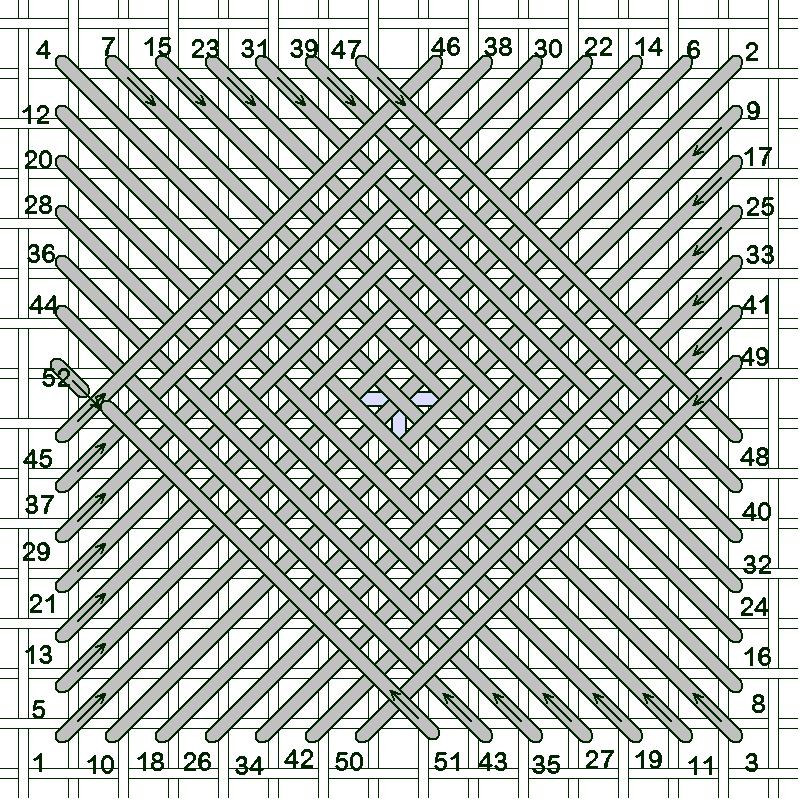
Before ending the last stitch, slide the needle between the canvas and stitch 45 as shown.
Now the waffle stitch is complete and you’re ready to end off the thread. Gently separate the stitches of the waffle stitch until you can see an open canvas thread under the stitches. Make a pin stitch over a single canvas thread, repeating the stitch twice. Pull the thread up tightly and snip it close to the stitches, taking care not to cut the threads of the waffle. If you prefer you can snip off the thread under the canvas after you’ve made the pin stitch. Stroke the waffle stitches back into place over the pin stitch, and admire your beautiful work!
Click here for even more detailed instructions for the waffle stitch.