Tools
A few tools are needed for stitching. In this lesson we’ll look at needles, scissors, laying tools and measuring devices.
Of course you’ll need needles. For counted canvas work, tapestry needles are preferred. Tapestry needles have a blunt tip to push aside the weave of the canvas without piercing it for stitching.
Needles come in many sizes – the smaller the number, the bigger the needle. I prefer size 22 Tapestry needles for 18 ct. canvas. A needle should hold the thread for stitching securely while slightly opening the holes in the canvas to reduce wear on the thread as it passes through the canvas. If the needle is too small (size 26 or 28) it won’t open the holes in the canvas sufficiently and the thread will degrade as it passes through the canvas. If the needle is too large (size 18 or 16) it will open the hole too much and it won’t revert to its usual size. Always select the appropriate size needle – it will make your stitching easier and the finished result nicer.
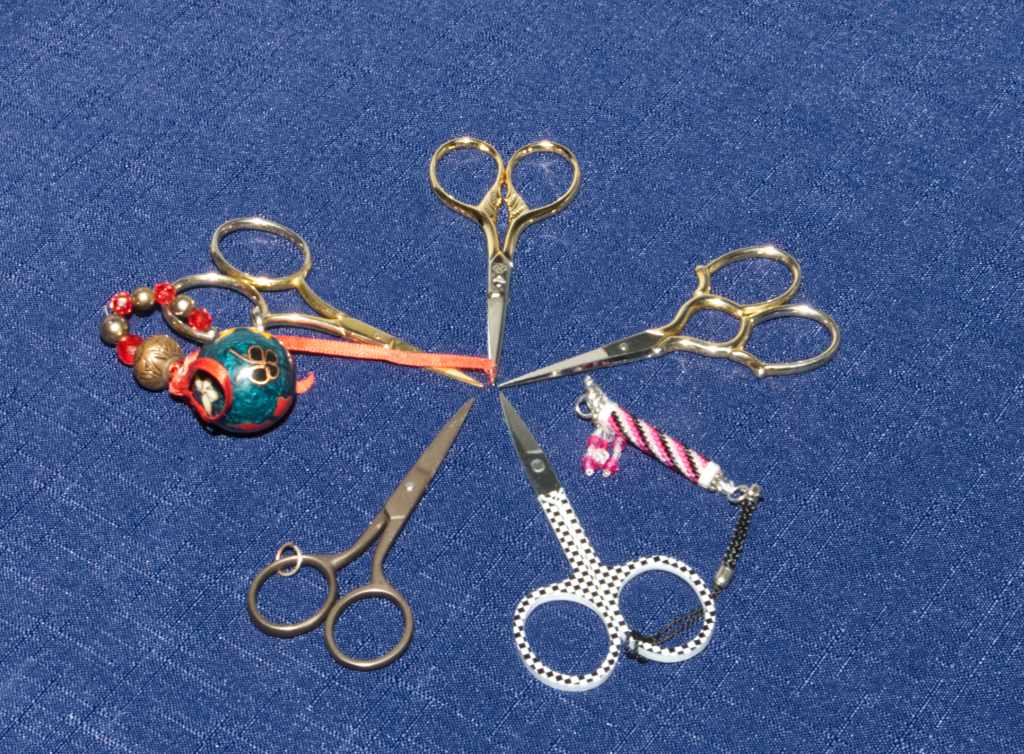
Scissors need to be sharp enough to cut threads without fraying. Usually smaller embroidery scissors are preferred, but if you have a larger pair you can use them, just as long as it cuts the thread without fraying it. Some people collect scissors, and some stitchers prefer to keep a pair of scissors with each project. It really isn’t necessary to have multiple pairs of scissors.
I have a specialized pair of scissors for cutting metallics, with a serrated edge. The serrated edge secures the metallic thread so it doesn’t slip while cutting. Very fine embroidery scissors can dull when used to cut metallics, so I prefer to keep one pair for metallics and one pair for cotton threads. But, if you want to dedicate one pair of scissors for metallics and one pair for other threads, that will be useful; it isn’t necessary for getting started.
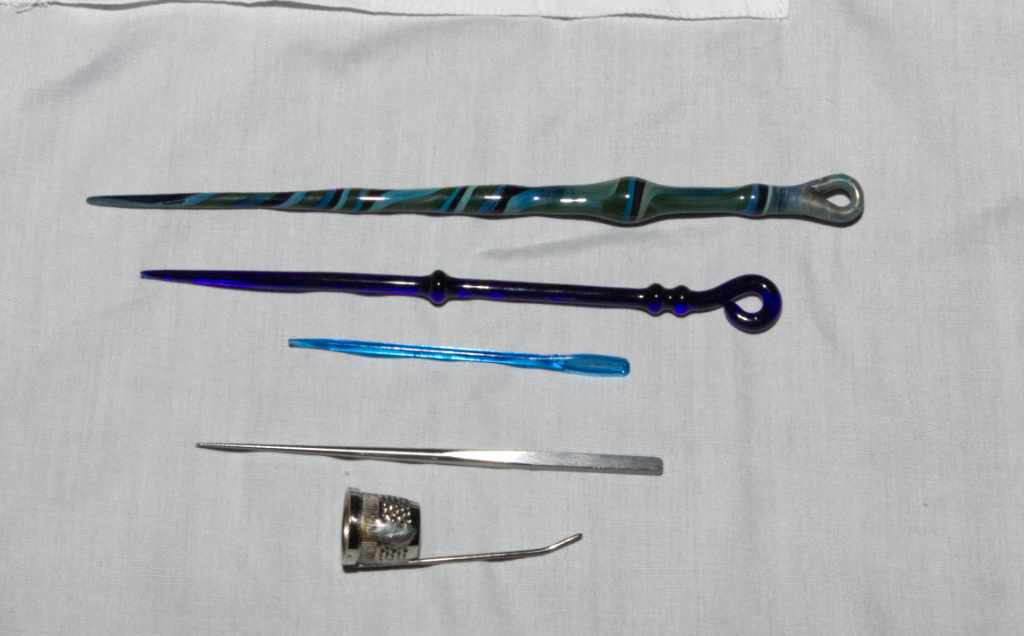
When working with certain types of threads you need a laying tool. Laying tools can be fancy and expensive, or just serviceable and less expensive. In a pinch a large tapestry needle or even a smooth toothpick will work, and some stitchers keep a toothpick in their stitching bags for times when they’ve left their laying tool somewhere else. Laying tools can be glass, wood or metal, longer or shorter, or be attached to a cuff for slipping over a finger (trolley needle). Find something that you find comfortable because you’ll use it a lot.
I use a trolley needle that slips on the index finger of my non-dominant hand. I find that holding a laying tool fatigues my hand after a few minutes; a trolley needle I don’t have to hold.
A laying tool should be very smooth, whatever you choose to use. You stroke the threads while you are stitching with a laying tool, so that multiple strands lay next to each without twisting. Smoothness is very important so you don’t snag your threads while stitching.
To use a laying tool: bring the needle up to begin a stitch. Hold the thread against the canvas in the opposite direction you are stitching; if the stitch is bottom to top, hold the thread against the canvas down, if the stitch is left to right hold the thread to the left, etc. Insert the needle to end the stitch. As you pull the thread through the canvas, stroke the laying tool under the arc of the thread as it goes into the canvas, following it all the way in, then slide the laying tool out of the completed stitch.
It does take a few minutes to become accustomed to using a laying tool, but the end results are so worth it!
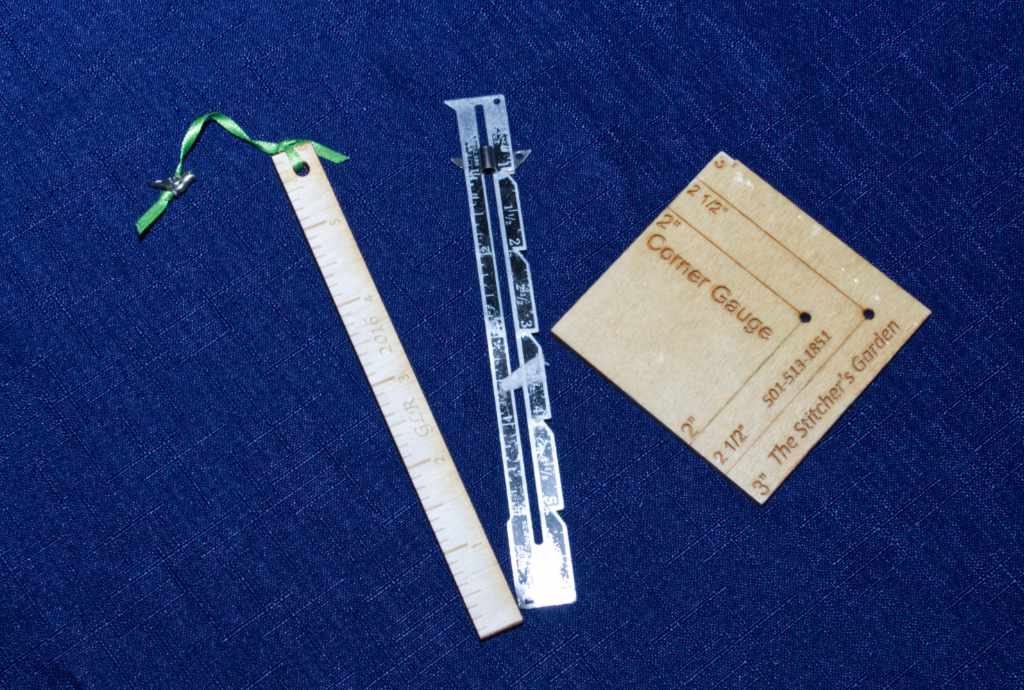
Something that is nice to have but not essential is a measuring device of some kind, like a hem gauge or corner gauge. The instructions may indicate beginning the project from the upper left corner of the canvas, either 3″ or 2″ is usual, and a little measuring device comes in handy. If the instructions include a thread length for a particular stitch, use the length of your stretcher bars as a handy measuring device – 36″ of thread would be 3 times the length of 12″ bars as an example.
There are other tools of course, but this is the pared down version of what’s needed for starting out.