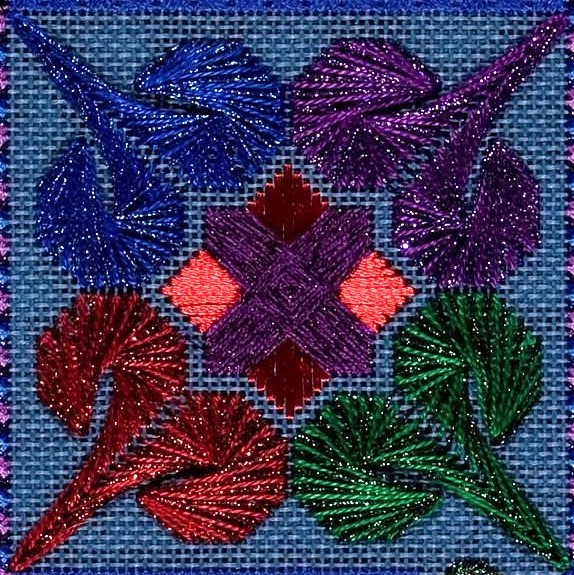
1 – Waffle Star, Crescents
Waffle Star
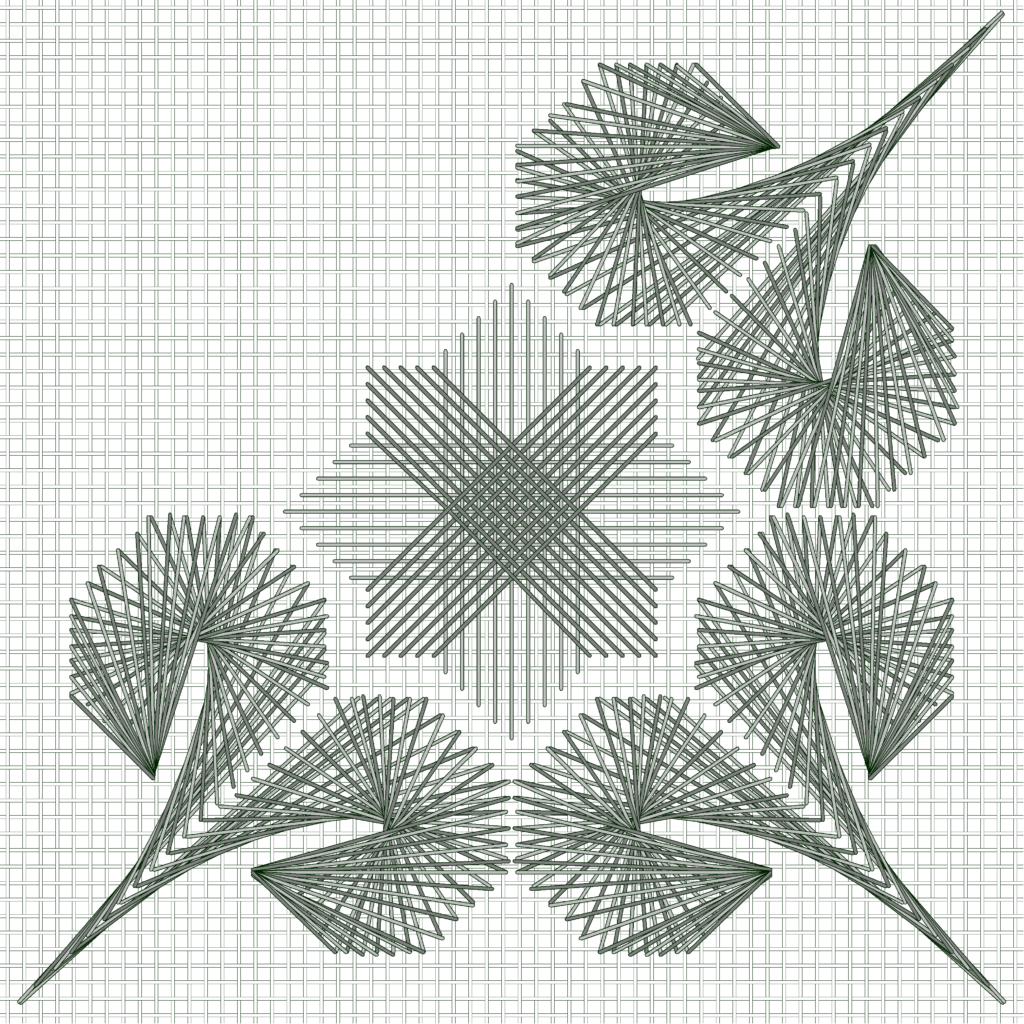
Begin stitching this project by finding the approximate center of the canvas. This motif forms the center of the project.
In the instructions you’ll see a thread table that indicates the type of thread to use, and the specific color for your color way. It will take about 42″ of the rayon ribbon for this first part. I find it helpful to iron the rayon ribbon before stitching, to remove the folds from the card. If you don’t have a flat iron or regular iron, you could also slightly dampen the ribbon before stitching.
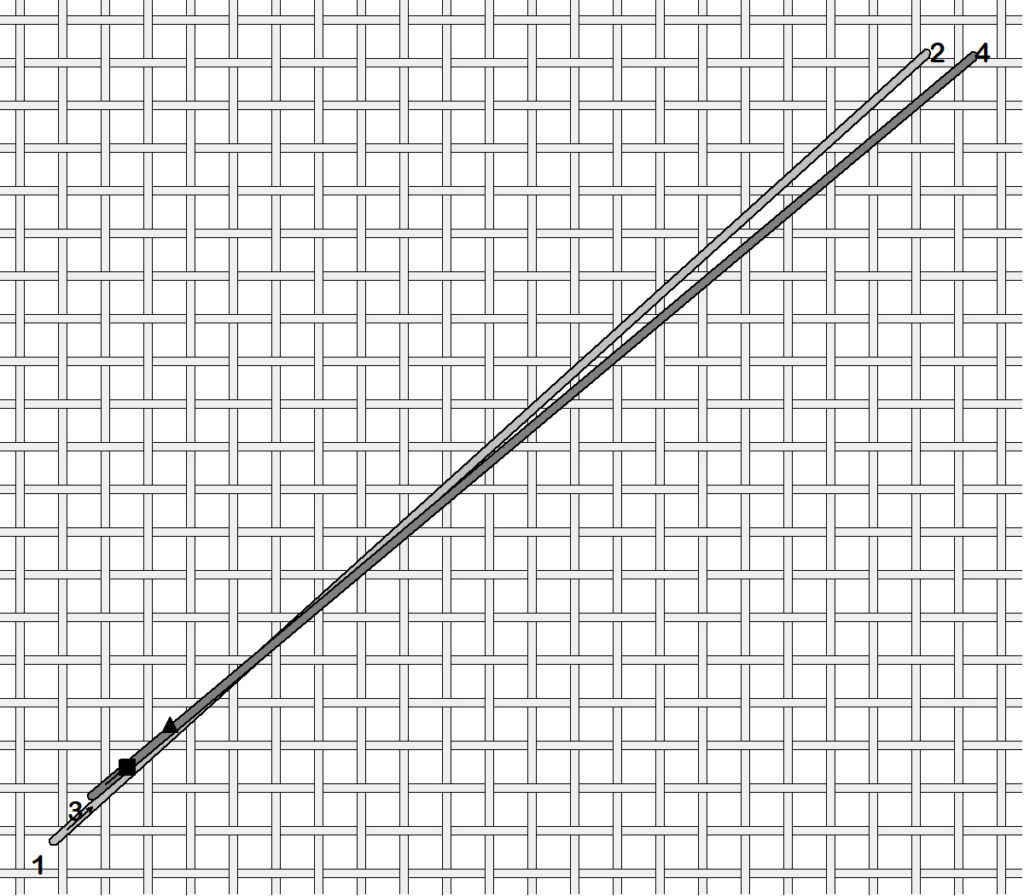
Anchor the thread with a pin stitch in the shape of the T, about in the center of the canvas.
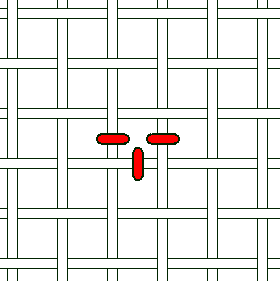
Do this from the front of the canvas, holding on to the tail while you make the stitch. It’s ok if the needle pierces the ribbon at this point because it will help to hold it more securely. Snip off the end of the thread close to the canvas.
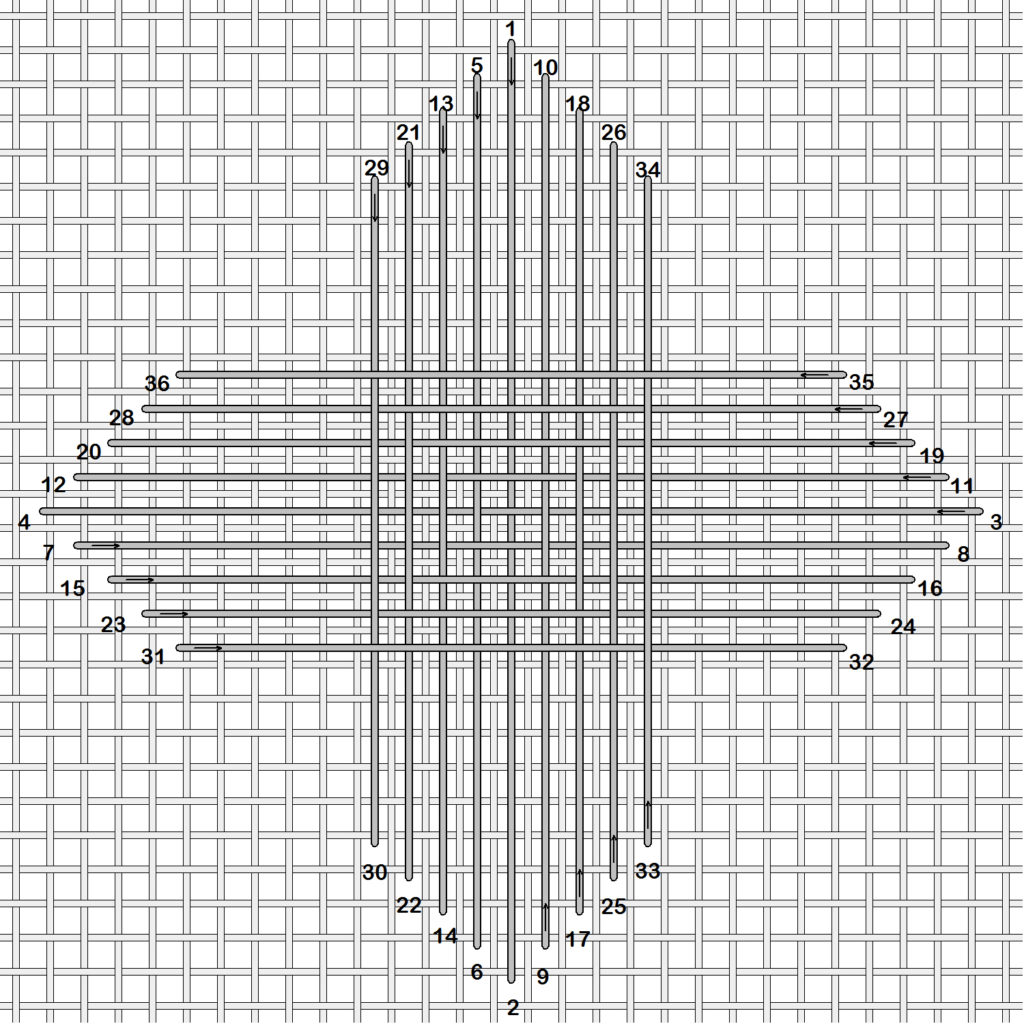
With the ribbon anchored, count up from the center 14 canvas threads and bring the needle up to begin. The first stitch covers 28 canvas threads in a vertical line. Use a laying tool to keep the ribbon very flat.
The second stitch crosses the vertical stitch horizontally in the middle. From the beginning of the first stitch, count to the right 14 canvas threads and 14 canvas threads down, to begin the second stitch. Cross the first vertical stitch in the middle; this stitch also covers 28 canvas threads.
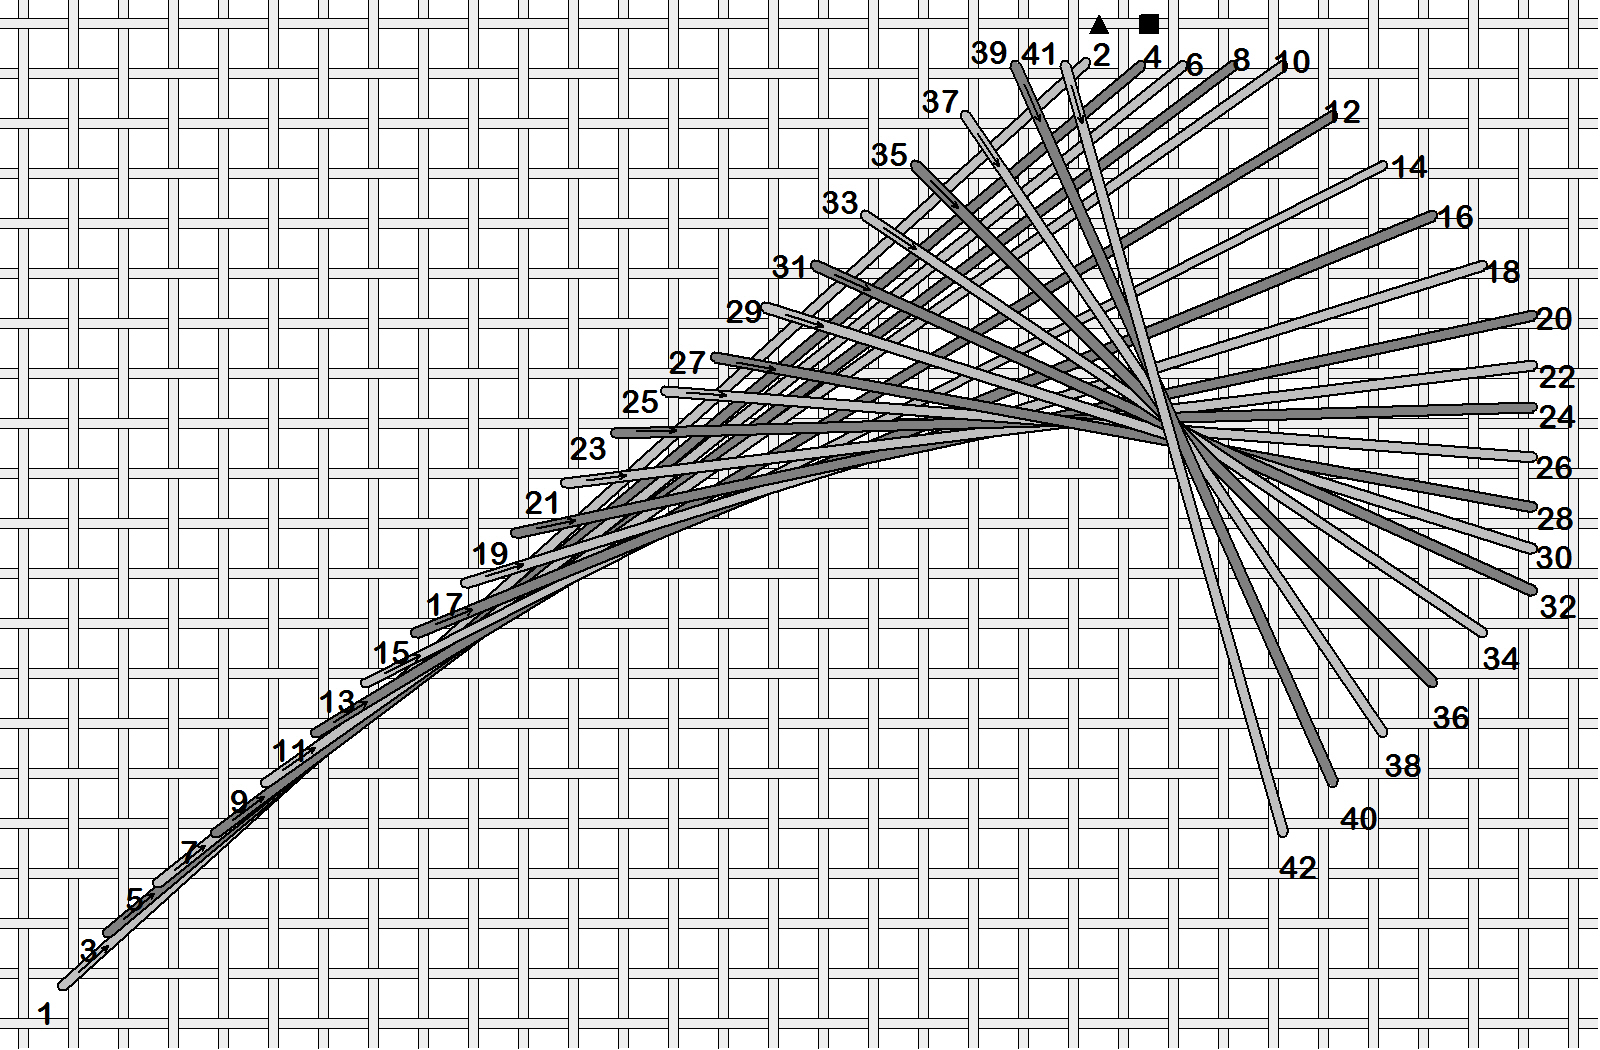
Now stitch as shown in the diagram. The stitches lay next to the previous stitches, and are stitched in this order to make an open diamond on the back (the thread carries are along the outside edges).
After stitching what is shown in the diagram, end off the ribbon. To end off, make a T stitch under the stitches on the canvas. Gently move the ribbon aside to see the canvas underneath, make the T stitch, then snip off the ribbon. Move the stitches back in place over the T stitch. Make the T stitch from the front to avoid catching the stitches; you may snip it off from the back if snipping from the front makes you nervous.
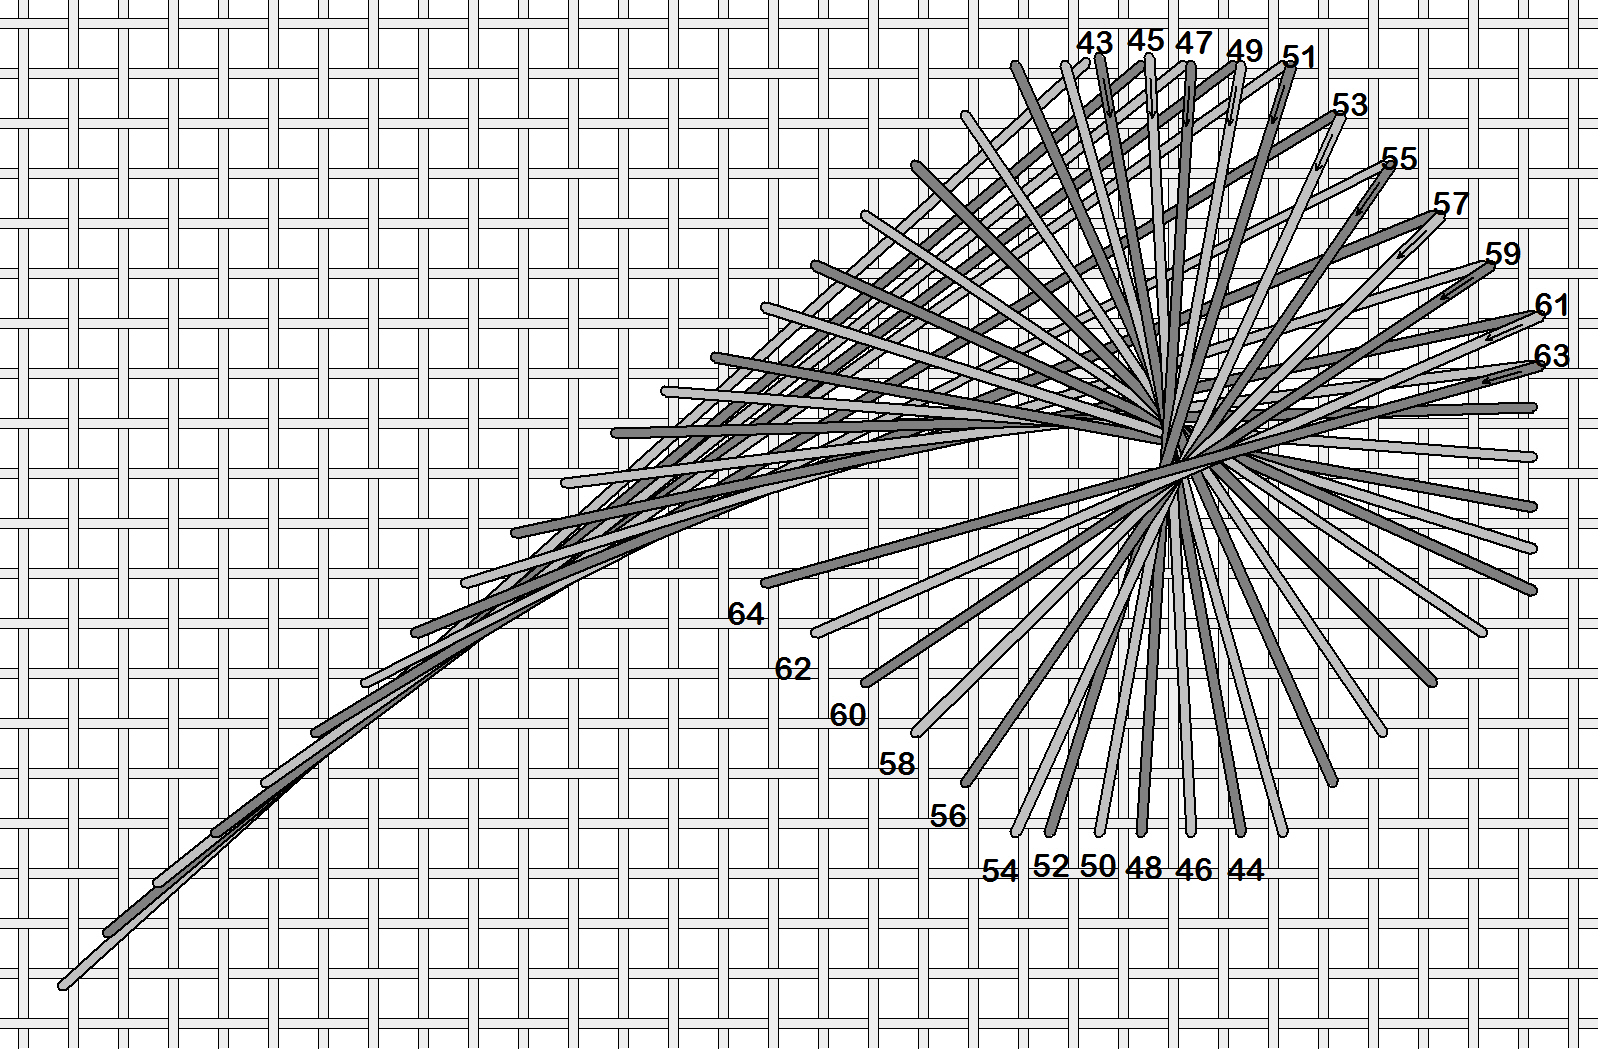
Refer to the thread table above the second part for the thread to use, in this case a silk/metallic braid. Anchor this thread with a T stitch as well, working from the front, where it will be covered by these stitches.
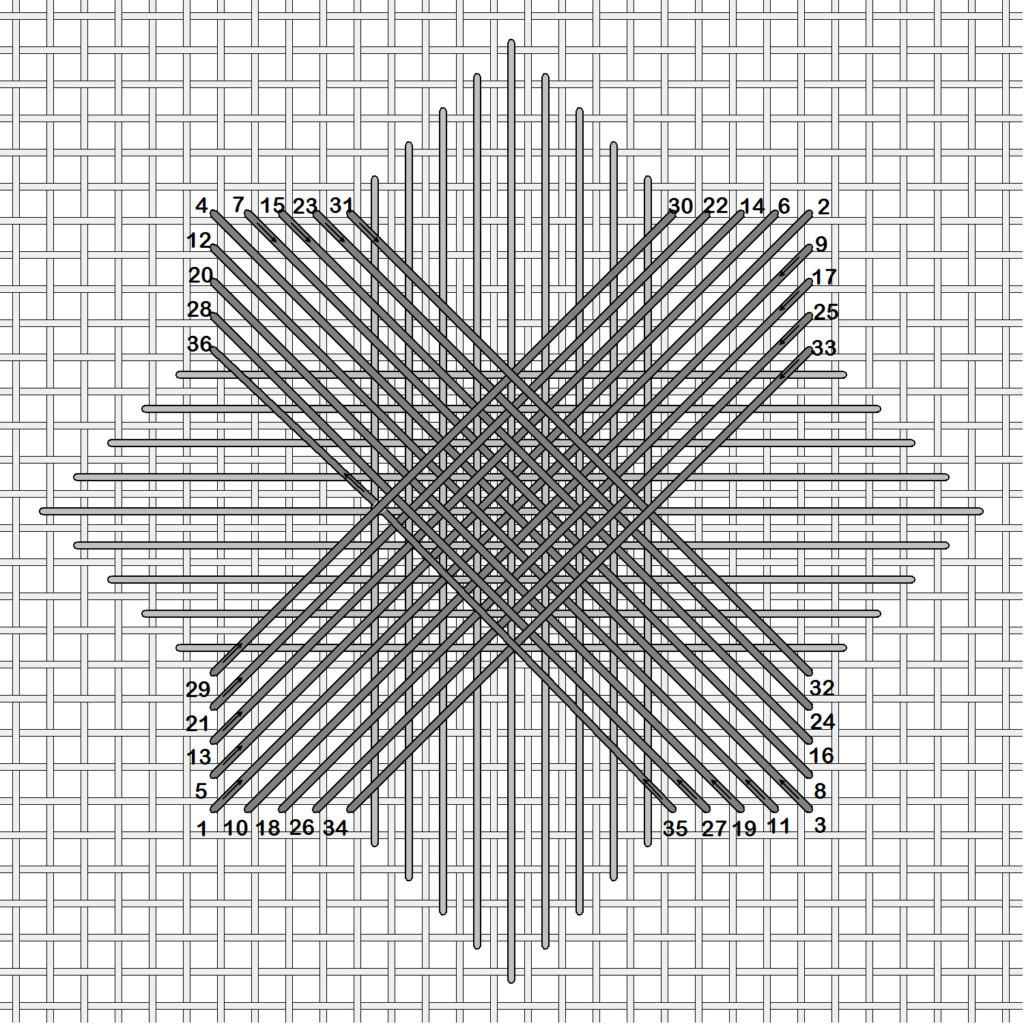
Before ending the last stitch (35), slide the needle under the first stitch of the last round (29) before ending. The needle slides between the canvas and the thread, and does not enter the canvas. Slide the needle under this stitch only, not any of the others.
This maneuver puts a thread on top of the last thread, which gives the waffle star a more balanced and complete finish – all the other stitches have a thread on top from the stitching process.
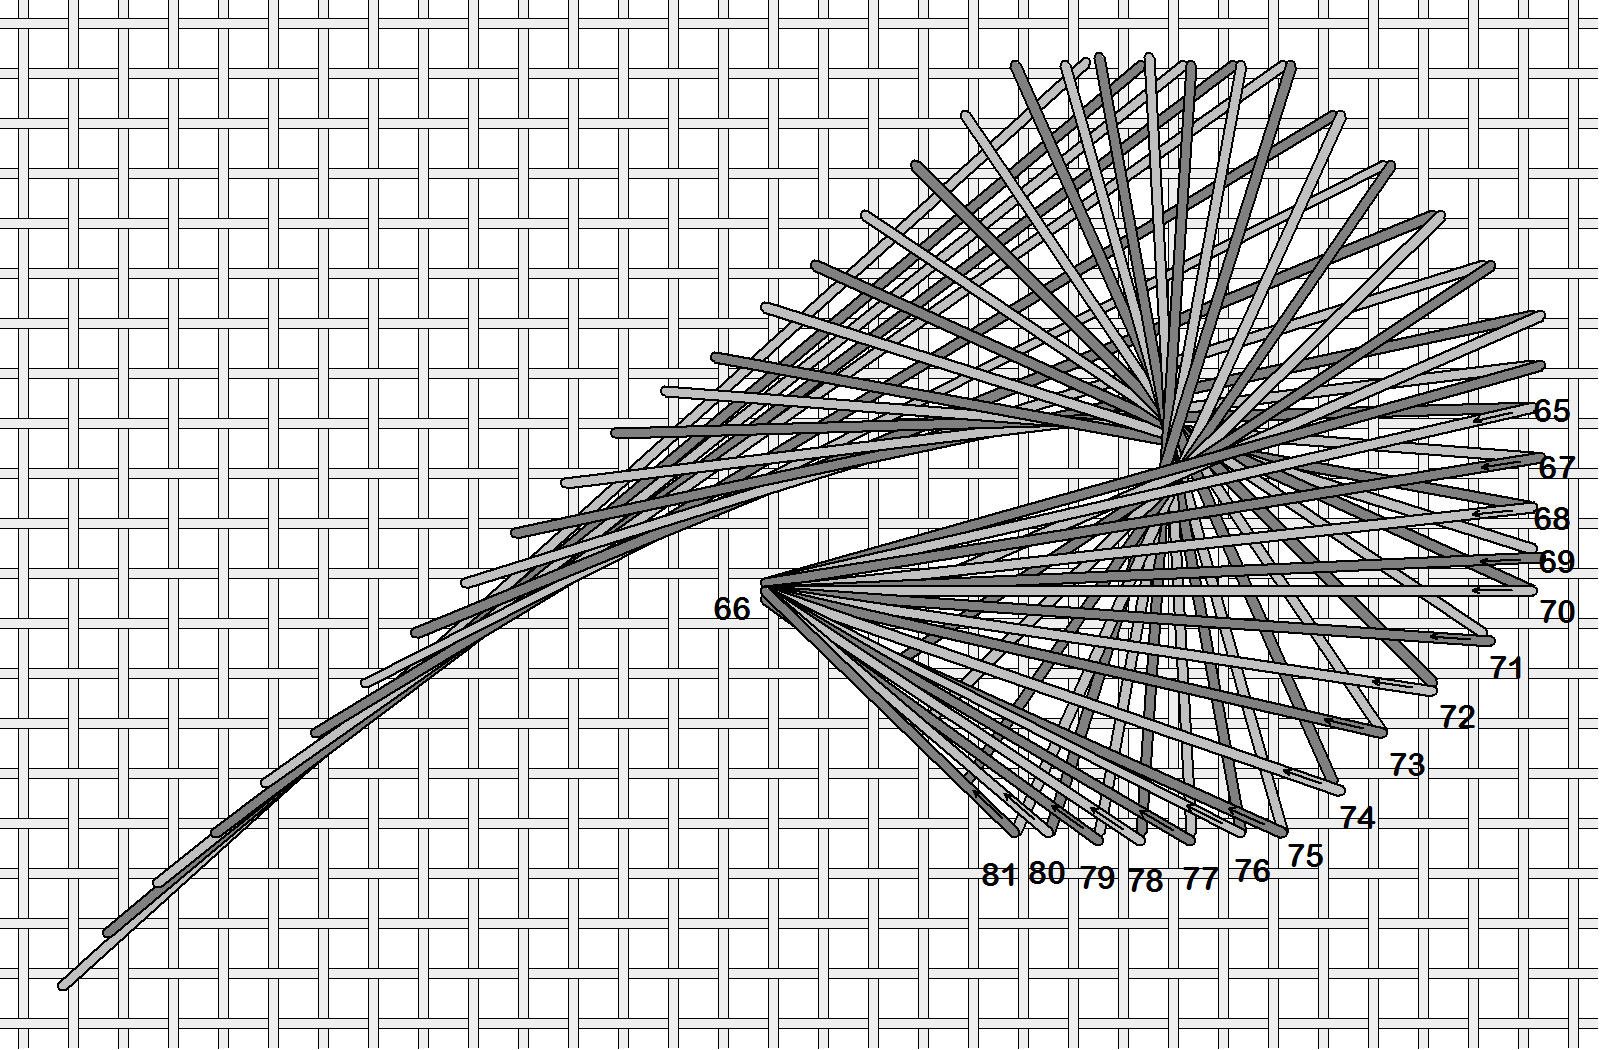
End off with a T stitch under these stitches as well.
Crescents
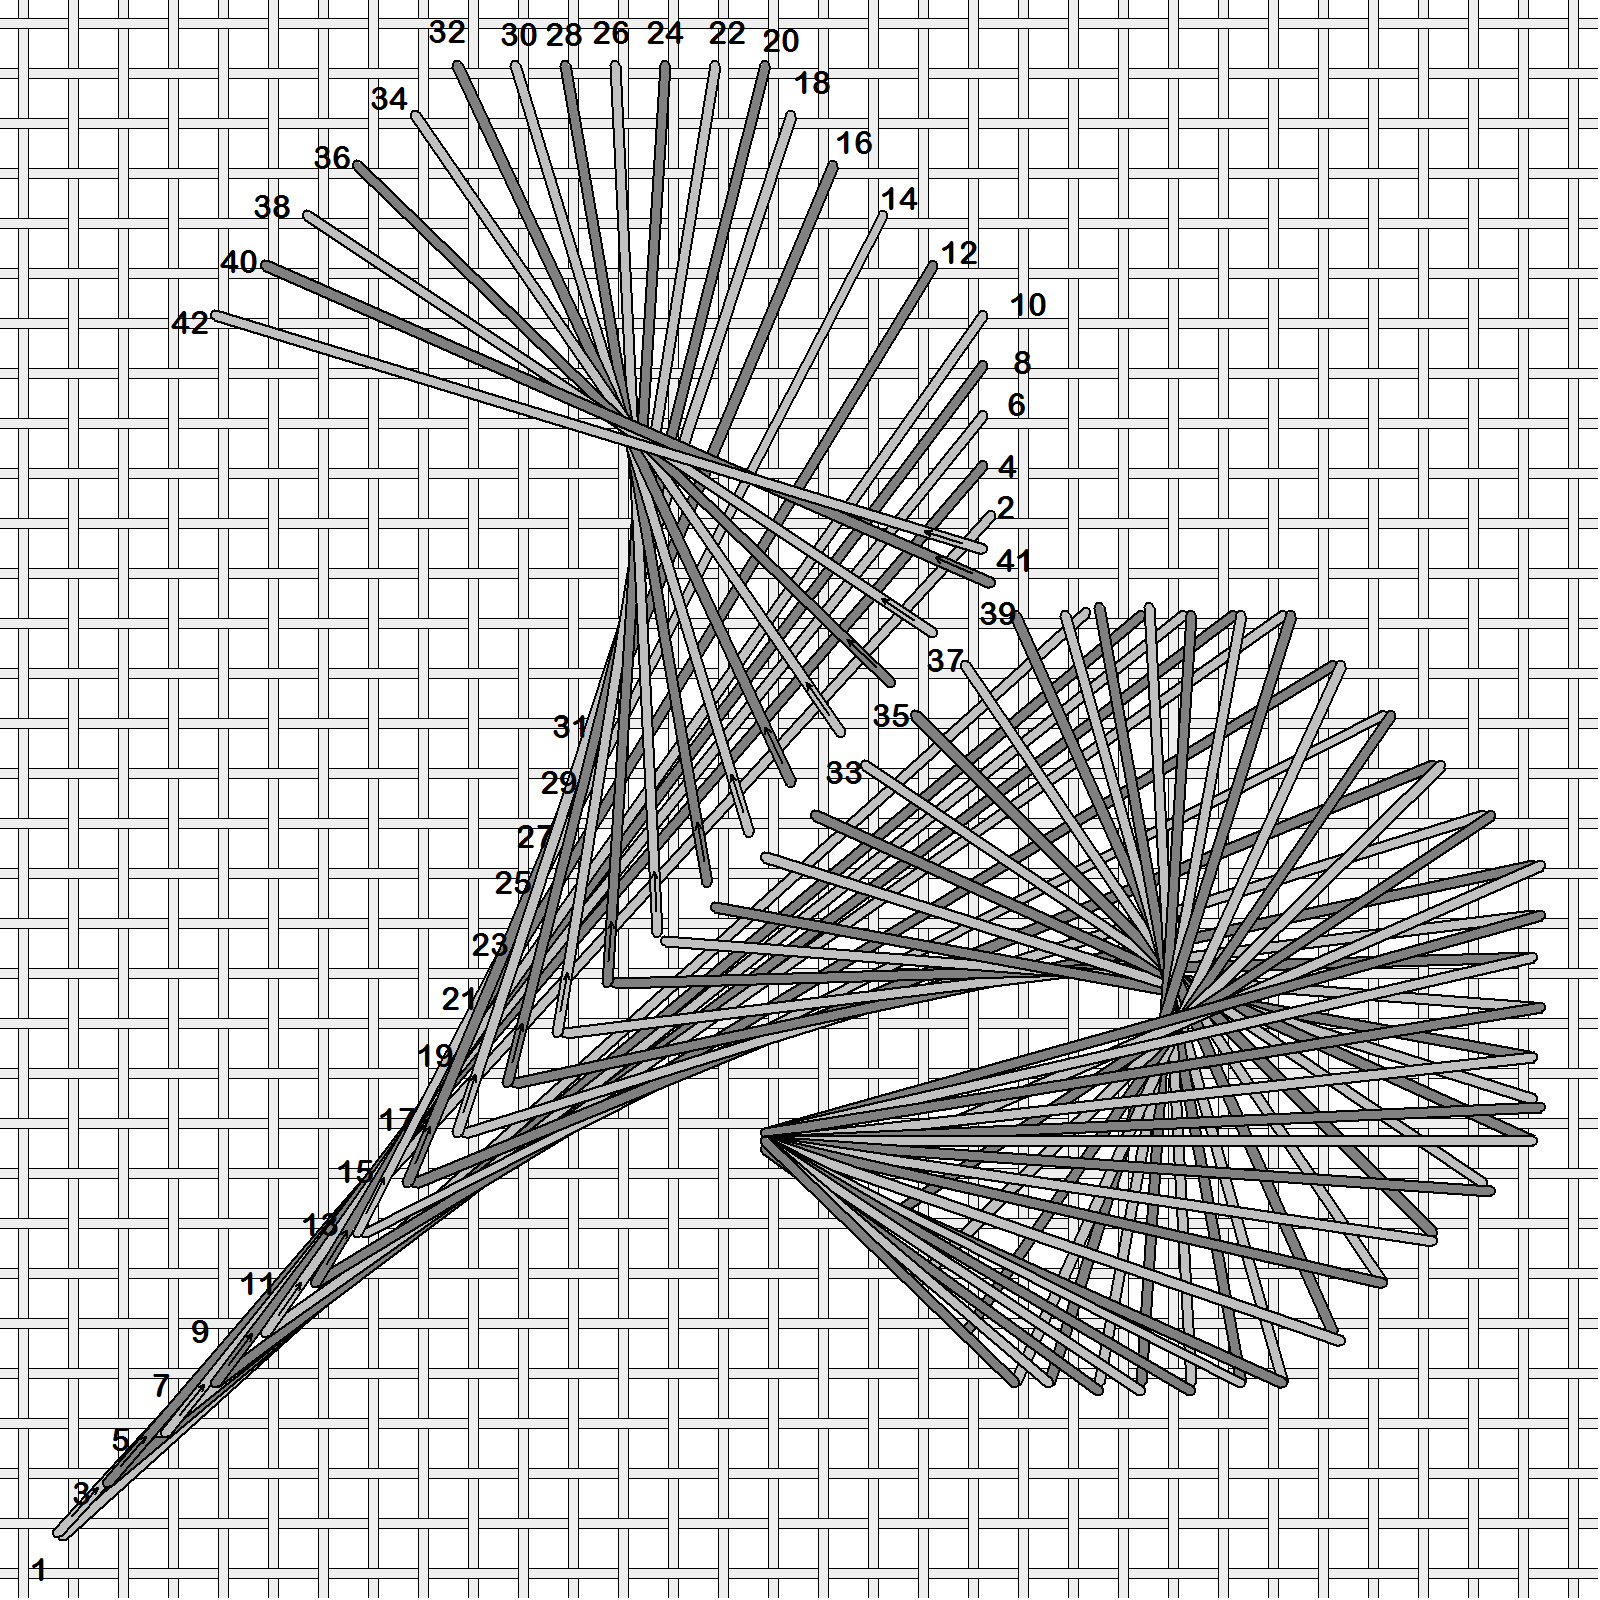
The crescents are in pairs, stitched with two threads at the same time. Refer to the printed instructions for a complete explanation.
Anchor both threads for one pair before beginning, using a pin that is 3 times over a single canvas thread, placed where it will be covered by the crescents.

Follow the instructions to stitch the first pair.
With the same two colors of thread, stitch the matching crescent to complete the pair.

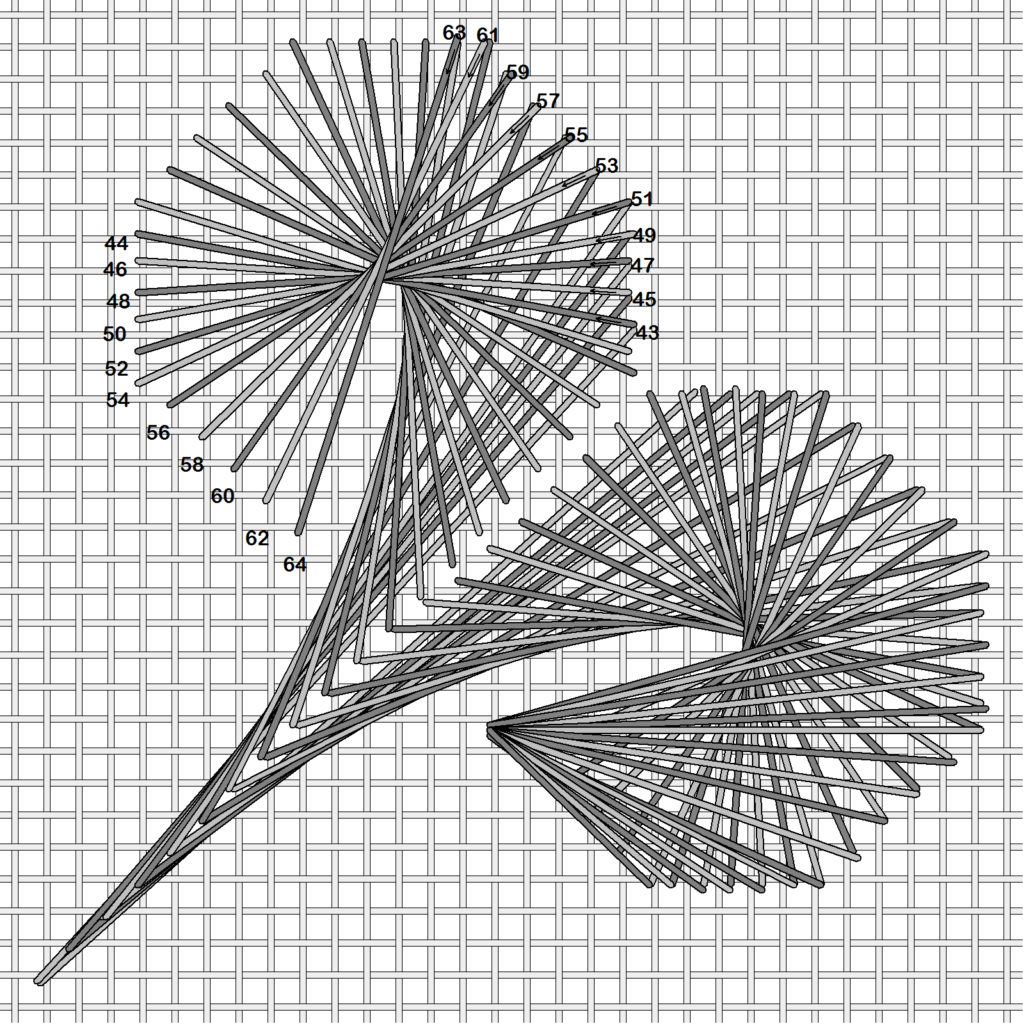
After stitching the first pair, I suggest rotating the canvas to stitch the next pair. You’ve already learned how to stitch this pair, and you can apply the same diagrams to the second pair.
Rotate the canvas again to stitch the upper right crescent pair.
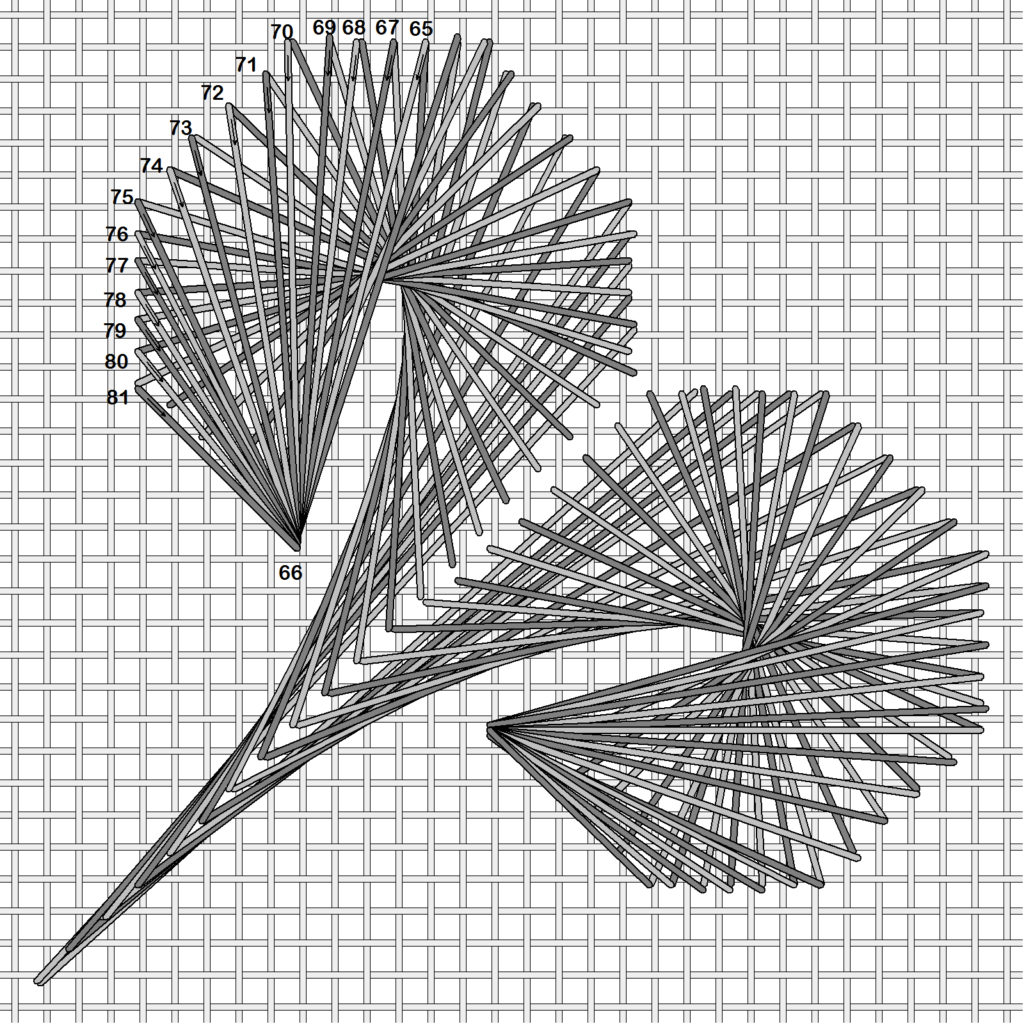
Rotate the canvas again to stitch the final, upper left crescent pair.
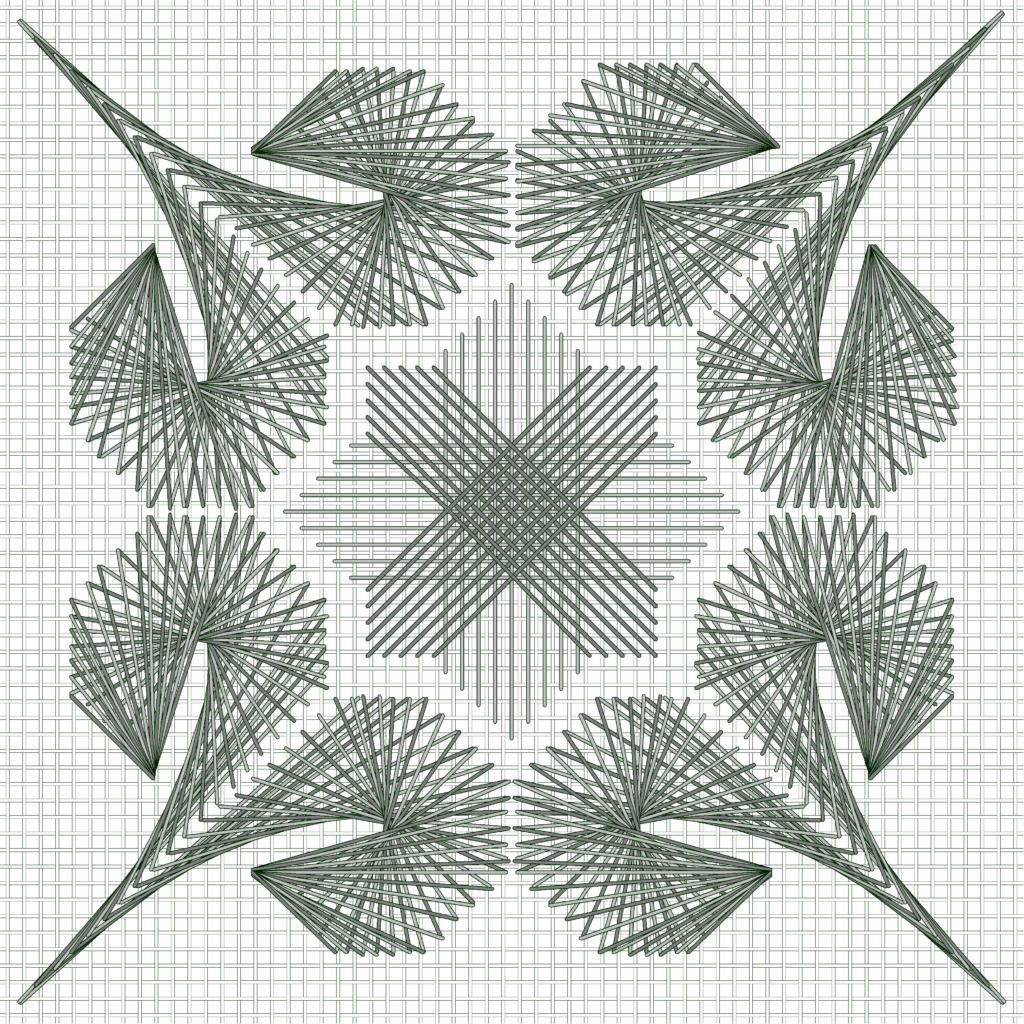
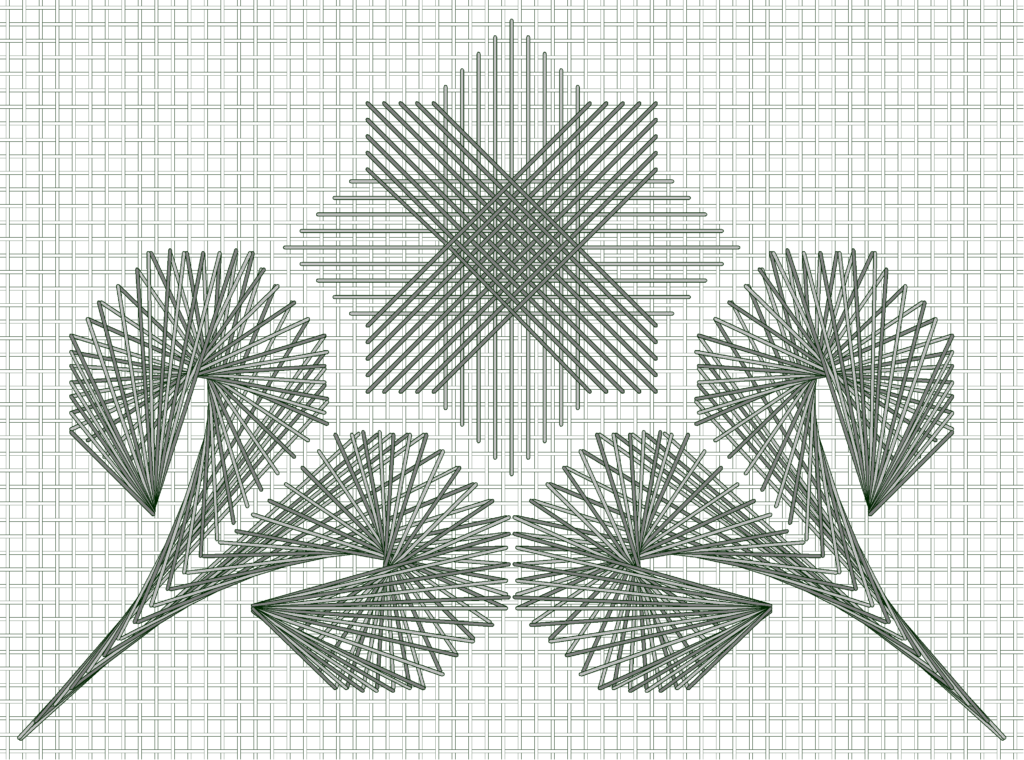
The center motif is now complete, with the waffle star and four crescent pairs.