Pin stitches are my preferred method of anchoring threads. I demonstrate them in my class stitch videos, and consider them to be a workhorse stitch that everyone should know how to use.
So first, let’s define pin stitch. A pin stitch is a small stitch that anchors thread at the beginning of a length of thread. It can also be used to end threads.
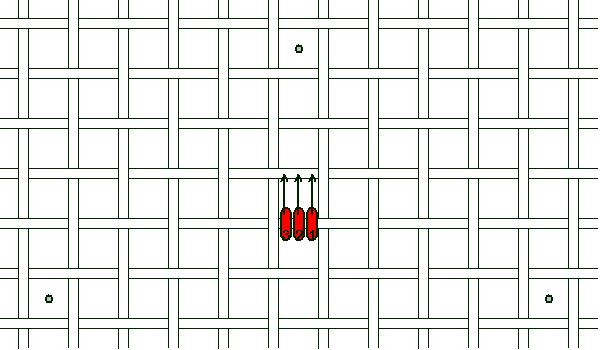
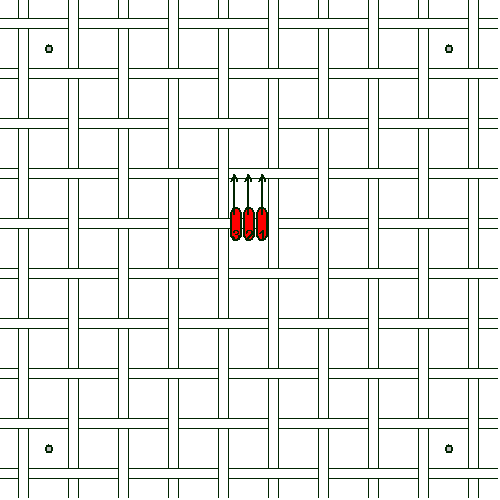
There are different types of pin stitches, and we’ll look several in this series, beginning with a pin stitch that is 3 stitches over the same canvas thread.
This is done from the front of the canvas. Enter the canvas close to the center of the area to be stitched, drawing the thread through until there’s about 1″ to 2″ left on top of the canvas. Stitch 3 times over the same canvas thread, then snip off the tail.
The thread is anchored and ready to begin stitching.
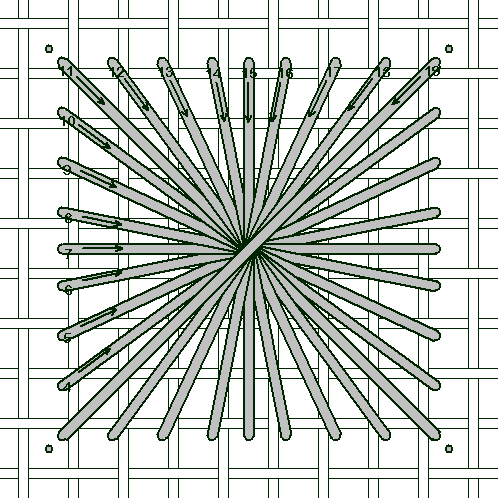
This example is a sprat’s head. The outer edges were marked in the diagram above, to get the pin stitch in an area where most of the threads will be crossing. This covers the pin stitch so it doesn’t show.
I’ll discuss ending with a pin stitch later; for now we are focusing on starting with a pin stitch.
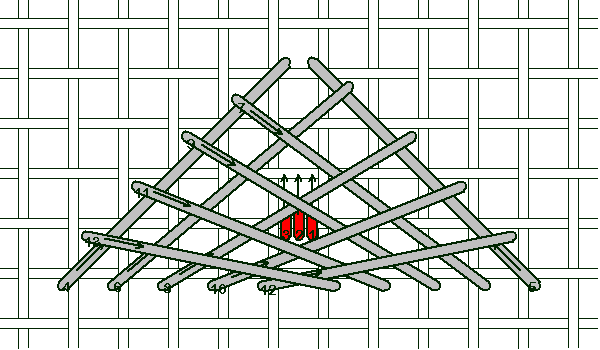
Let’s look at a Rhodes stitch example. A Rhodes stitch, by its nature, is highly mounded in the center, so a little more under the center won’t be noticed.
Again, enter from the front of the canvas, stitch three times over the same canvas thread, then begin stitching.
This is the completed Rhodes stitch, with the pin stitch completely covered.
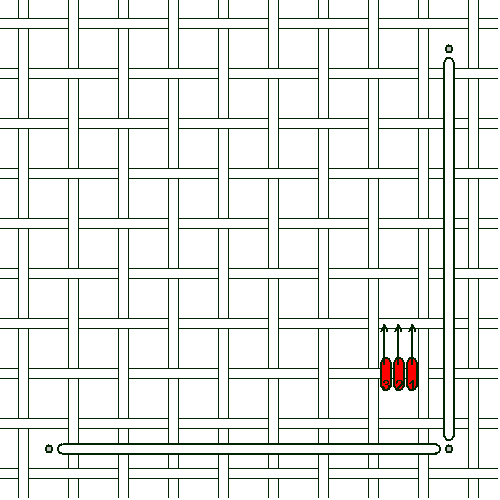
One thing I always stress is to make the pin stitch outside of the stitching channel. The stitching channel is where the needle will come up and go down for the stitch.
In this example, a crescent, the stitching channel is marked with white lines, and the outer edges are marked with small dots.
The reason why you place the pin stitch outside of the stitching channel is to avoid confusing it with an end point of the stitch. Some stitches are complex, and it can be difficult to make sure you’ve placed the end points properly without skipping a hole or putting two stitching in the same hole.
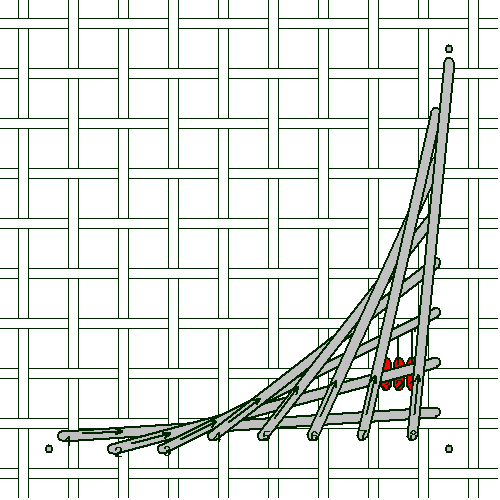
Here the completed crescent has covered the pin stitch. It is not in the stitching channel, where the needle comes up and goes down.
So how do you determine where to put a pin stitch? You need to look at the final diagram of the stitch, and see where most of the threads are crossing to provide cover for the pin stitch.
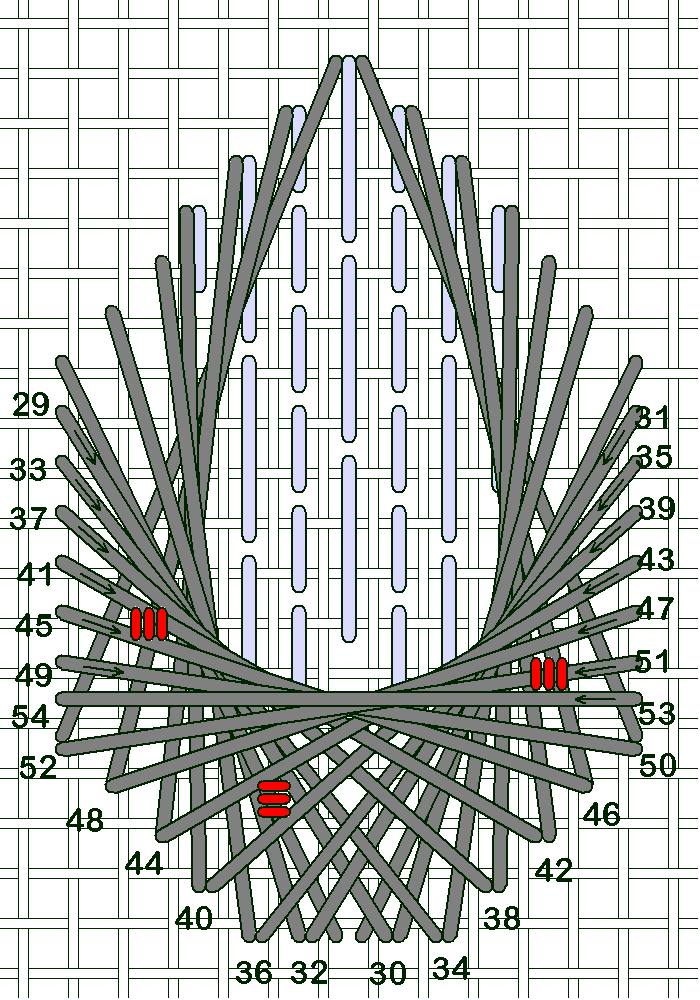
In this example, a tear drop crescent, I’ve pointed out several places where a pin stitch can be placed.
Three times over the same canvas thread is only one type of pin stitch. Next time we’ll look at a different form of pin stitch.
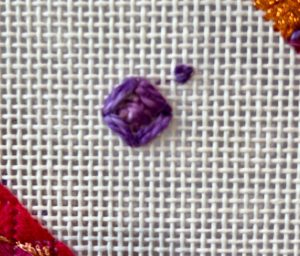
The picture at the top of the page shows a pin stitch being used to anchor a Chilly Hollow Stitch. Here’s how the pin stitch gets covered:

Beginning pin stitch 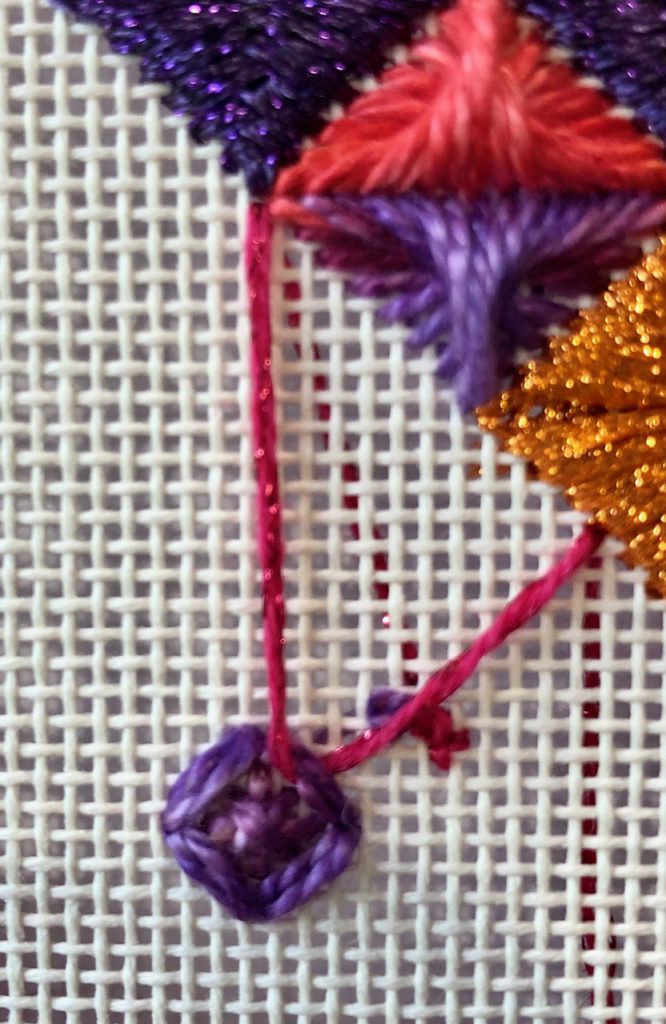
First stitch 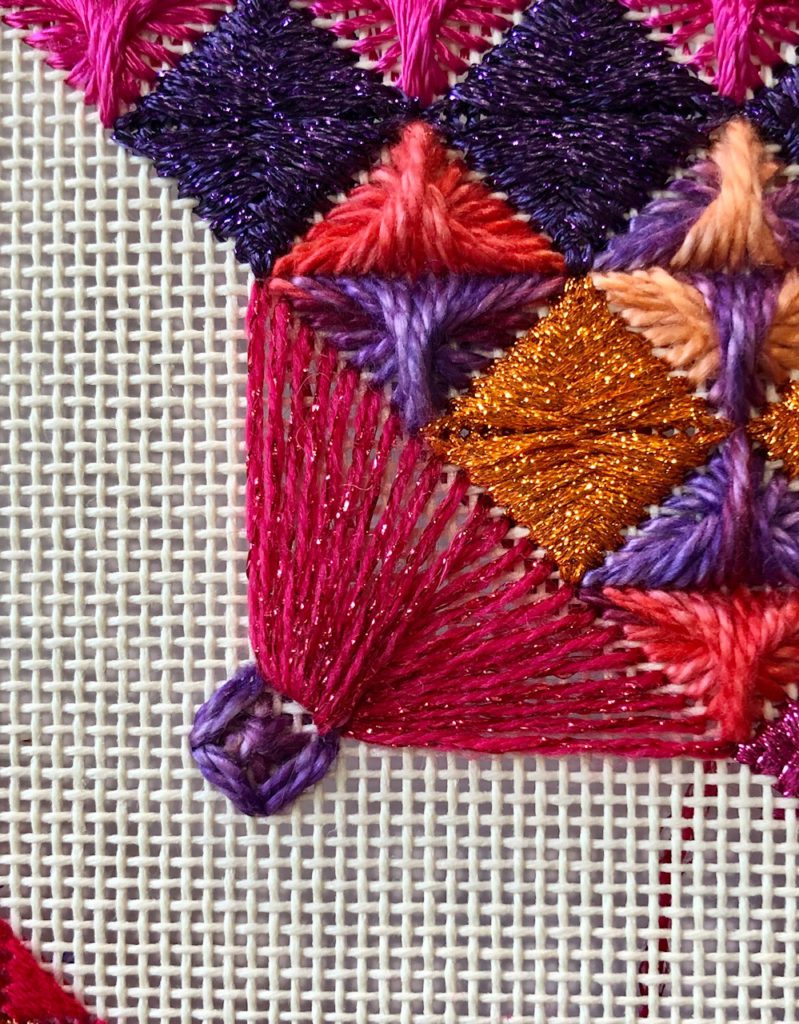
Covered!