It’s always fun to start a new project! Last time I showed you the threads I pulled that I was thinking of using. Today I’ll show you my start.
When I design something I may or may not start in the center, may or may not start with a border, may or may not start from the corner and work out. For this design, I started with an outline of the blocks that I wanted, then filled them in. The next decision is where to start, in an orderly fashion, that makes sense for stitching. The stitching order isn’t always the design order. And that was the case this time.
I decided to begin in the upper left corner, with a block of Milanese stitches. And right away, I wasn’t happy with the threads I thought I might want to use. So I went “stash diving” to see if I could find something I’d like better.
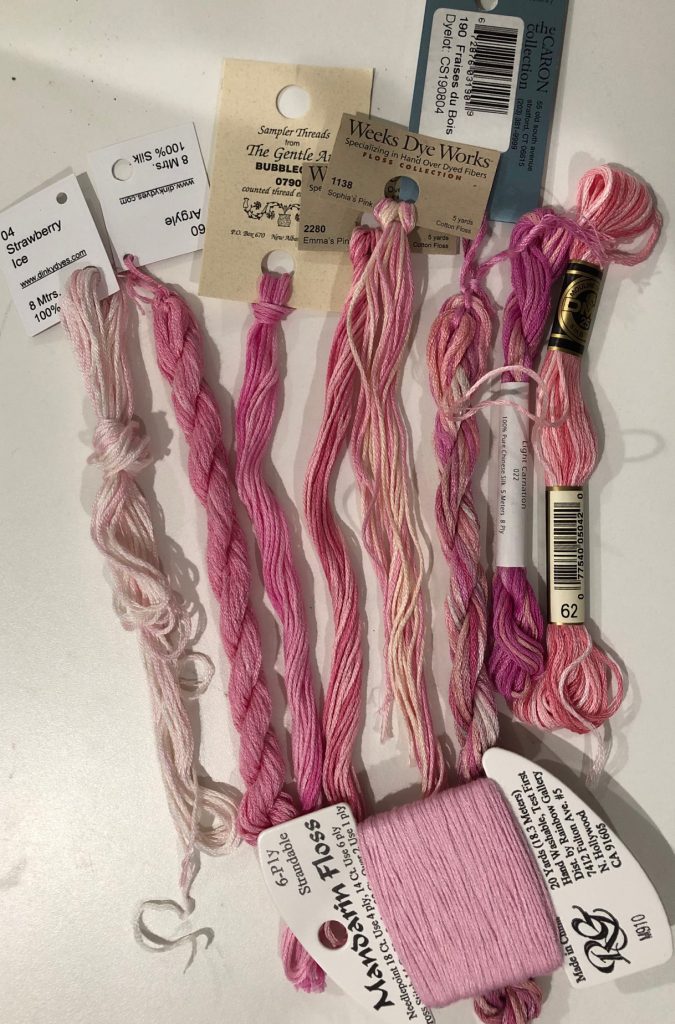
I decided to see if I had an overdyed thread in my stash that might work. I liked the Dinky Dyes Strawberry Ice, but it was too pale; it did have the subtle color variations that I wanted, no abrupt shifts. I also liked the Dinky Dyes Argyle – subtle shading but a little too dark. Next I looked at the Gentle Arts Bubblegum, but didn’t like the dark shades in with the pink. For the same reason I discarded the Weeks Dye Works Emma’s Pink. The Weeks Dye Works Sophia’s Pink would have introduced a pale yellow to the palette, and I didn’t want that. Caron Collection Waterlilies Fraises du Bois had to many shades in it, including a light violet/mauve that I didn’t want. NPI’s Light Carnation was too dark. The DMC 62 was almost right but to many abrupt color changes. So I put everything aside and thought about it for awhile.
When I was thinking about it, I remembered that I had really enjoyed working with the Rainbow Gallery Mandarin Floss for another project, so decided that since there wasn’t an overdyed in my stash that was PERFECT, I’d stick with the solid Mandarin Floss. I put the rest of the threads in my project bag, just in case any of them worked for a different stitch. I’ll keep you posted!
Anyway, I started with the Mandarin Floss and I’m pleased with the results.
Here’s the start of the Milanese section:
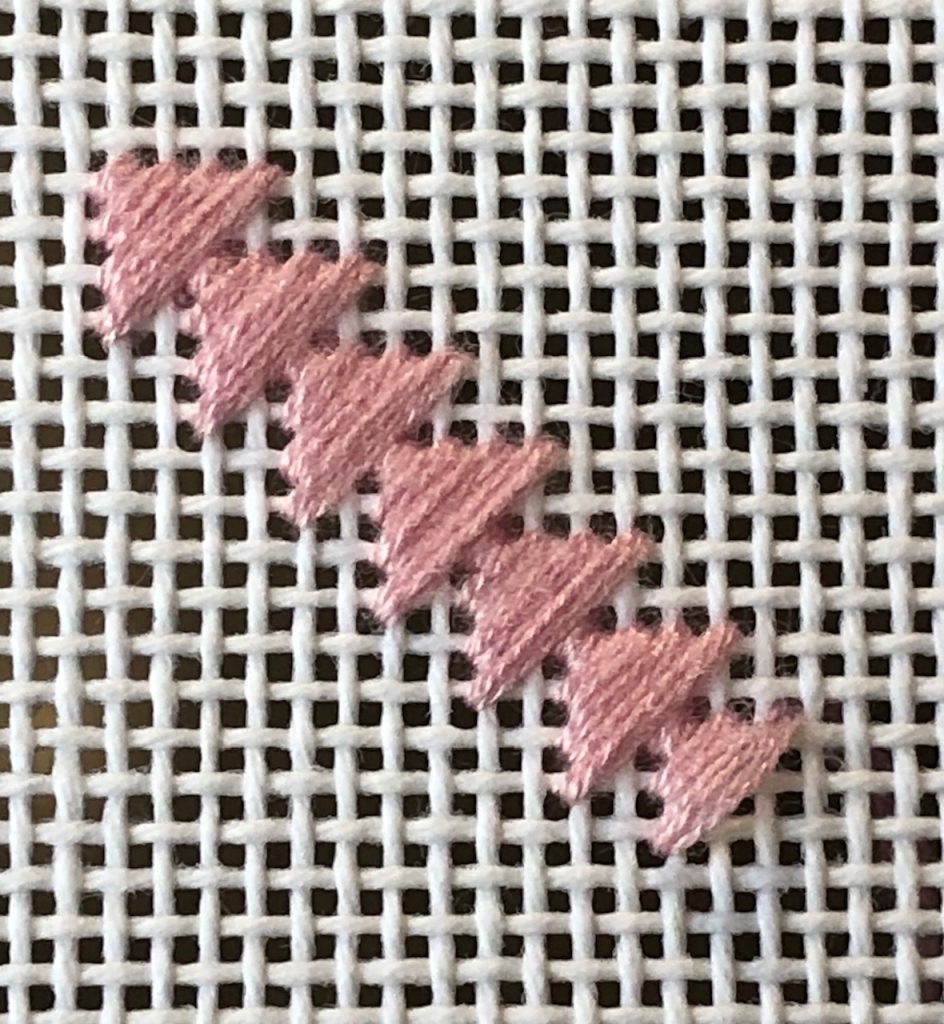
I’m using four strands of the Mandarin Floss and I think the coverage might be a little heavy for some, but I liked it.
Here’s the second picture:
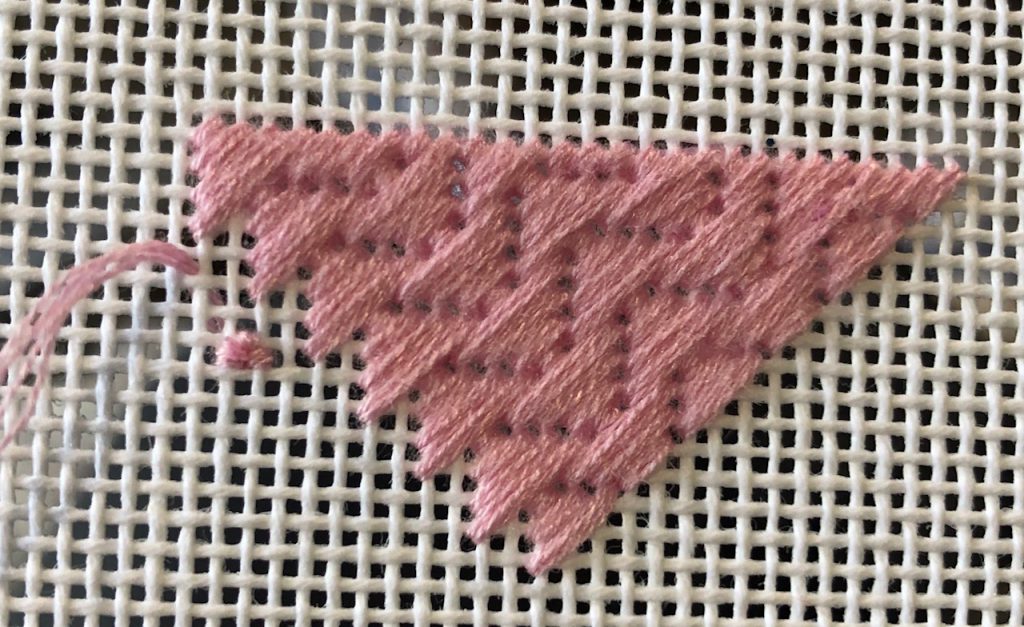
You can see my pin stitch on the left side to begin the last part of the Milanese. For the rest of it I used a loop start, but I finished on the right side and had a lot of thread left in the needle, too much to discard. I used a pin stitch to end, and of course a laying tool.
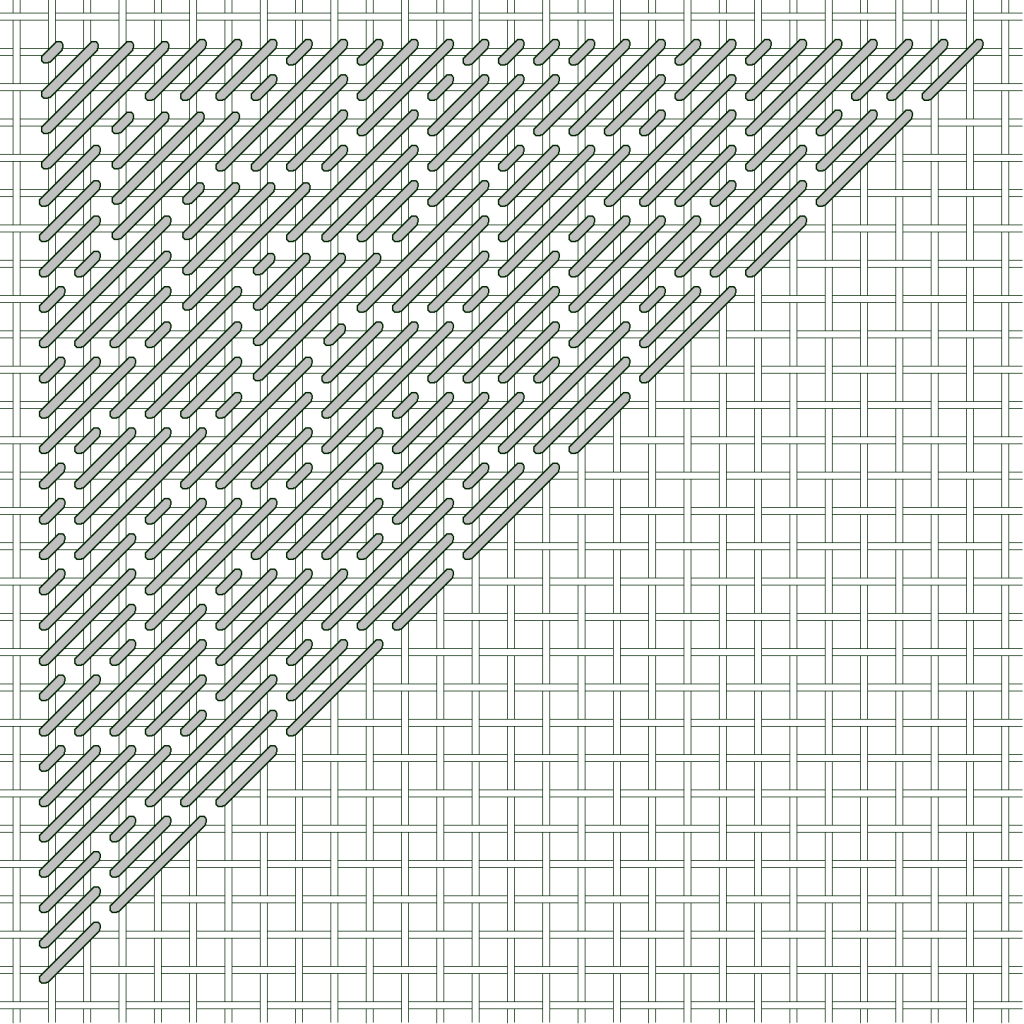
Here’s the completed Milanese section:
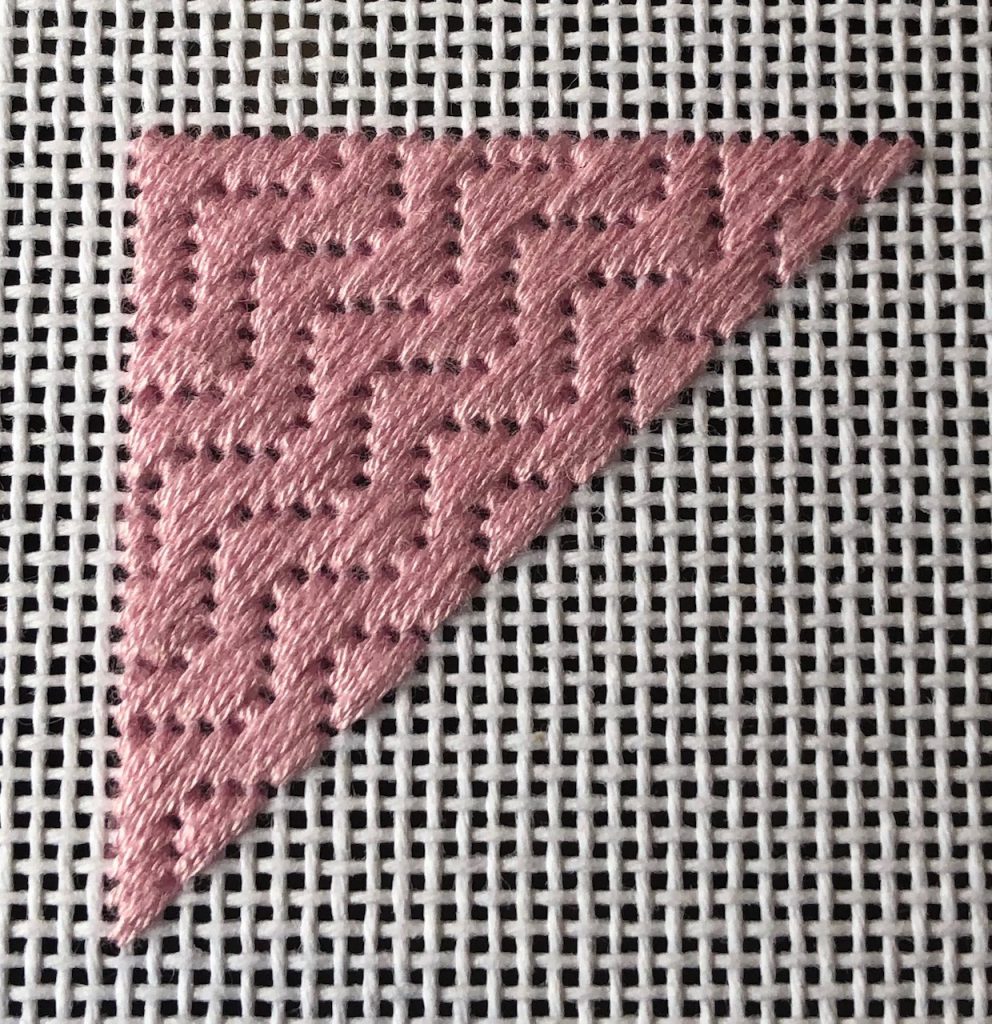
So even though the overdyed didn’t work out, I’m pretty happy with the final result.
Here are the stitch diagrams if you’re stitching along. I began 3″ from the upper left corner because I have 3″ of margin on each side of the design.
Here’s the first step. Stitch exactly as shown in the diagram.
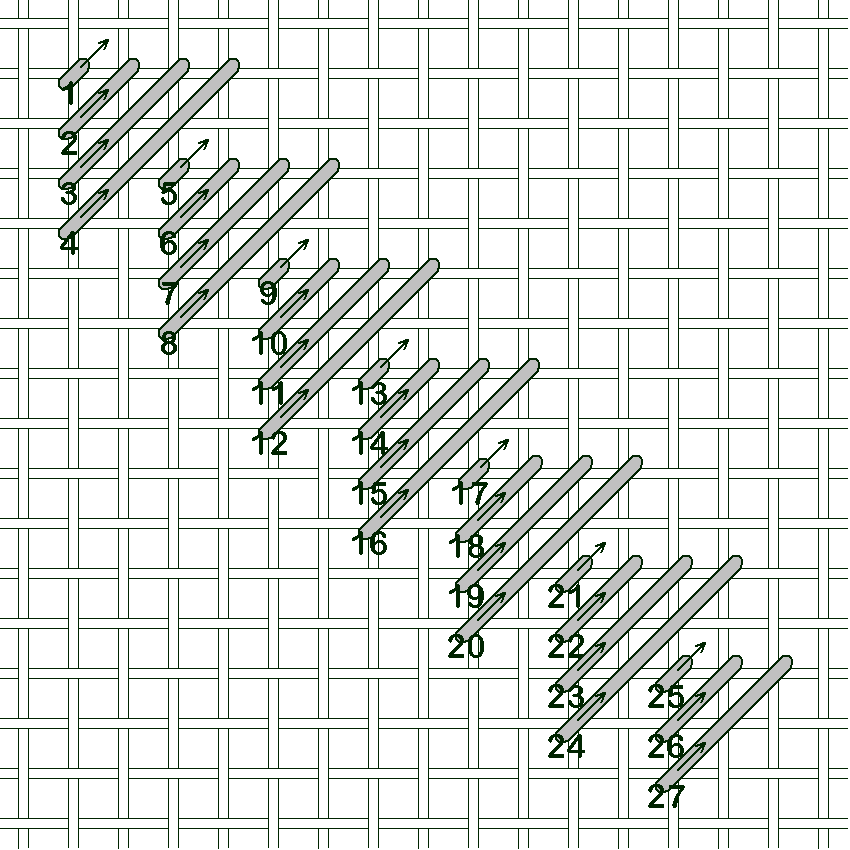
Reverse the direction of the stitch as you continue. This way you can bring the needle up in an empty hole and down in a shared hole.
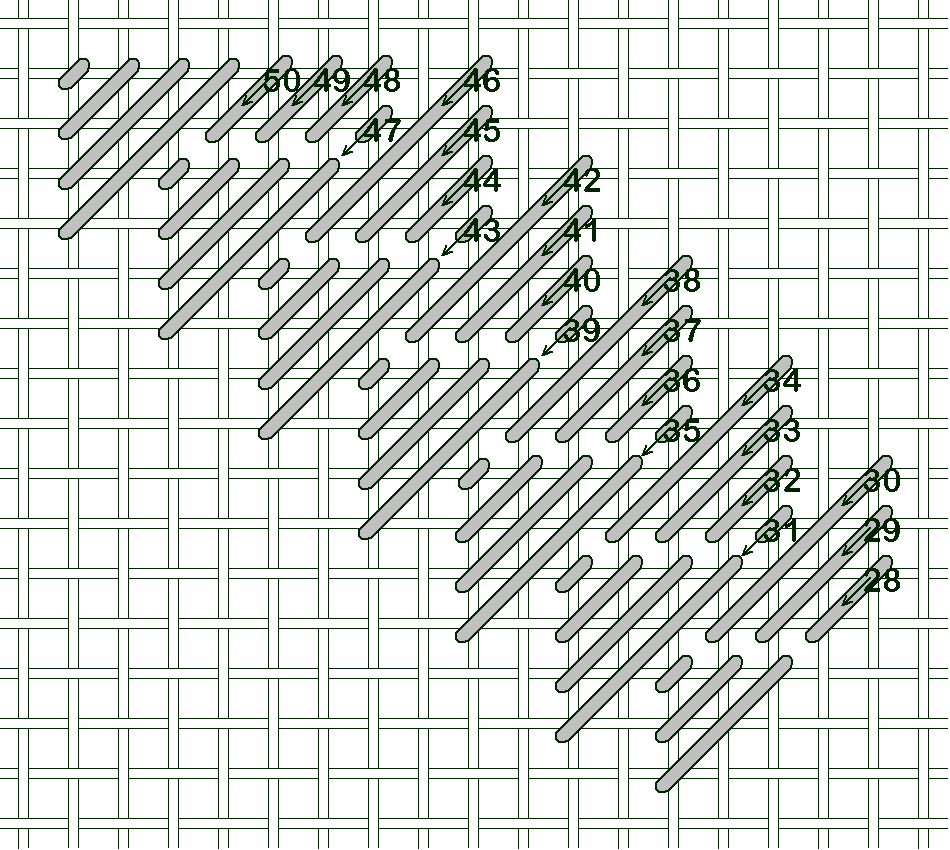
This is the completed right side.
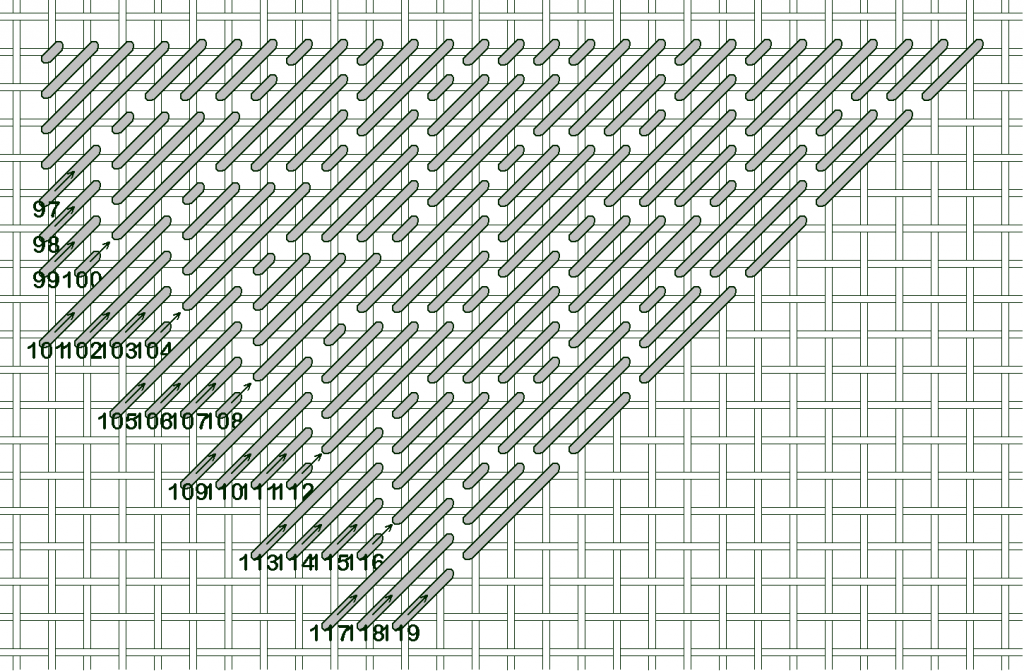
Now stitch the left side, reversing the stitch direction as shown so you’re coming up in an empty hole and down in the shared hole.
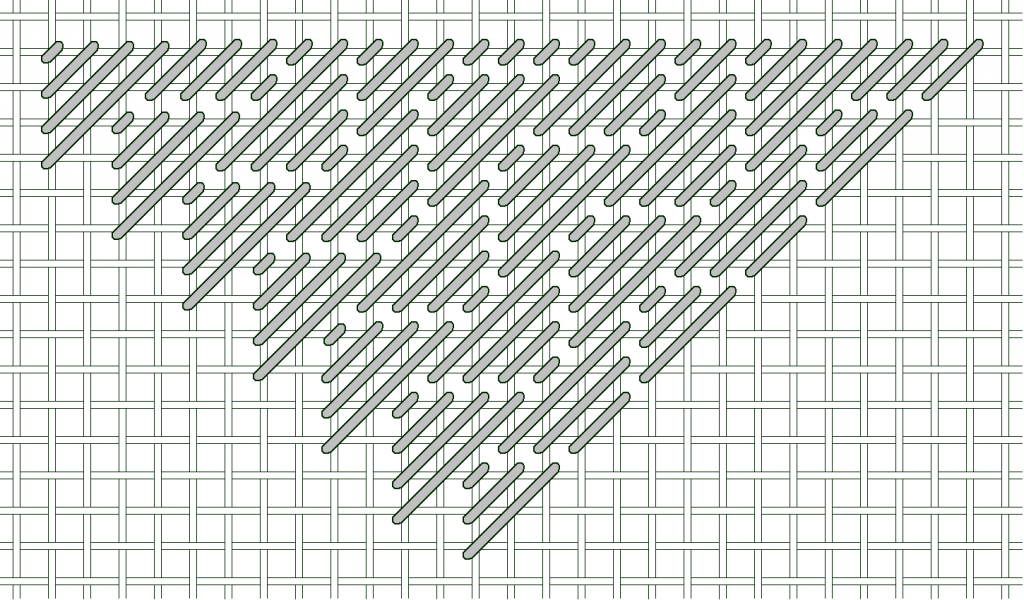
And this is the finished section.
Be sure to let me know if you have any trouble with this section.
Here’s a pdf of today’s instructions:
Click here for Quilt Block 1A – pdf
If you want to wait until everything is finished, I’ll post a complete pdf with the last step.