I’m continuing on with my little quilt block project, and have added waffle stitches with ribbon.
I like using ribbon for waffle stitches, especially Neon Rays. Neon Rays is probably my favorite thread to use, at least for today! I use my mini-flat iron to iron the Neon Rays before I use it, which seems to tame it pretty well. I’ve also stitched with it without ironing. And, I’ve stitched with it damp. In my experience, dampening rayon threads dulls the shine, and I use them for the shine. So, I no longer dampen the Neon Rays. One of my students reported that ironing it also dulls the shine. I haven’t tested this myself, just haven’t gotten around to it, but I will so I can pass along my own experience.
I picked up a mini-flat iron at the local discount store. Look in the hair section, specifically for travel tools, and you can find one relatively inexpensively. You don’t need one with settings. An auto turn off feature would be nice, but I use my flat iron and immediately turn it off, so I haven’t found I needed to pay for something like that.
I also found a rechargeable cordless flat iron, but don’t like it as well. I’ve had two of them, and they seem to work ok for a time but then stop holding a charge. When I travel I really rely on that, and I don’t like tools that let me down. Your experience with a different model may be different, but this is mine.
I cut a length of thread, and run it through the flat iron once or twice. I also iron rayon floss, Neon Rays+, and occasionally silk floss. I don’t iron braided or round threads; in my experience ironing a round or braided thread flattens the braid, so I don’t recommend it.
I think it will take about 44″ to make one complete waffle stitch. Most of the thread is on top of the canvas, very little on the back. I confess I didn’t measure the thread before I started, but from counting what is covered on the front and allowing for anchoring the thread, I think 44″ should do it.
I anchored with a “T” stitch:
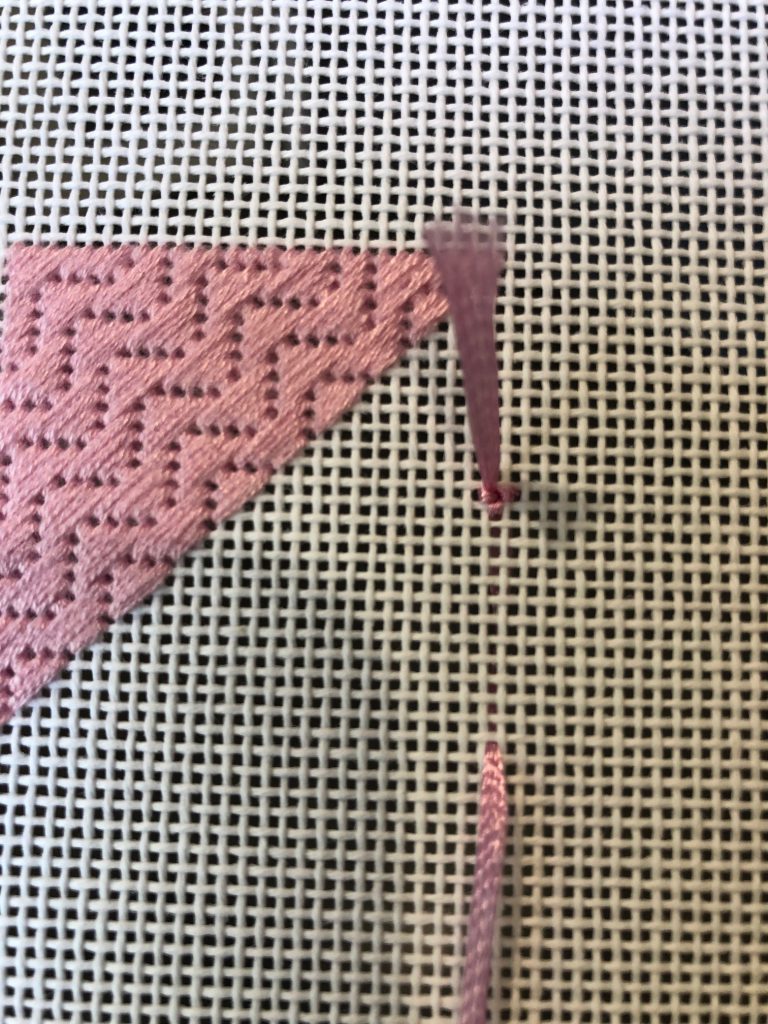
After anchoring the thread, snip off the tail so it doesn’t get in the way.
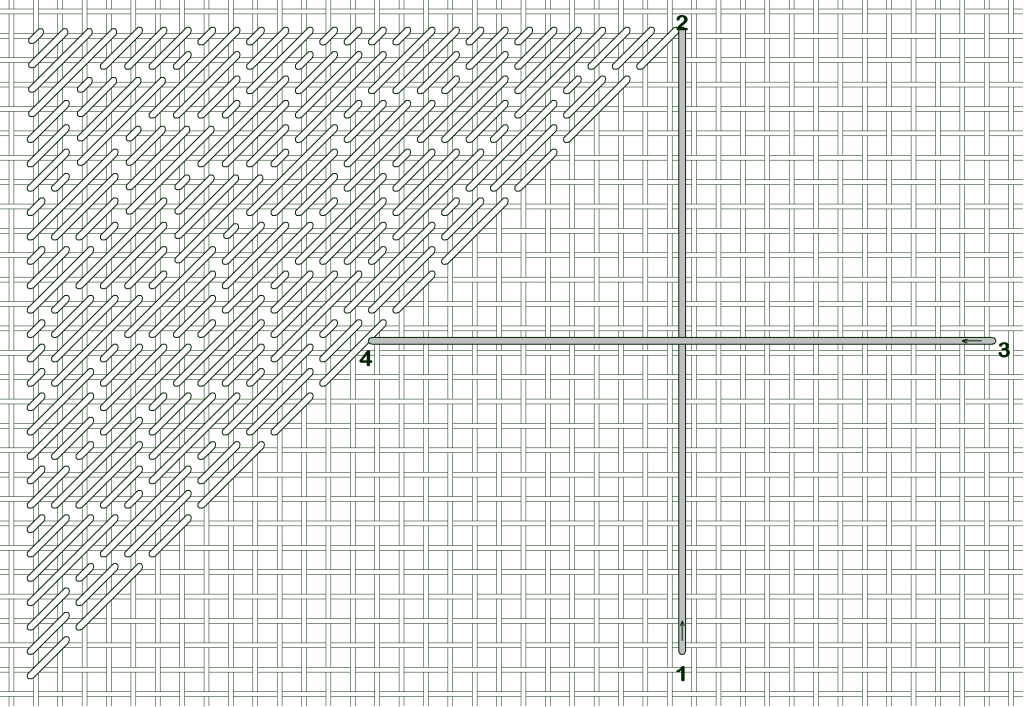
The diagram shows the first two stitches of the waffle stitch, with the Milanese block for placement reference.
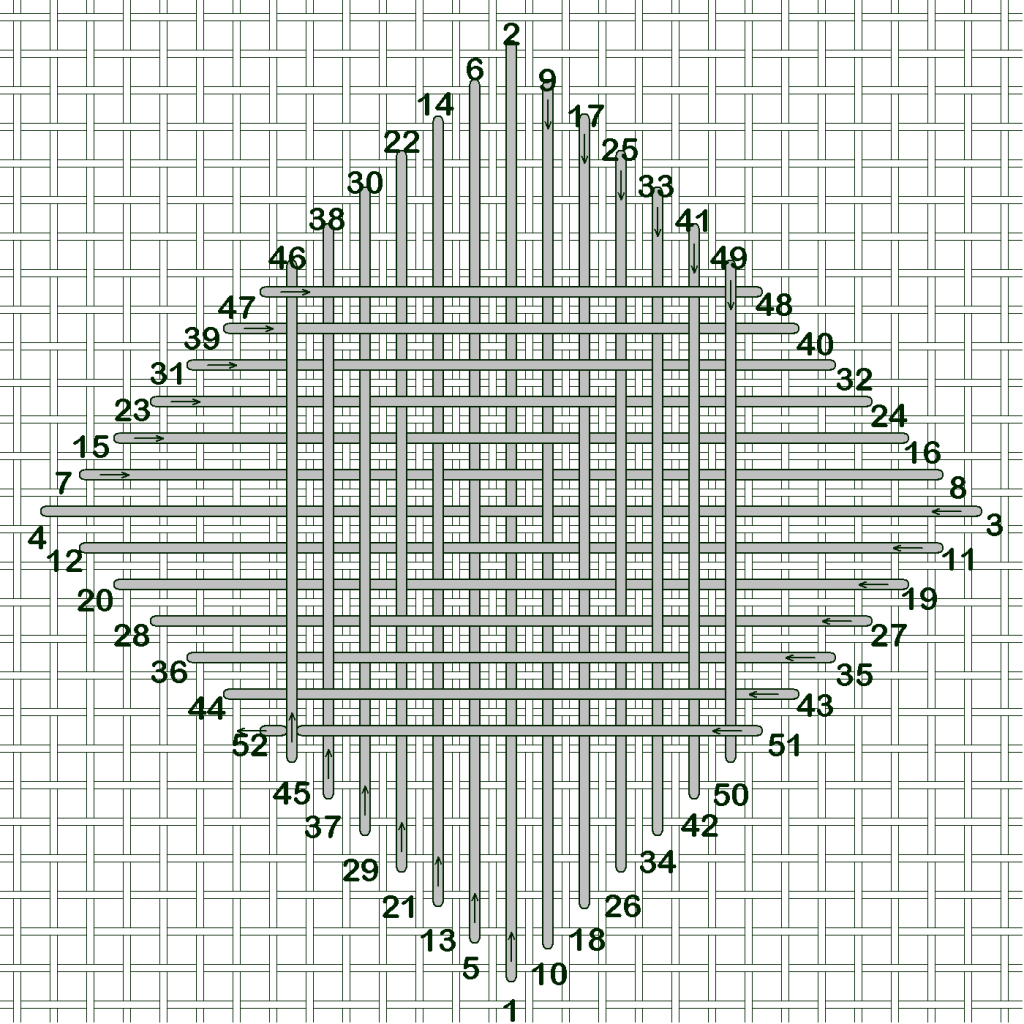
This is the waffle stitch diagram:
And the finished waffle stitch:
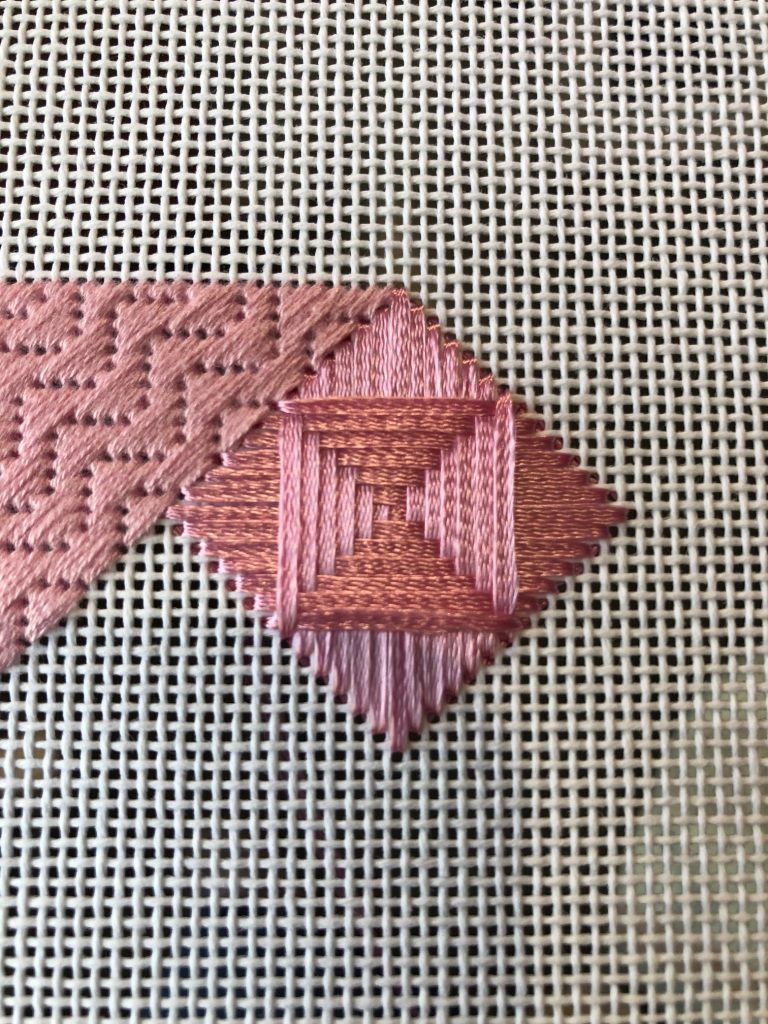
I just love the way a waffle stitch looks with Neon Rays! I also like waffle stitches with other threads, but the Neon Rays just covers the canvas so nicely.
Notice in the diagram, and in the picture, that the last stitch is slid between the canvas the beginning of the last round before ending. This puts a thread on top of every thread, and the waffle doesn’t look as nice if you don’t take this step. (It can look a little wonky.)
Stitch four waffle stitches, leaving a gap between them:
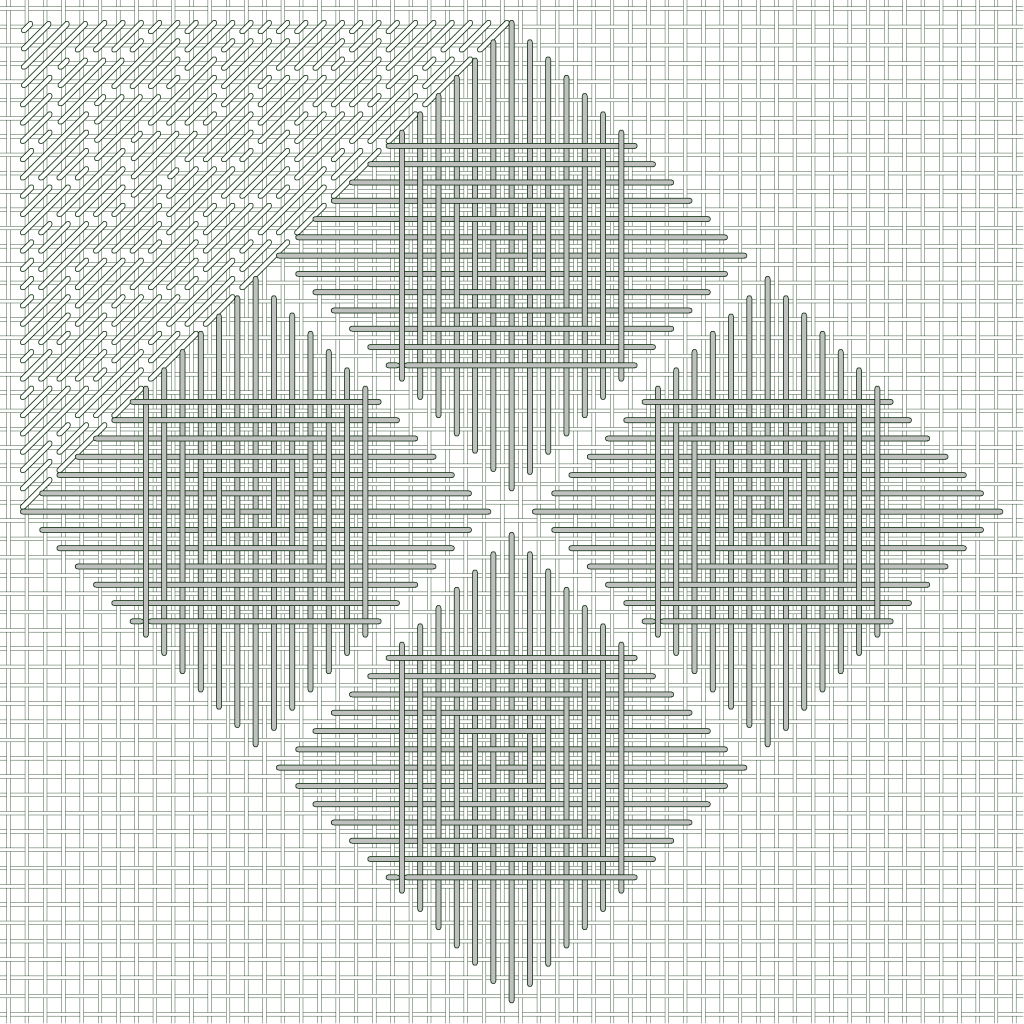
I stitched the top and bottom ones with Neon Rays, and the left and right ones with Neon Rays+.
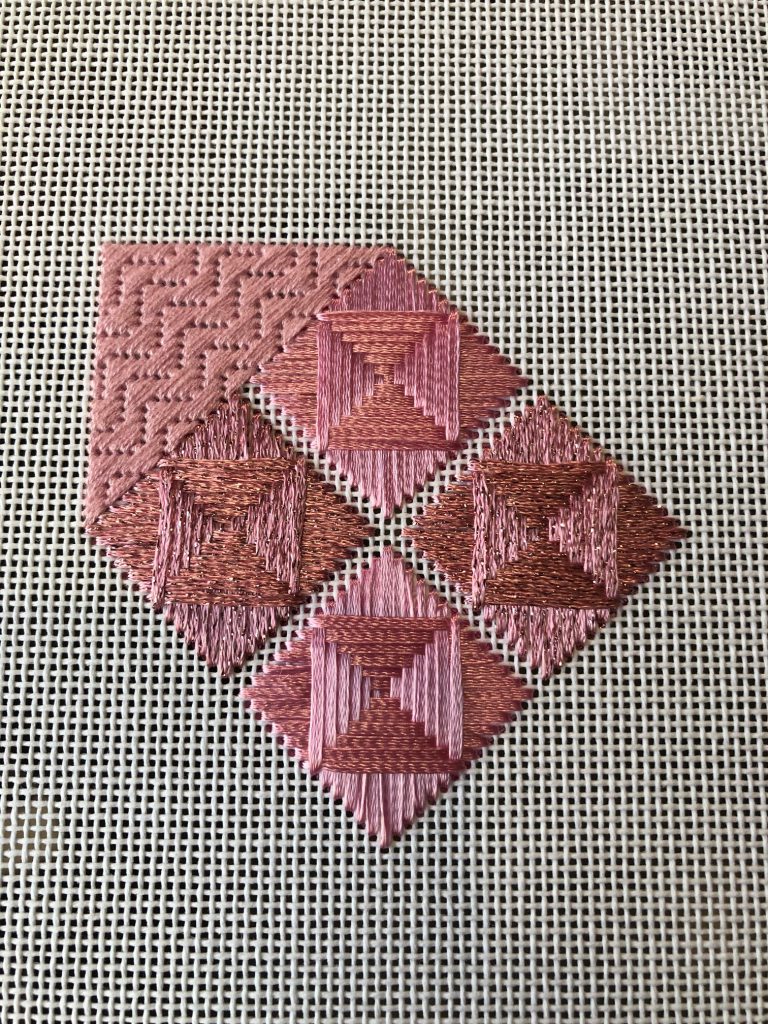
My light cast a yellowish tint, but the colors are a pure pink. I ended each waffle stitch with a pin stitch under the waffle stitch. Separate some of the threads in the waffle until you can see canvas, then take a pin stitch in the shape of an “L” or “T” to secure the thread. There isn’t enough on the back to weave the end securely. After stitching, I pull up on the thread so it’s tight, then snip it off as close to the canvas as I can without snipping the stitched waffle, then smooth the stitches back over my pin stitch.
Finish this block with upright cross stitches, stitched with #8 Kreinik braid.
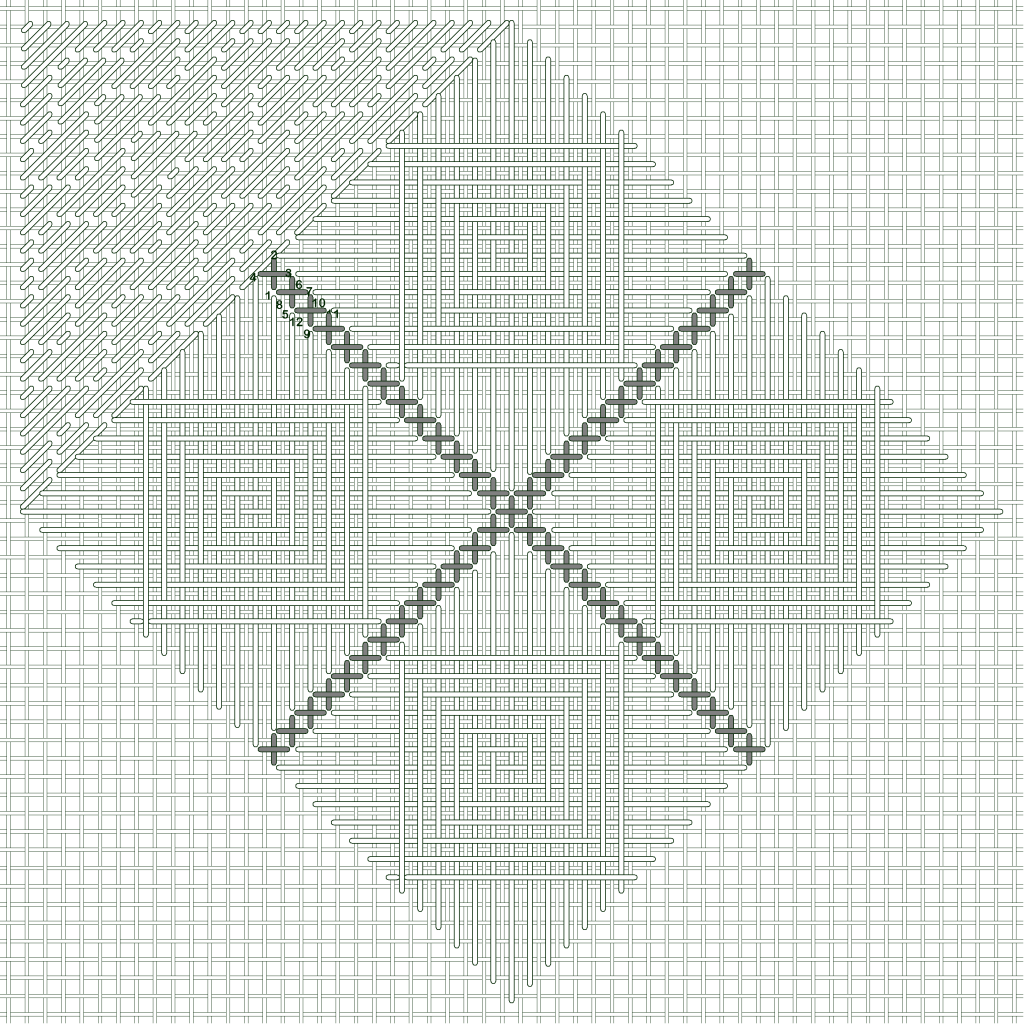
Here’s the finished block. I anchored the #8 braid with an away knot and stitched toward the knot, and anchored on the back by weaving under the upright cross stitches.
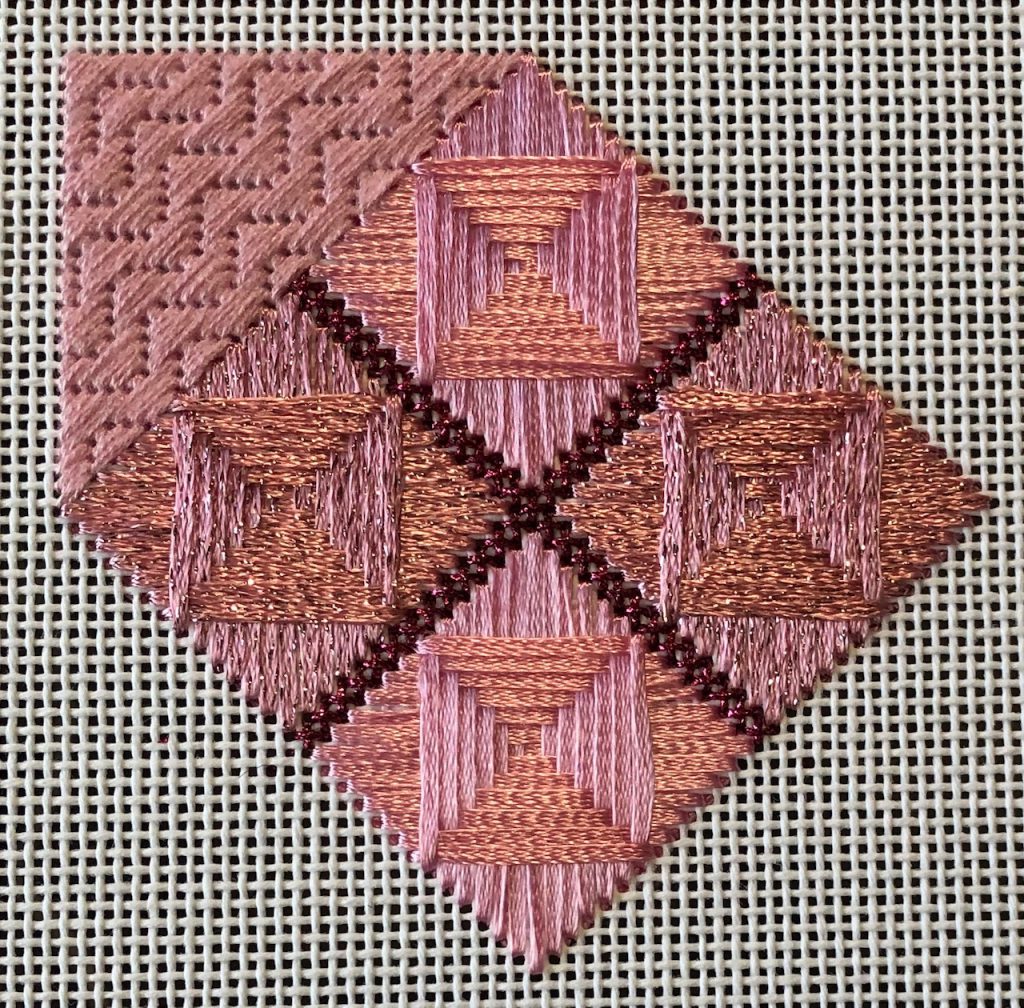
There will be another block like this one, but I’m not ready to do that until I’ve stitched the area between to avoid counting errors.
Here’s a pdf of today’s instructions:
Click here for Quilt Block 1B – pdf
I like the look so far! If you’re stitching along be sure to share pictures with me.