Rhodes stitches are one of the work horse stitches in a needleworker’s tool box. Spot motifs, borders, combinations, different shapes and sizes – how could we live without our Rhodes stitches?
A Rhodes stitch is always capitalized when you see it in print, named for the person, Mary Rhodes, who is credited with its creation. A Rhodes stitch is characterized by all of the stitches crossing a center point, which puts as much thread on the back of the canvas as the front. It’s a highly textured stitch, and one that works great in a wide variety of threads.
When I first started doing Rhodes stitches, I was a little troubled by the finished look. My first Rhodes stitches were usually squares, and the final stitch was almost always oblique, not the true vertical, horizontal or diagonal stitch. When I started designing I started tinkering with it, to have the final look be more pleasing to my eye.
Here’s how a Rhodes square over 4 is usually diagrammed:
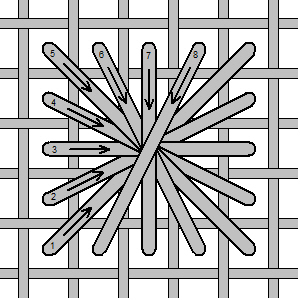
You can see that the stitch begins with the true diagonal, making the final stitch oblique. This is the look that I didn’t care for, so I began diagramming my Rhodes squares like this:
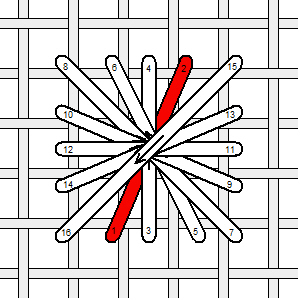
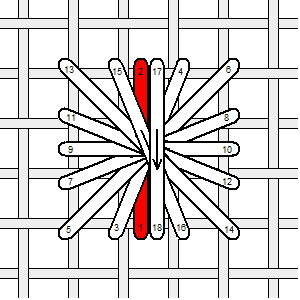
The first stitch, shown in red, is the oblique stitch, so the final stitch can be the true diagonal.
But what if the project doesn’t have a diagonal feel to it, and I’d rather have the final stitch be horizontal or vertical? Easy peasy – just alter the placement of the first stitch:
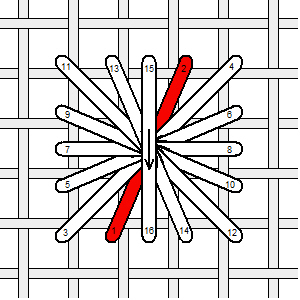

In the examples above, the final stitch is a true vertical or a true horizontal.
And why does it matter? The overall look and feel of a piece is made up of all its component parts. If I want the center to be emphasized, I want all of the stitches to be “pointing” to the center. If I want a strong horizontal line, say for a border, I want all of the stitches to reinforce that feel.
But wait a minute – aren’t all Rhodes stitches in a piece supposed to have the same final stitch? Yes, and no. If I’m stitching a border, for uniformity I want all of the final stitches to be the same. But if I want to emphasize a particular area, I want the final stitch to be pointing toward that area.
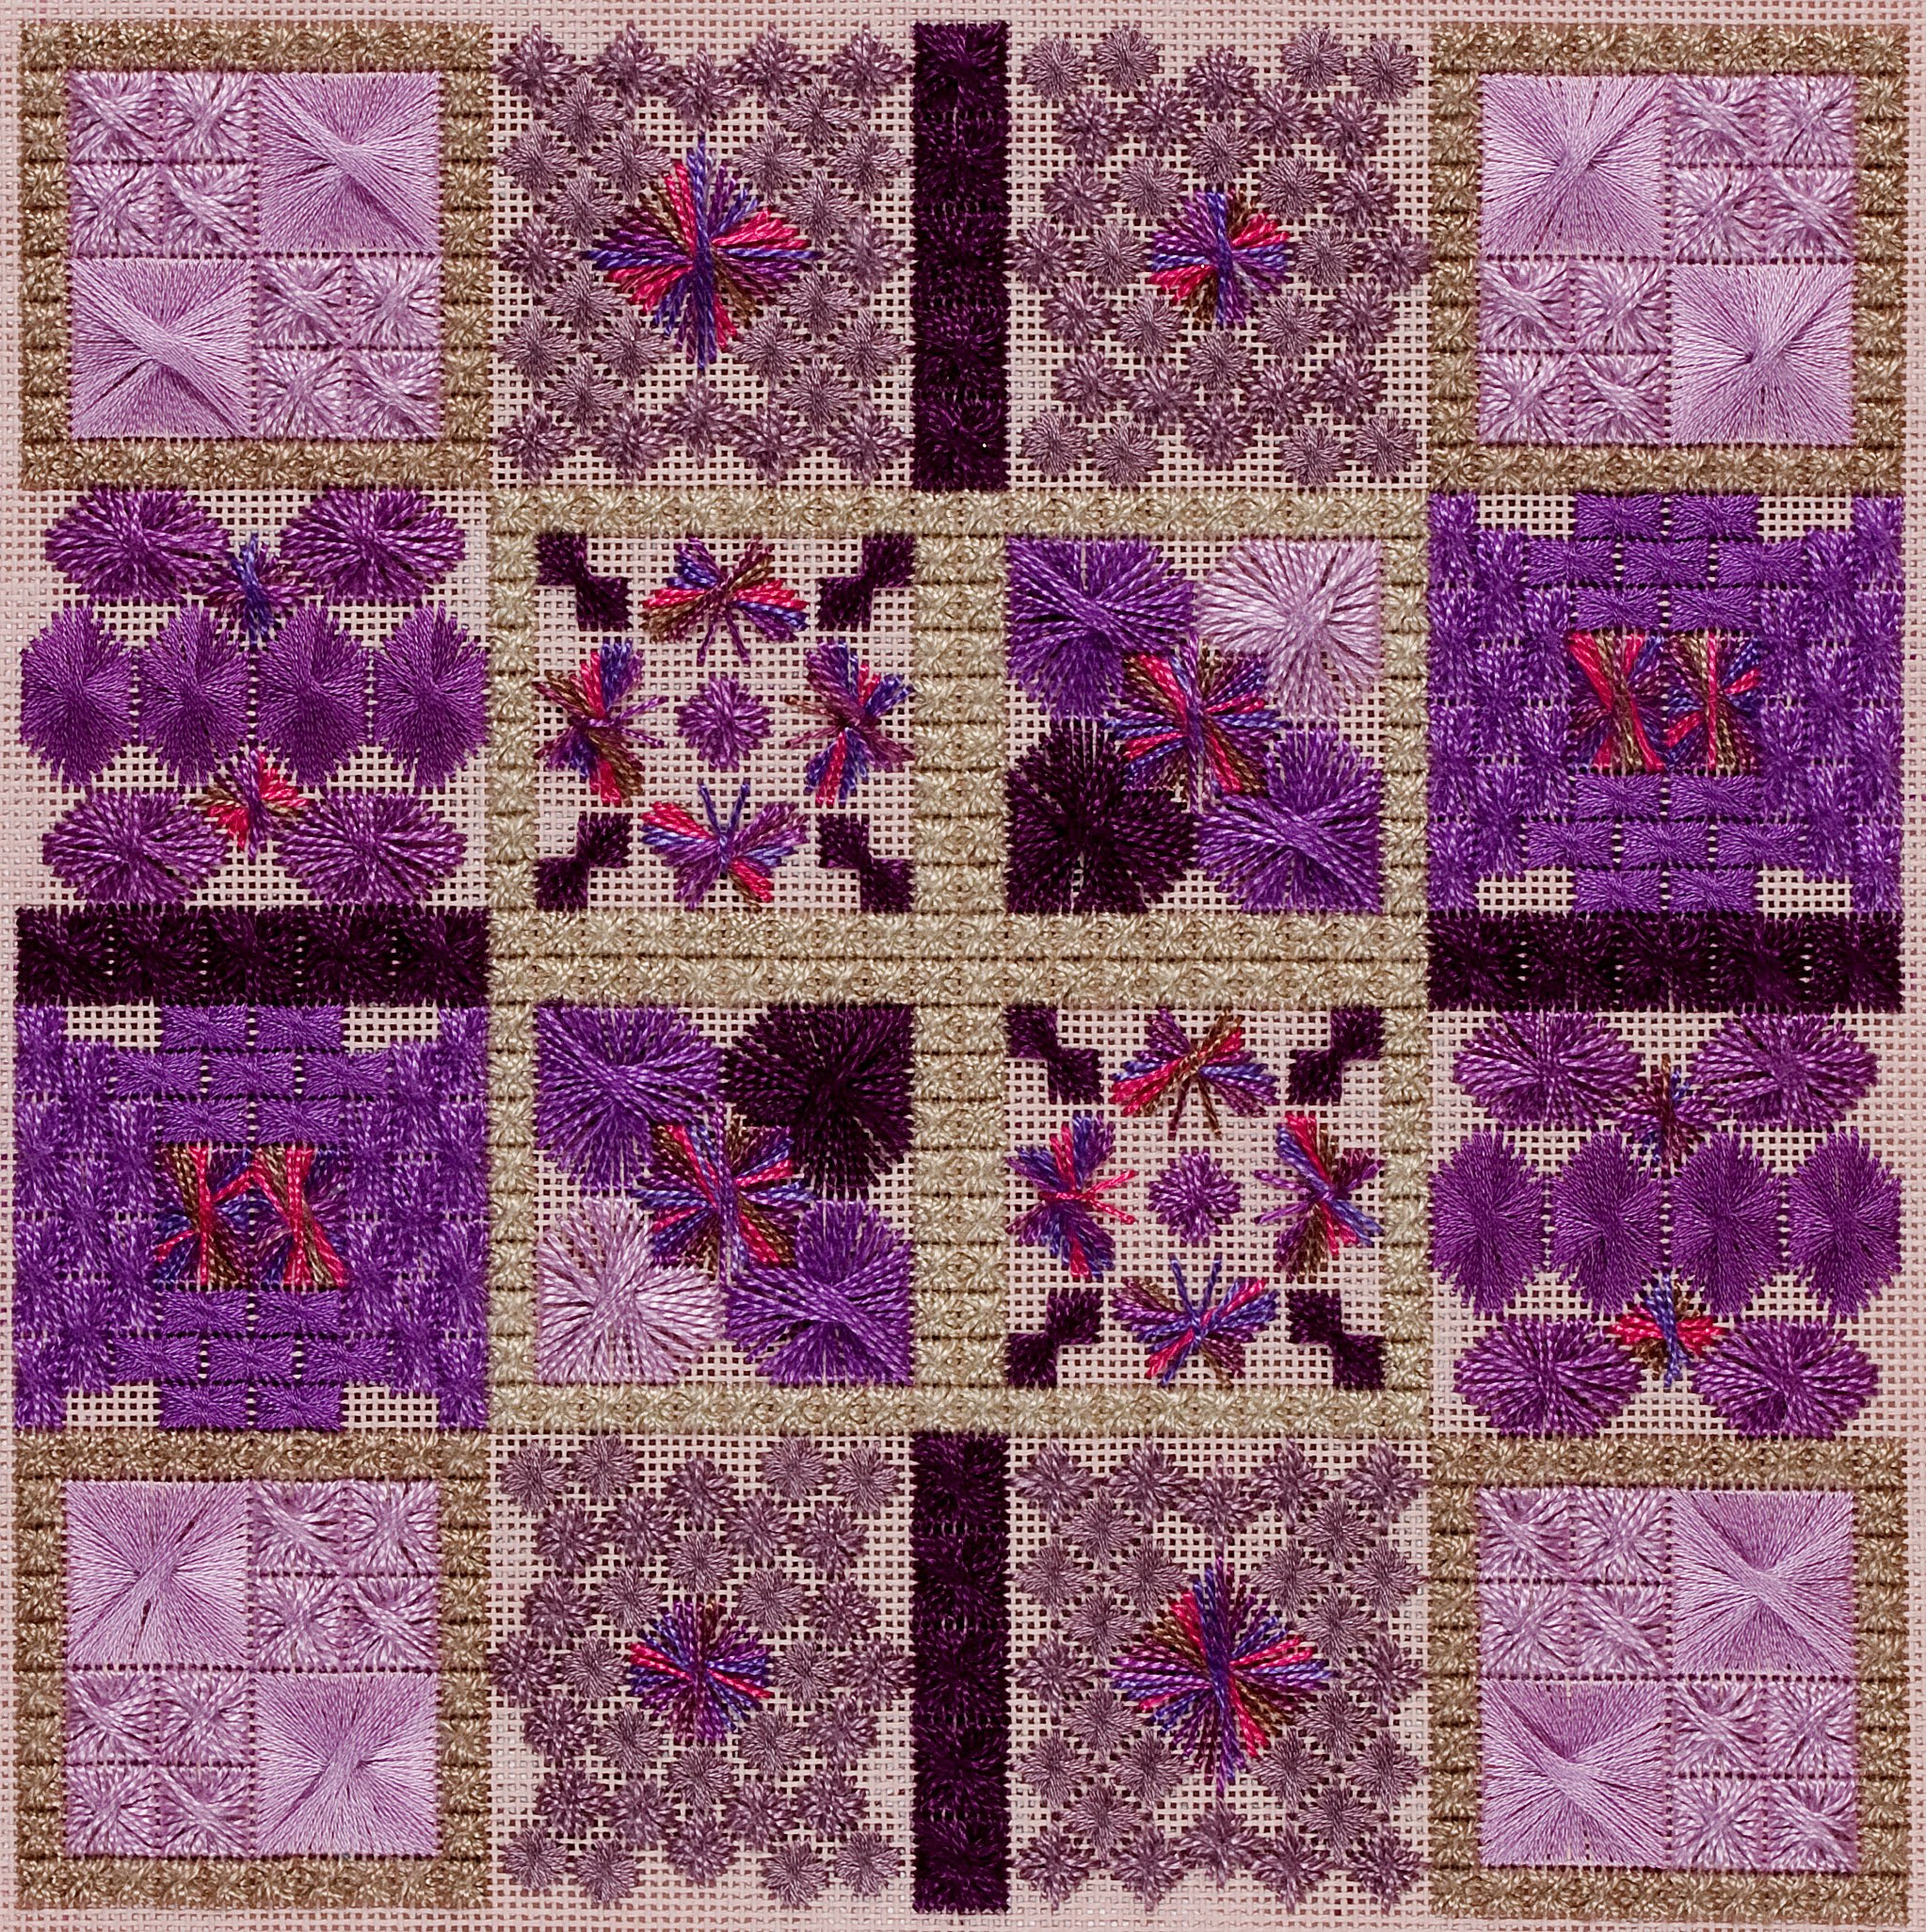
In “A Bump in the Rhodes”, pictured at the top, the Rhodes stitches don’t all have the same final stitch. You’ll see that the very large Rhodes squares in the corners have final diagonal stitches that point toward the center. Since I determine which is the final stitch based on my first stitch, it’s an easy thing to manipulate so the stitch looks the way I want it.
And this is something you can do in your projects as well. Determine how you want your final stitch to lay, and stitch away. If you have trouble with the layout, here’s a little trick – start your Rhodes stitch with the true line, stitch round, then stitch over the first stitch:
I’ve slightly offset the first stitch so you can see it better, but when you actually stitch it will be covered by the final stitch. Your finished Rhodes will be slightly higher in texture, so make sure you do all of them the same, but the final look is a standard Rhodes square.
I hope this helps you as you plan out your stitching. All Rhodes stitches can be stitched in this way, with you determining how you want your finished Rhodes to look.