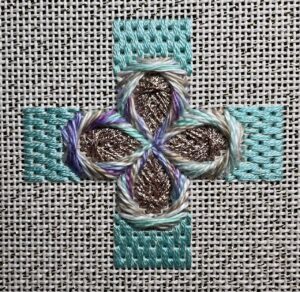
This time we have a simple satin stitch pattern, a brick stitch. Brick stitch is one of those versatile stitches you’ll use over and over, for small areas as here, or larger areas or background stitches.
I used 4 strands of floss, DMC 964 Light Seagreen (this is an update, I thought it was 959 Medium Seagreen until I actually looked at my notes) . The original color way used Rainbow Gallery Splendor S930 Lite Pearl Gray. When stitching use a laying tool to make sure the stitches are very flat and smooth. The stitching is nicer and prettier if you bring the needle up in an empty hole and down in a shared hole as much as possible.
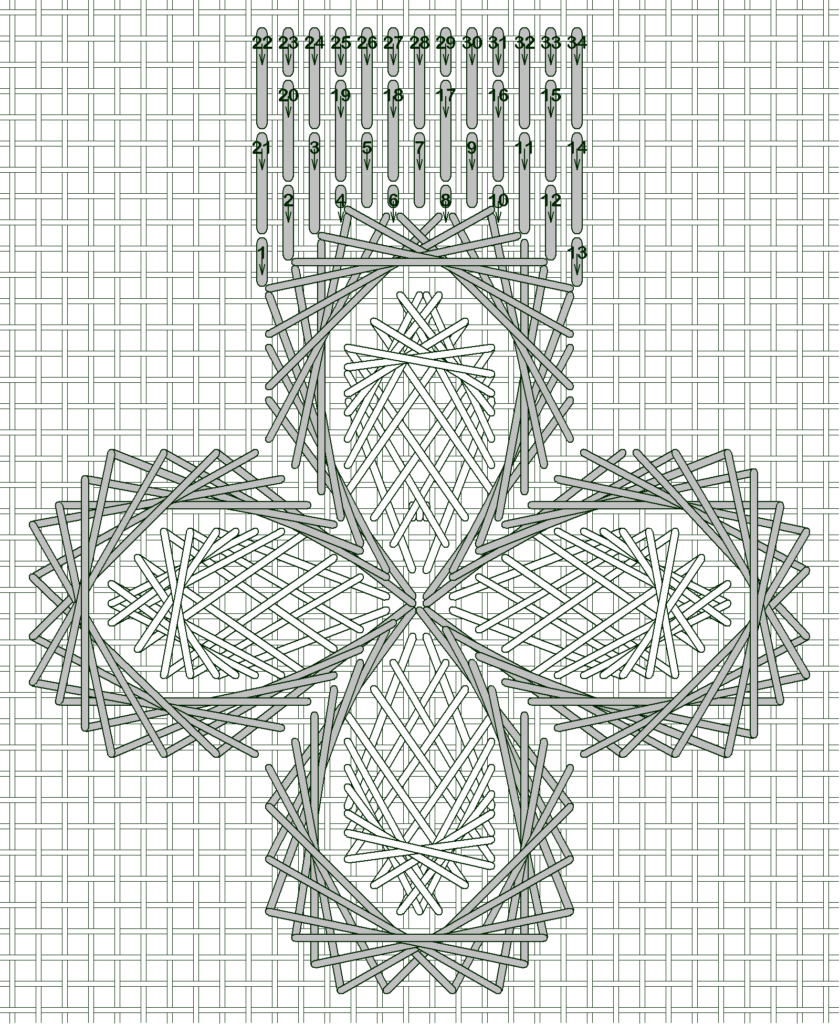
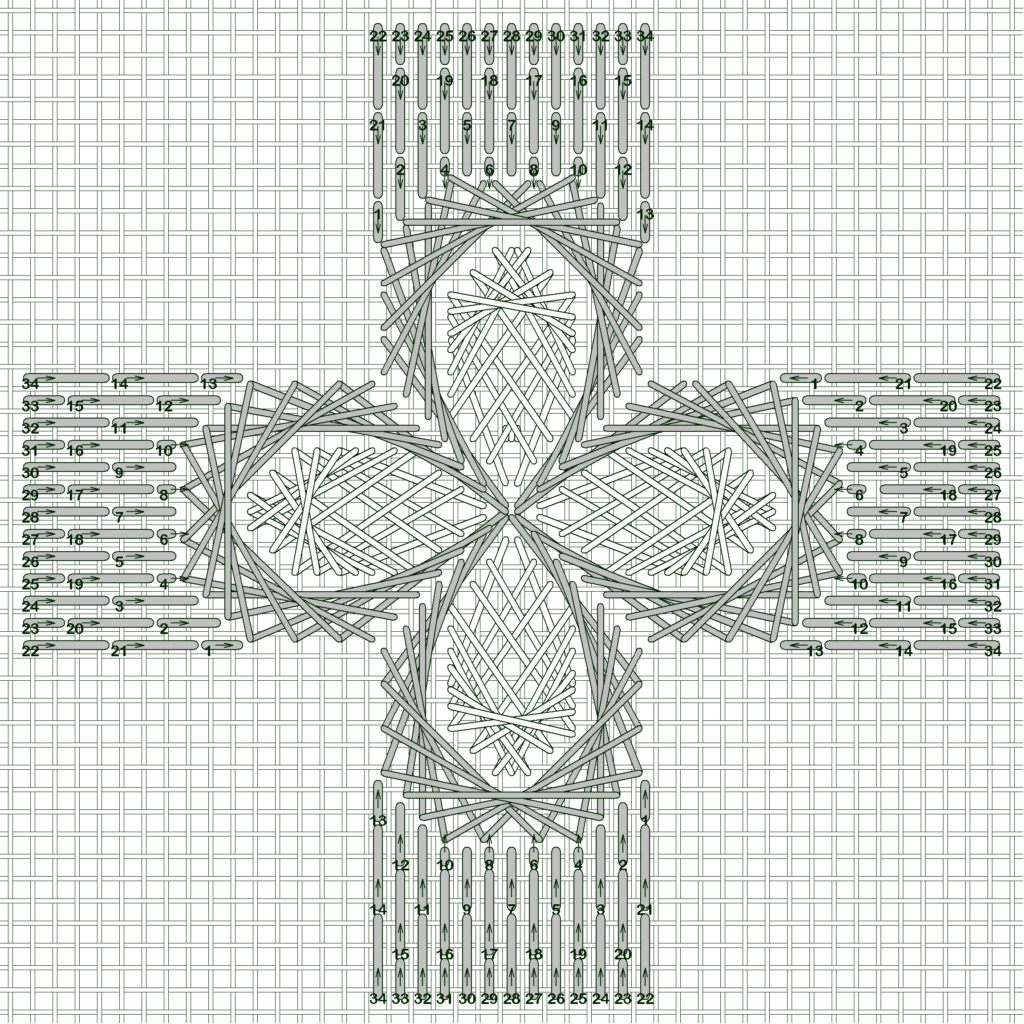
The diagram shows a possible stitching order, but make sure if you choose a different stitching path make sure that all of the stitches are in the same direction, as shown in the diagram.
I anchored with a loop start but an away knot will also work.
For a loop start, cut a length that is twice as long as the stitching length you prefer. Example, if you want to stitch with about 24″, cut a length that is 48″.
Separate out half the number of strands you’re stitching with, here for example 2 strands. Fold the strands in half, giving you 4 strands for stitching.
Thread the needle, then insert the needle in the canvas from the front. Pull most of the thread through, leaving the folded end on top of the canvas. Bring the needle up again 1 canvas thread away, pass the needle through the loop, then insert the needle again. Pull all the thread through, snugging the loop to the canvas, and tug the loop to the back.
When making a loop start, do not make the loop over more than a single canvas thread. It’s too hard to control the tension if it’s over more than one canvas thread, so make it over 1 canvas thread. Place it where it will be covered by the stitches, but not at the beginning of the first stitch you’re making because you will undo the loop.
To end off the thread, weave it through the backs of the stitches. The entire brick stitch areas are shown in the following diagram.