Click here for Labyrinth Section 3 instructions as a pdf
Well, the best laid plans…I had intended to take care of this yesterday but am suffering from a minor injury and took it easy yesterday. So a day late, but here’s the next step in the Labyrinth stitch along.

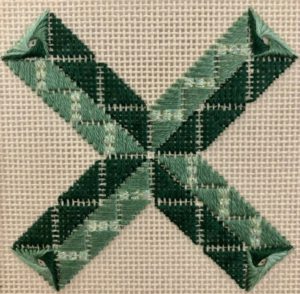
As promised, today’s stitch is one we haven’t done before in one of my stitch alongs, a triangle Jessica.
Jessicas are twisty, string art type stitches that can be any size or shape. They aren’t hard, just a little different.
The one in our project is stitched in layers, with three different colors of silk floss.
I began with 2 strands of the darkest color, S907 Dark Pistachio Green. I used a loop start to anchor the thread, then stitched the first layer all the way around.
The first part is basically a crescent, easy peasy!
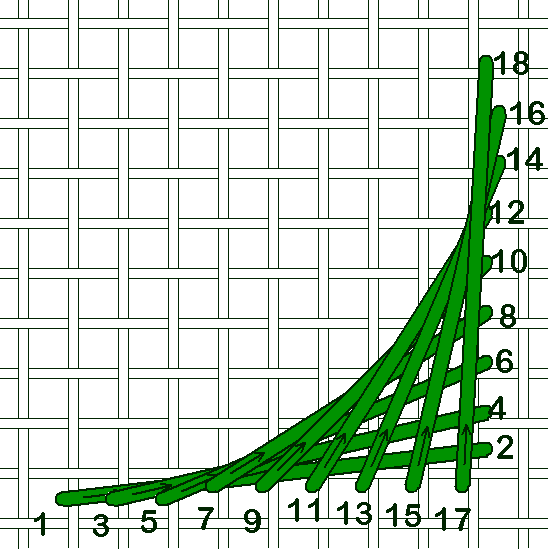
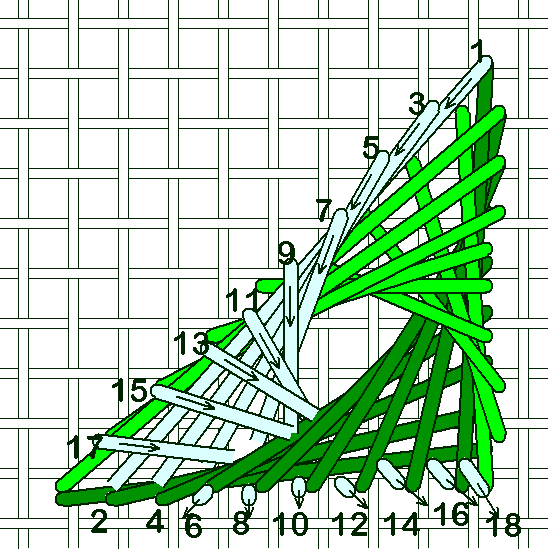
The first stitch is slightly offset, not a straight stitch, then the remaining stitches come up in adjacent holes in a straight line and end in adjacent holes in a straight line.
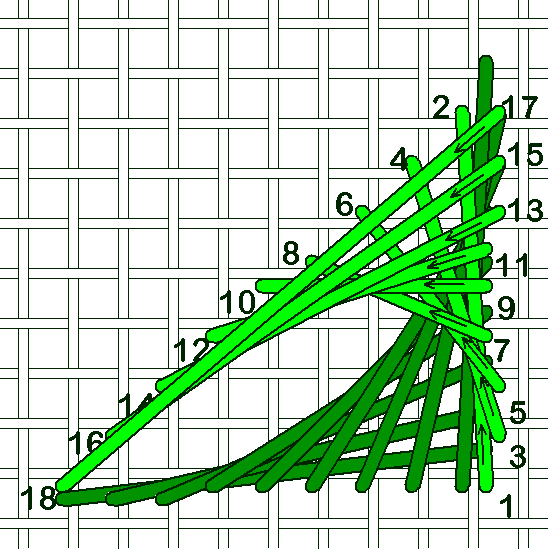
The diagram shows where to place the first layer in relation to what we’ve got so far.
Here’s a diagram showing the placement of the stitch with the numbers. Note that the layer shares holes with the previous stitches.
For the next layer, I used 2 strands of the medium shade, S906 Medium Pistachio Green. These stitches lay over the previous stitches.
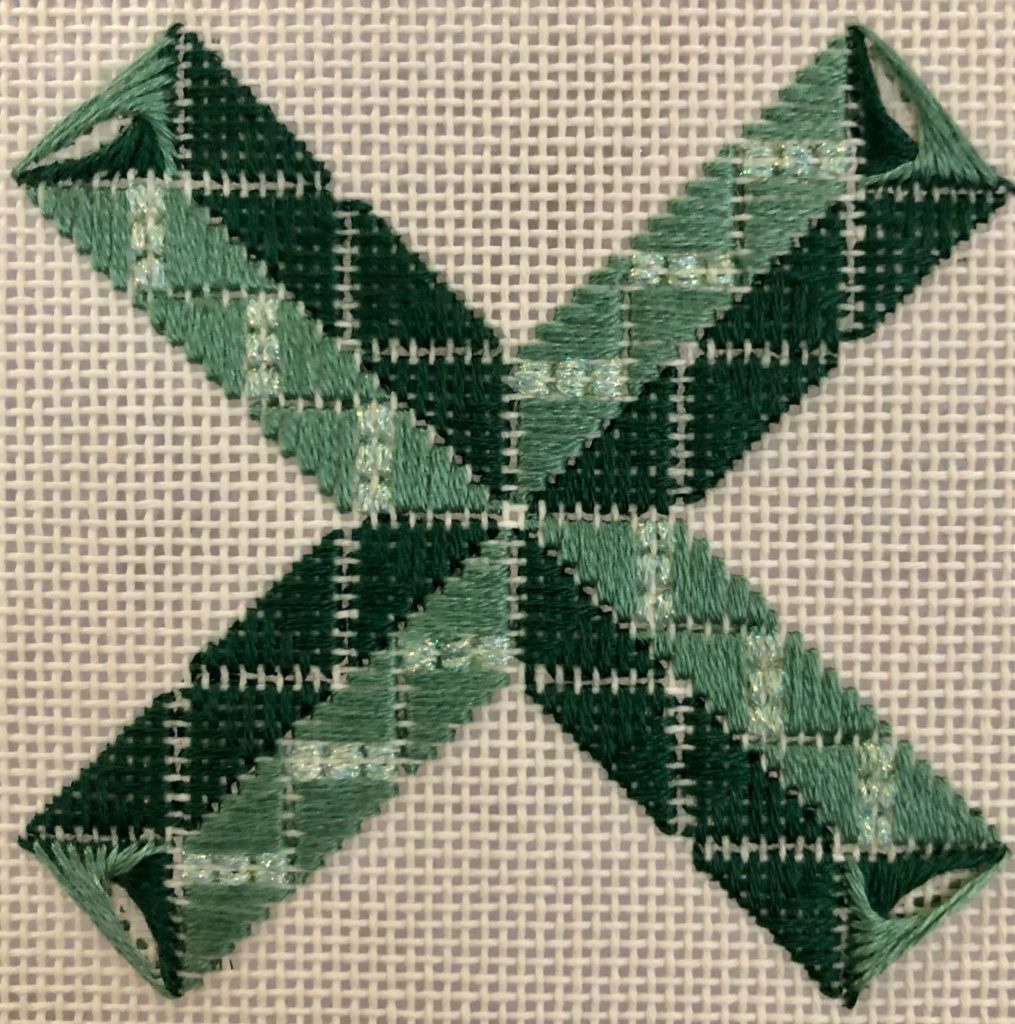
For the third layer I used 2 strands of the lightest shade, S905 Lite Pistachio Green.
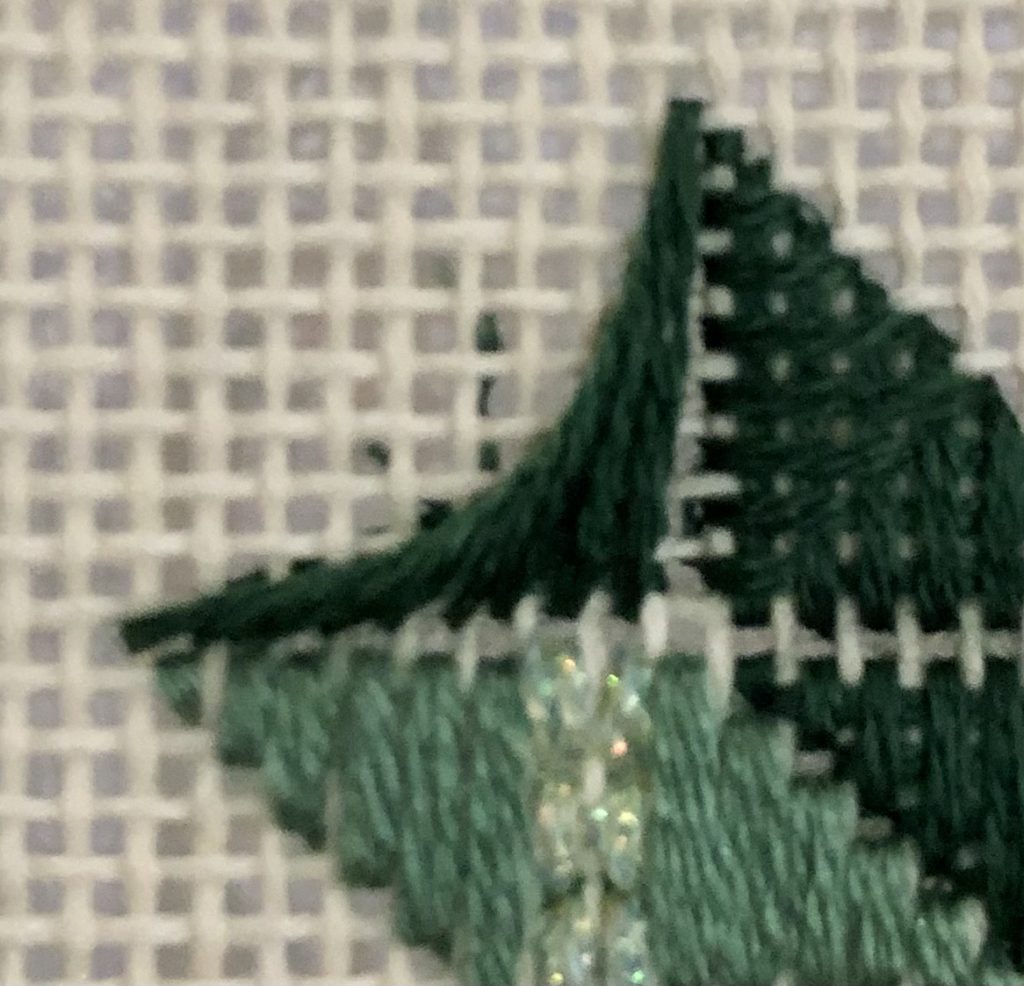
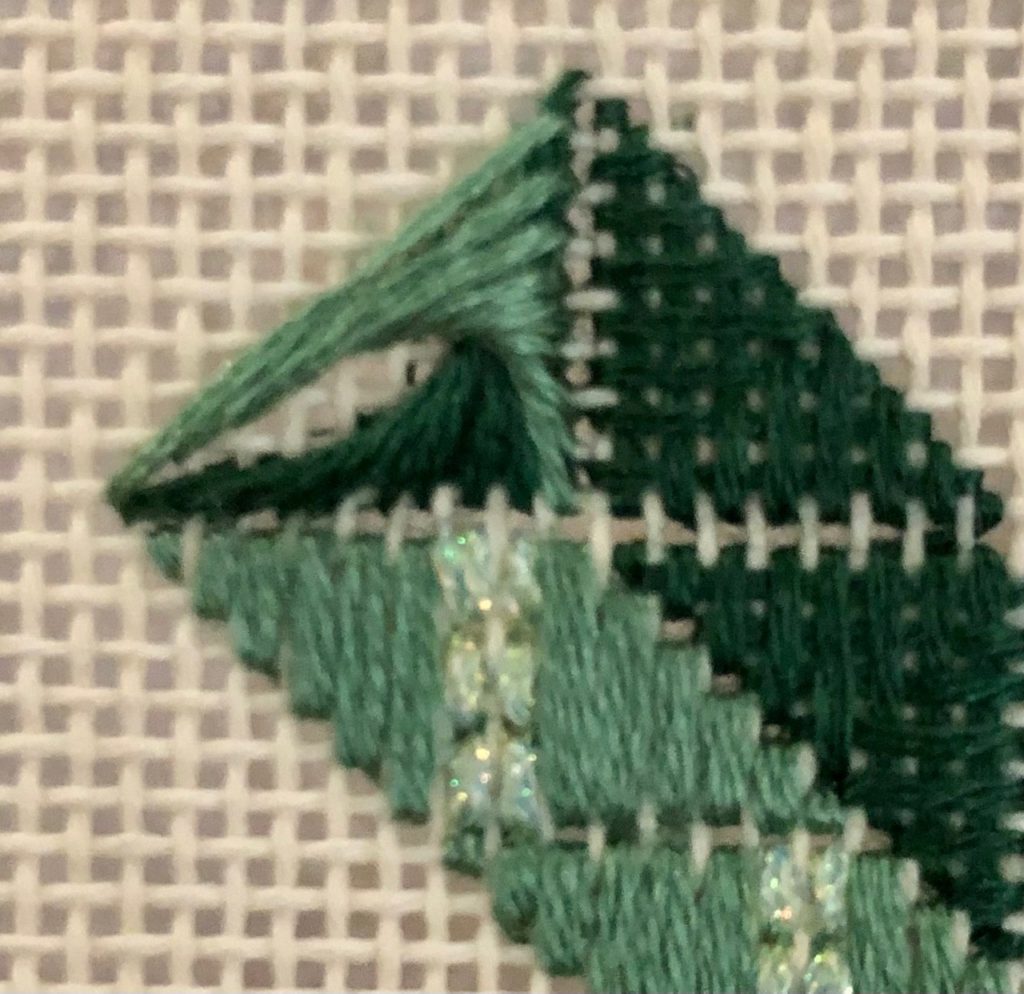
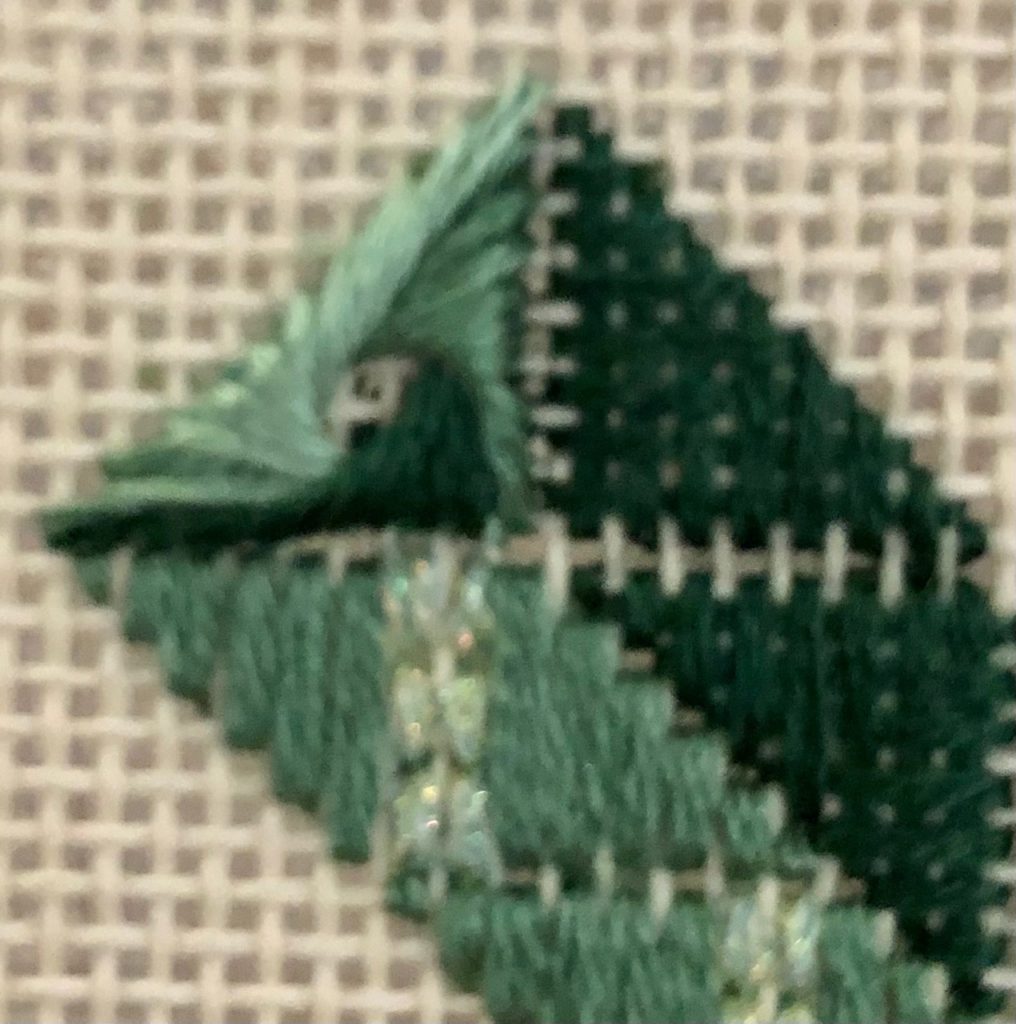
The third layer is where it gets a little tricky. The stitches in this layer begin in shared holes with other stitches, and end in shared holes, but before ending slide the needle between the canvas and the previous stitches. You’re tucking the stitches under the previous stitches. This gives the Jessica its distinctive characteristic of not being able to tell where it began and ended.
When you finish, each hole should have a stitch beginning and a stitch ending in it.
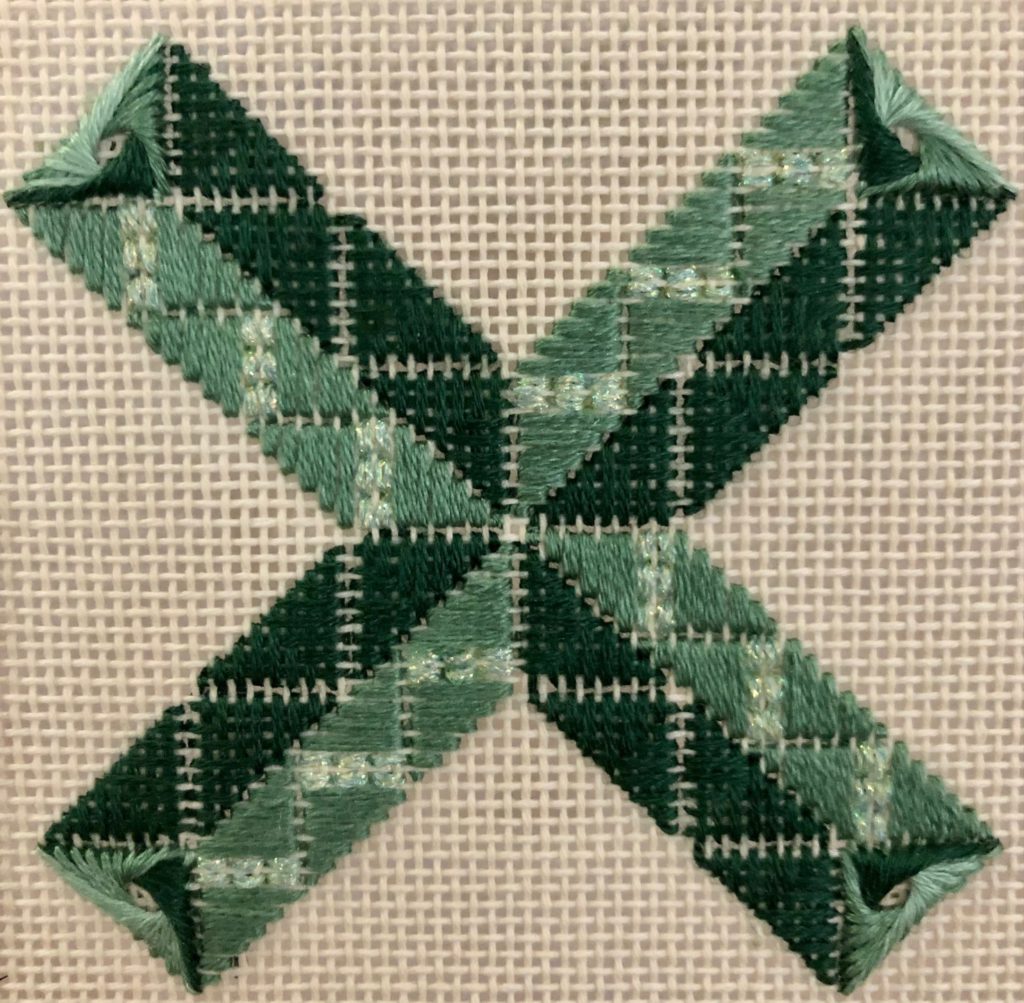
Pretty neat, isn’t it! I hope you can understand why I love Jessicas of all shapes and size so much.
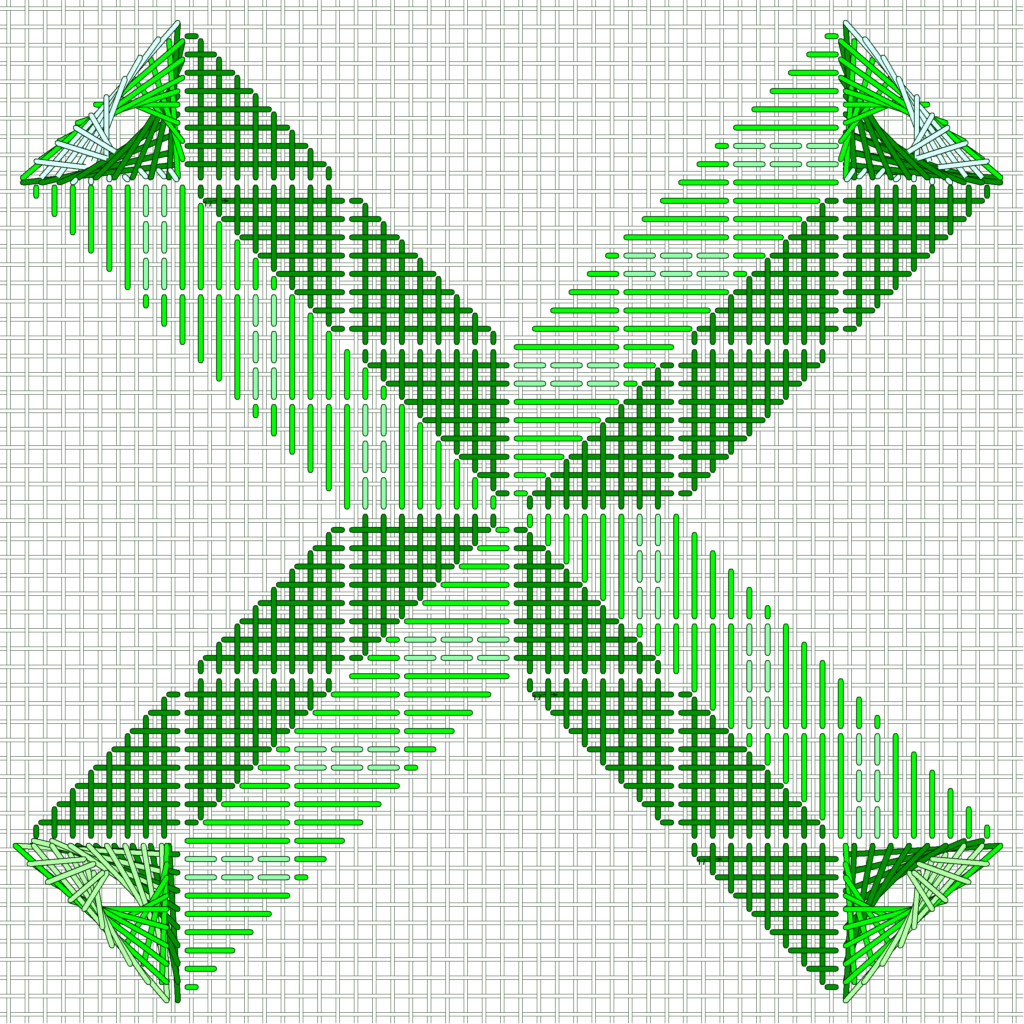
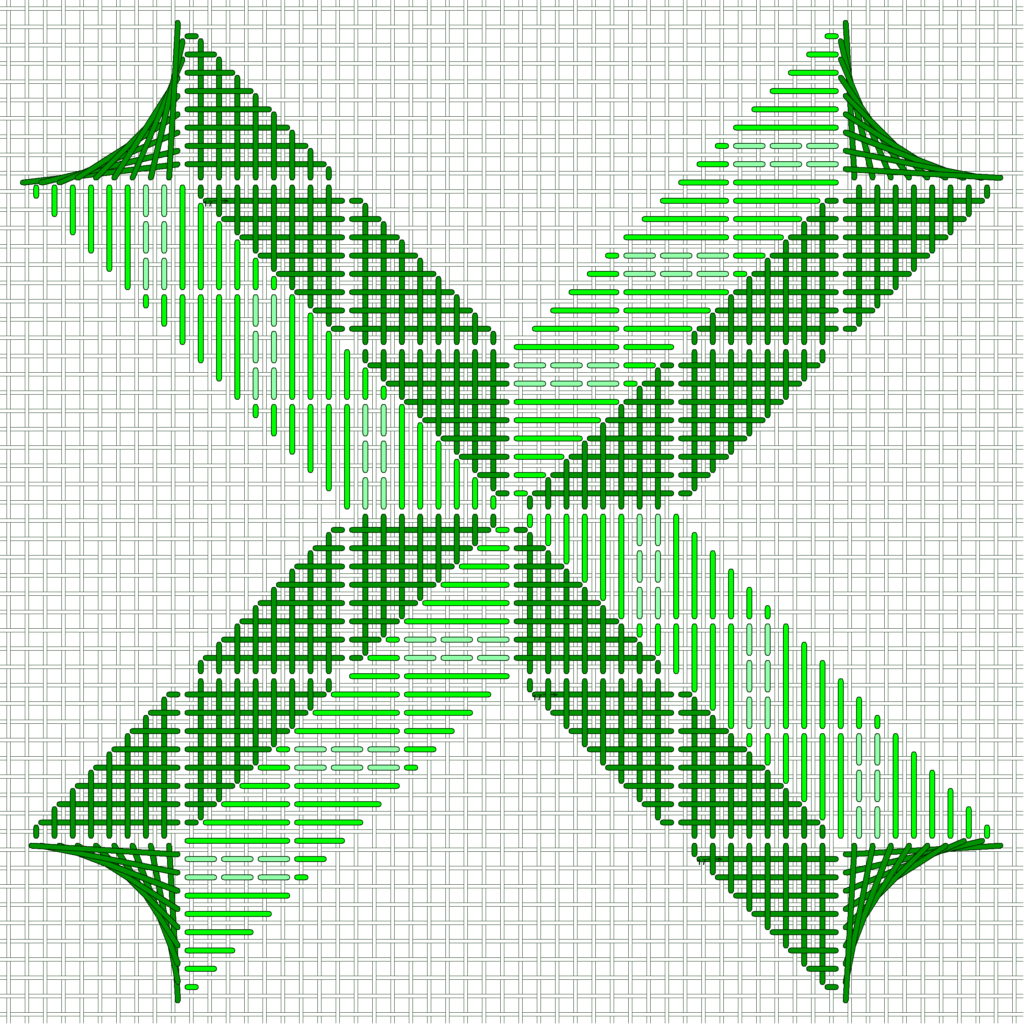
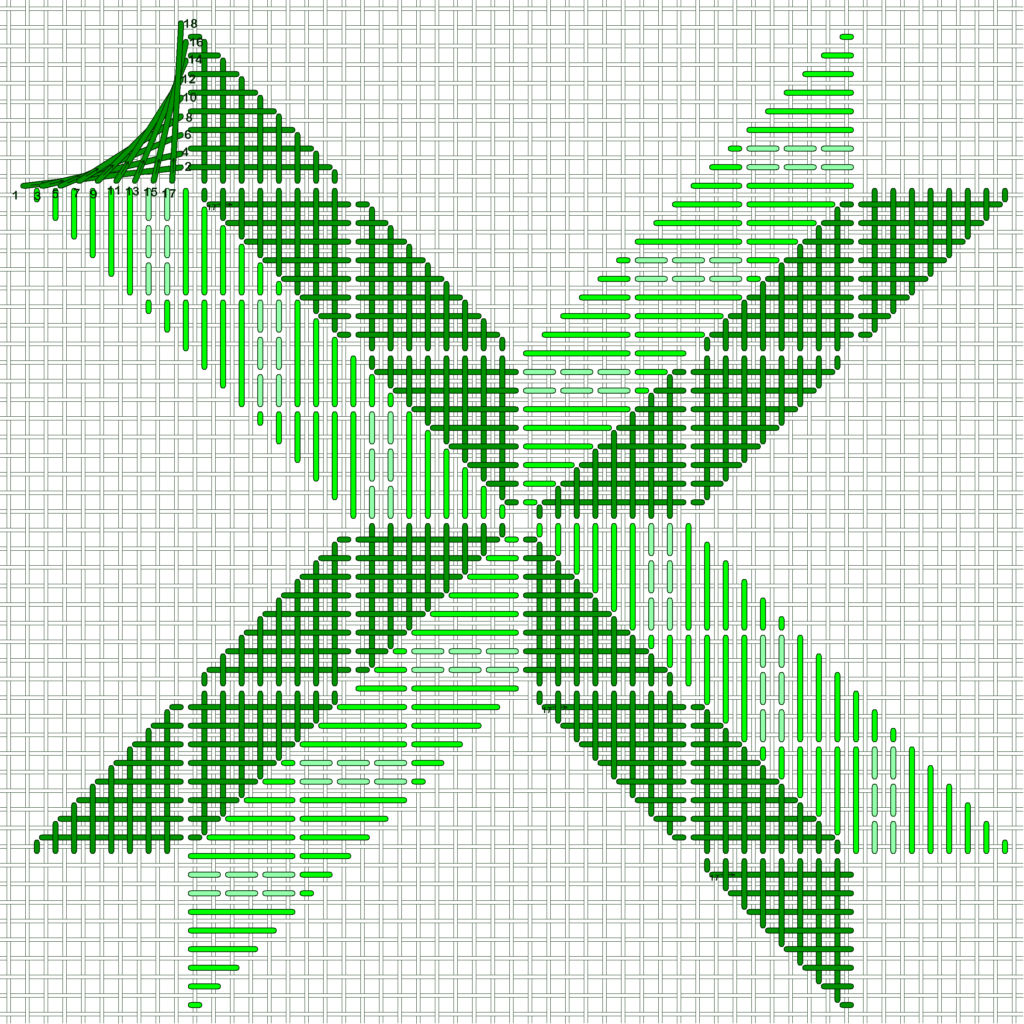
Here’s the completed diagram for this week.
Next week we’ll be back familiar territory!