Click here for Labyrinth Section 4 instructions
I had intended to do a different stitch for this area, but before I stitched I realized that this is supposed to be background. The stitch I had planned was very textured and may have pulled focus from the main part of the design. So, time to rework the section.
I decided on a Brighton stitch. Brighton stitch is a diagonal satin stitch that works up very much like reverse scotch stitch, in this case over 3 canvas threads. Now to move ahead with the stitching.
I started with 4 strands of Splendor S900 Pale Beige, and got quite a bit of it stitched with 4 strands before I decided it was too heavy. So I ripped it out and started again with 2 strands. I started with 4 strands to make sure I got good coverage, but diagonal stitches usually cover quite well with fewer strands.
Then, I wasn’t happy with the stitching path I was taking. Sigh. Ripped it out again and started again. I could have left it, but when writing instructions I try to be as precise as possible, so you don’t have to rip.
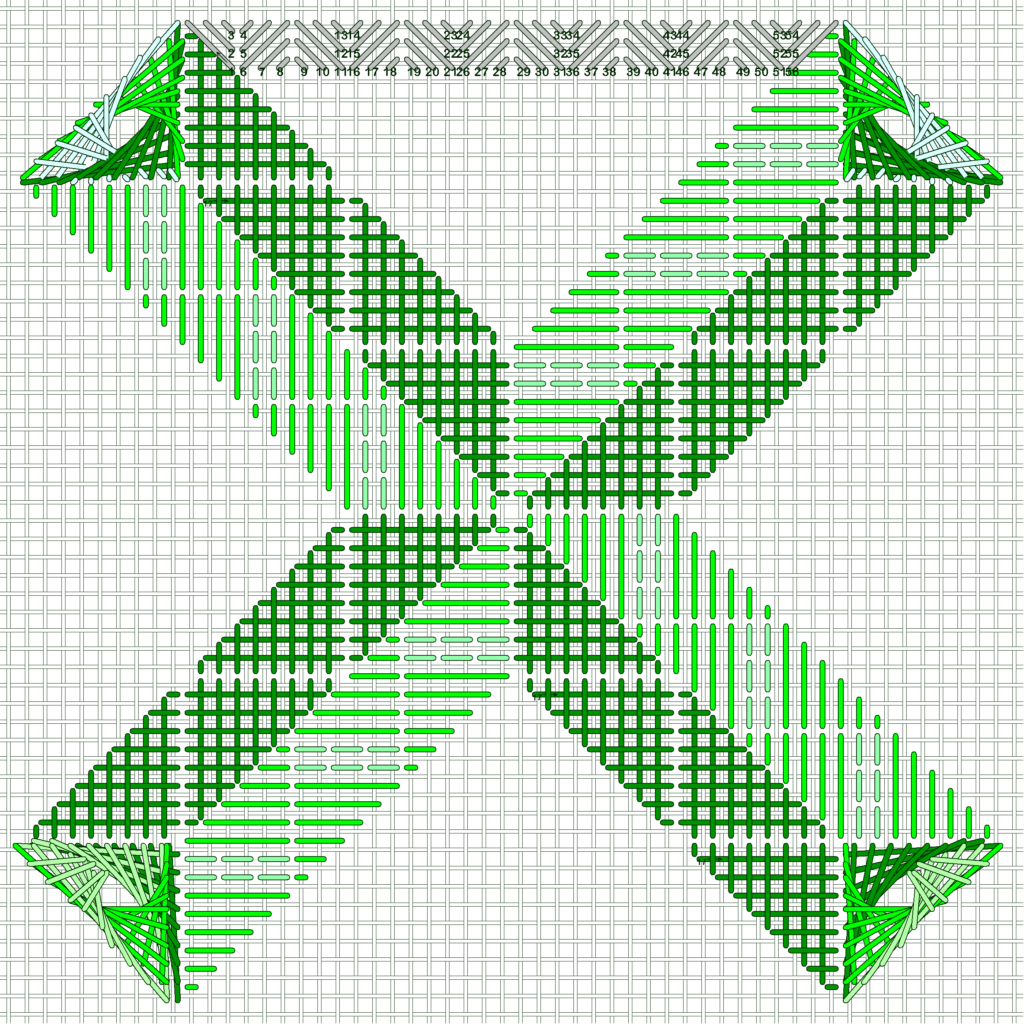
This is where I started with the Brighton stitch. You’ll probably need to enlarge the diagram on your screen to see it clearly.
The pattern establishes itself pretty quickly and aside from laying the threads, is not a challenge to stitch. Of course it’s football tonight, and probably baseball games somewhere – this is perfect for stitching while watching your favorite show or sport.
If you look up Brighton stitch in your stitch reference books, this is a different stitching path. Usually stitch reference books show a stitch in isolation, and not how to travel from one to the next when stitching in rows.
You may have a different stitching path you prefer, and that will be fine.
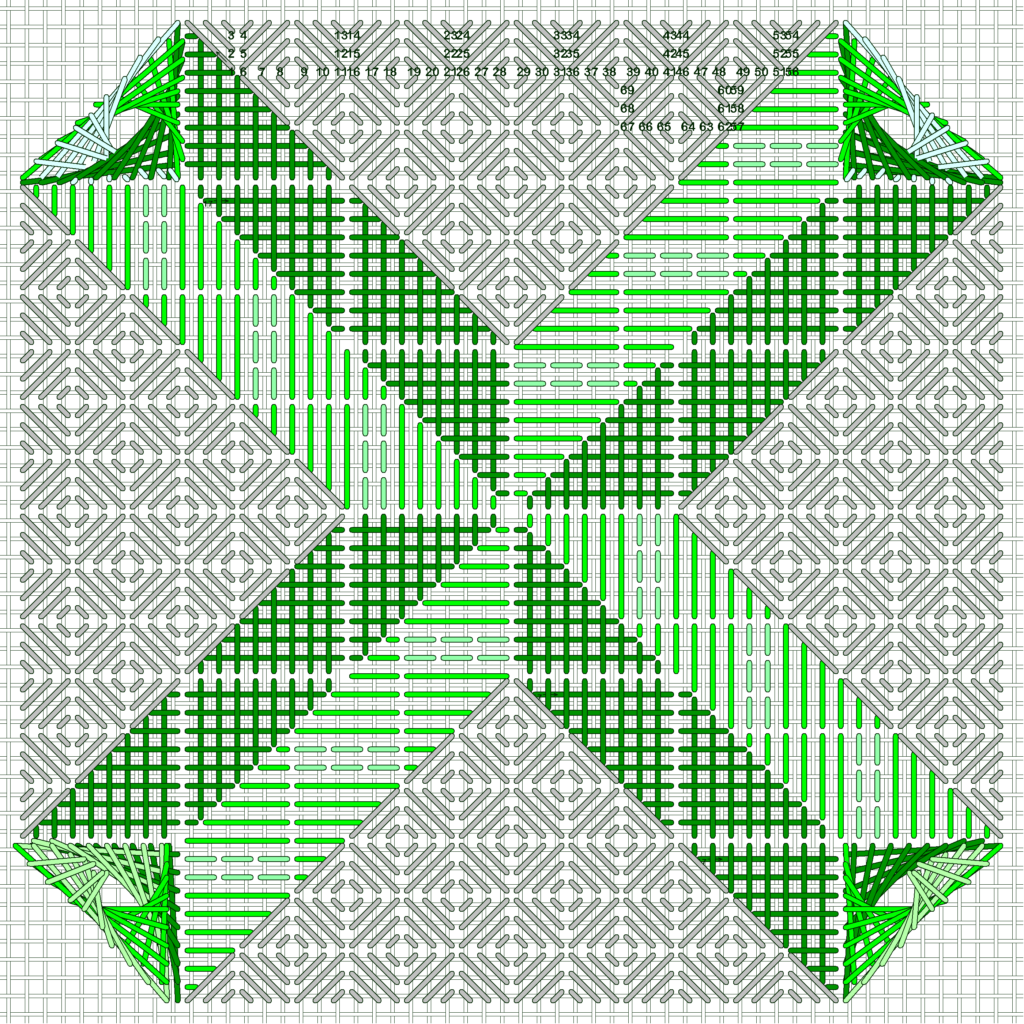
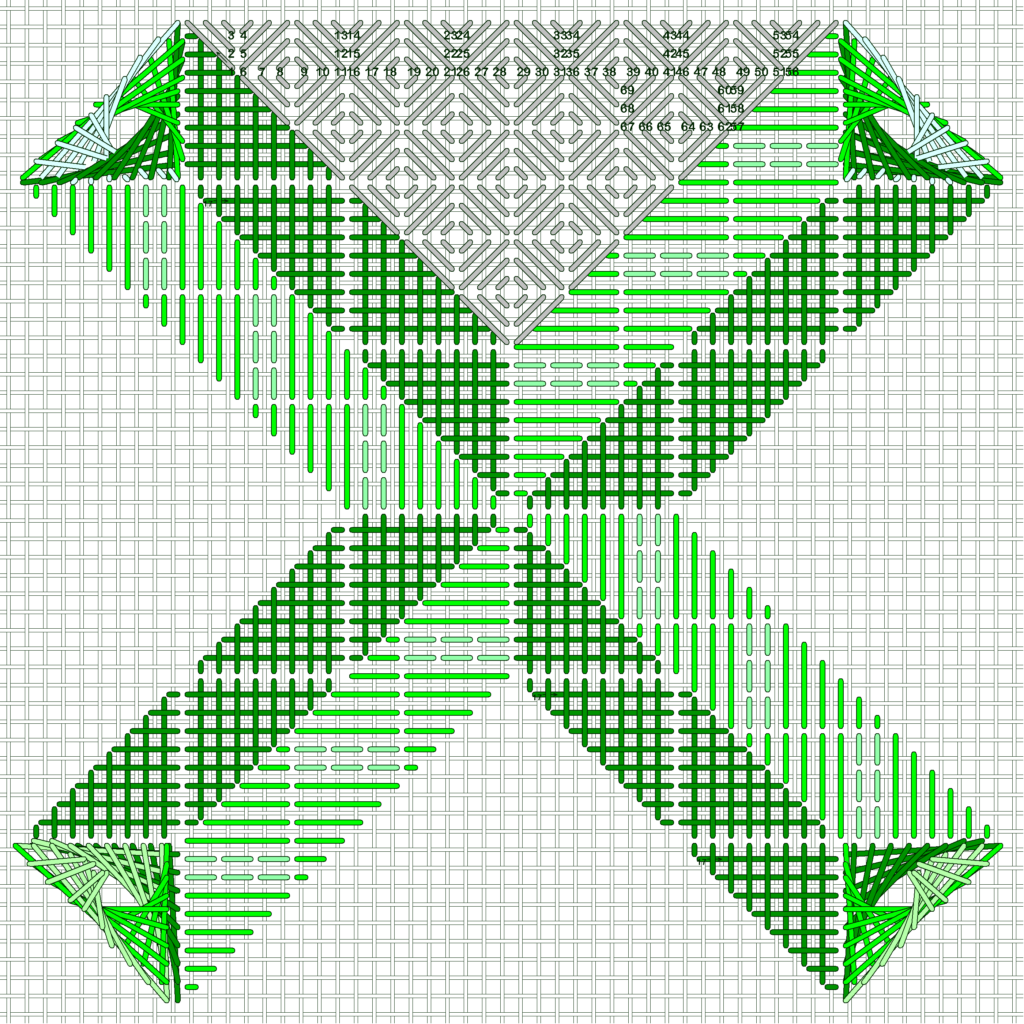
Stitch the remaining areas in the same way. You may turn the canvas while you stitch if you find it easier. This design is symmetrical, and this part can be stitched with the canvas turned.
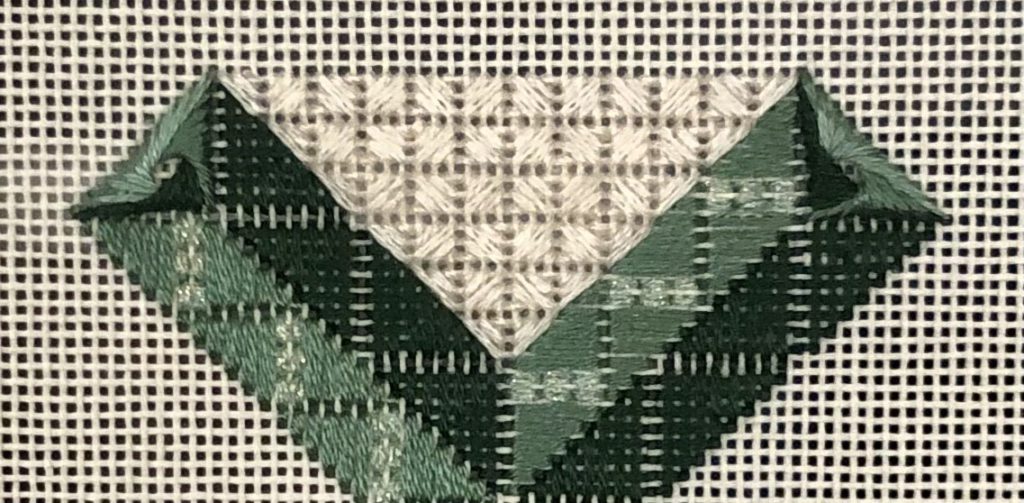
Here’s a close up of the first area. I was so annoyed at having to rip three times that I didn’t care while laying the stitches, and wish I would have put my frustration aside to stitch better.
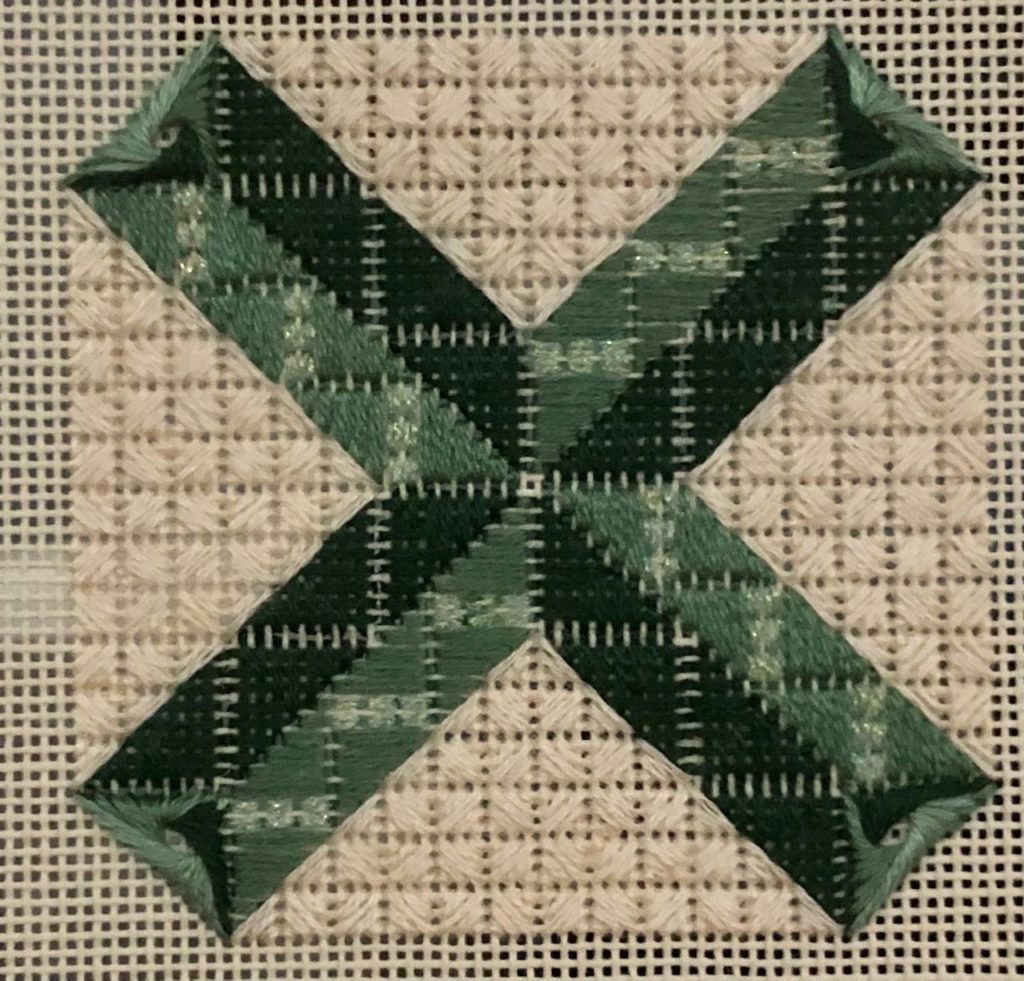
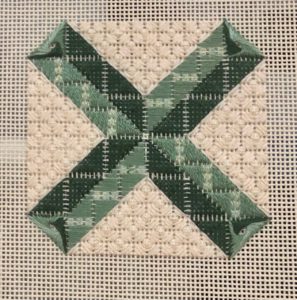
This is where we are so far, after stitching this part in all four areas.

What makes this a Brighton stitch and not reverse scotch is the filling stitch. I used Kreinik #8 5555 Oyster to stitch upright crosses in the spaces between the satin stitches. The metallic I used is very similar in color to the silk I’m using, just adding a little sparkle without high contrast in the areas.
If you want to use a higher contrast, go for it. It will look absolutely fine. You can use a higher contrast metallic or other floss.
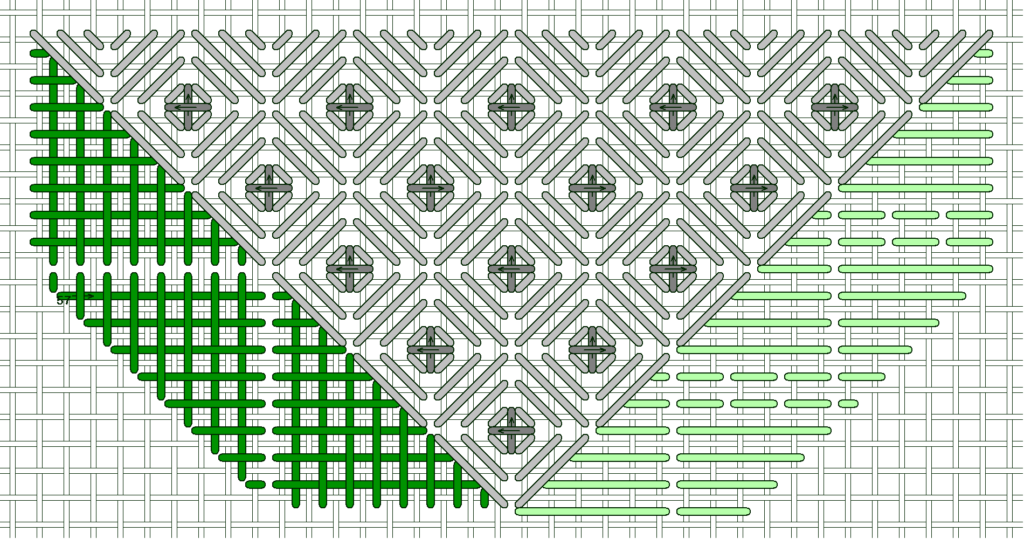
I didn’t put numbers on the ends of the upright cross stitches, but did put arrows. I stitched the top and bottom areas in horizontal rows. When stitching in a row like this, you need to alter the direction of the final stitch so it has proper tension at each end of the stitch. The arrows indicated which way to make the last stitch.
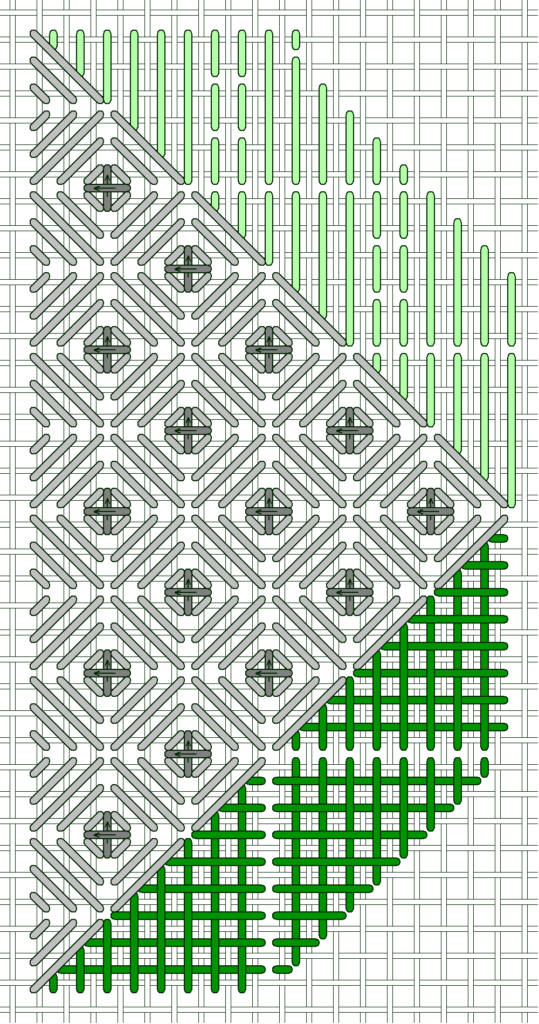
For the left and right areas I stitched in vertical rows. It’s not as important to change the direction of the final stitch, since either way there should be good tension on each end of the stitch.
It is important, especially if you turn the canvas while stitching, to make sure that the final stitch is the horizontal stitch in each direction for the overall look of the project. If you turn the canvas while stitching, you’ll need to make the horizontal stitch first, and the vertical stitch second. If you find this confusing, just stitch this part without turning the canvas.
That’s it for this week – but trust me, it will take a little time to stitch this much with laid satin stitches!