Click here for On Point Wallet stitch along instructions Area H
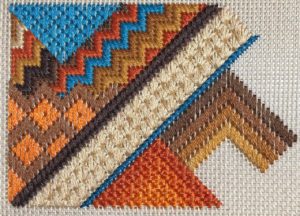
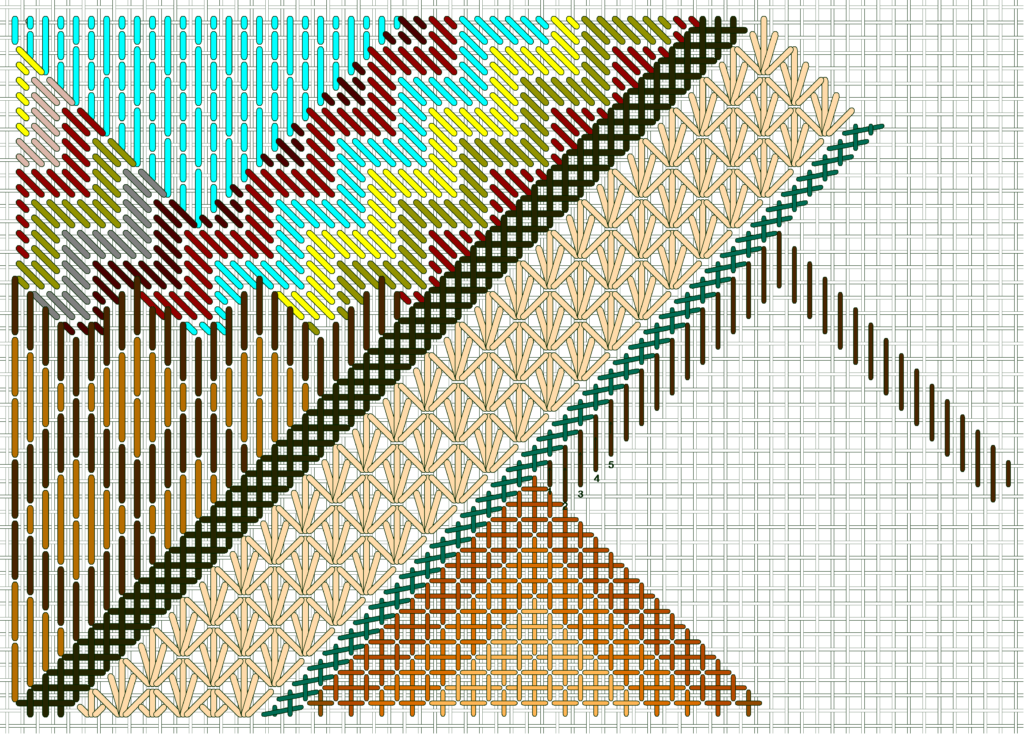
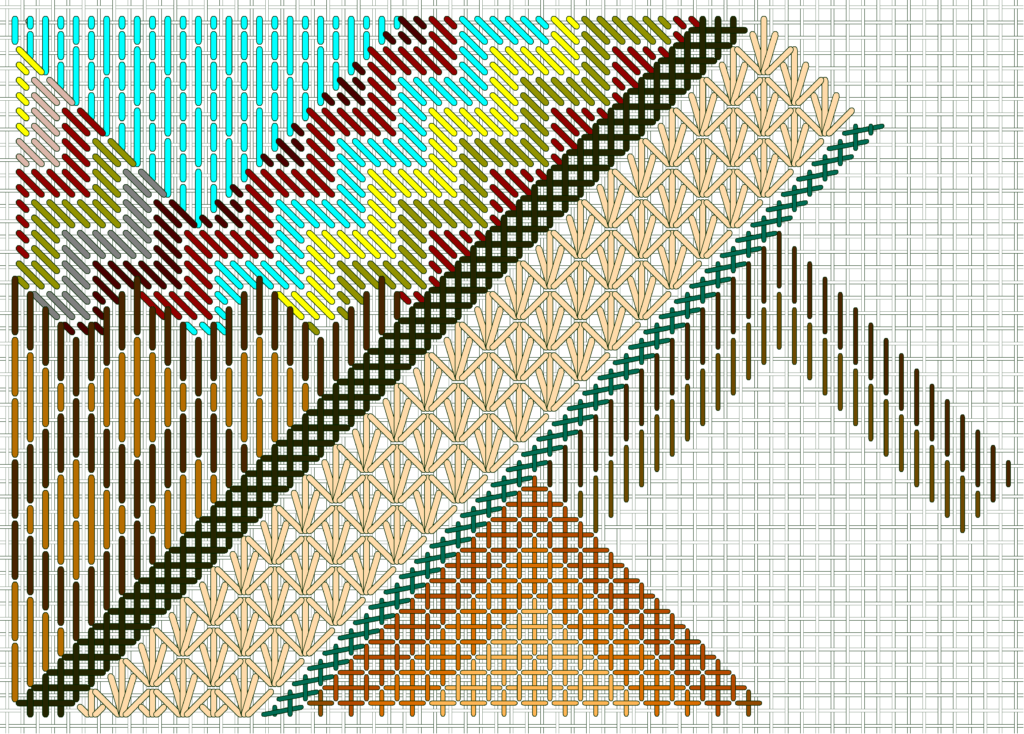
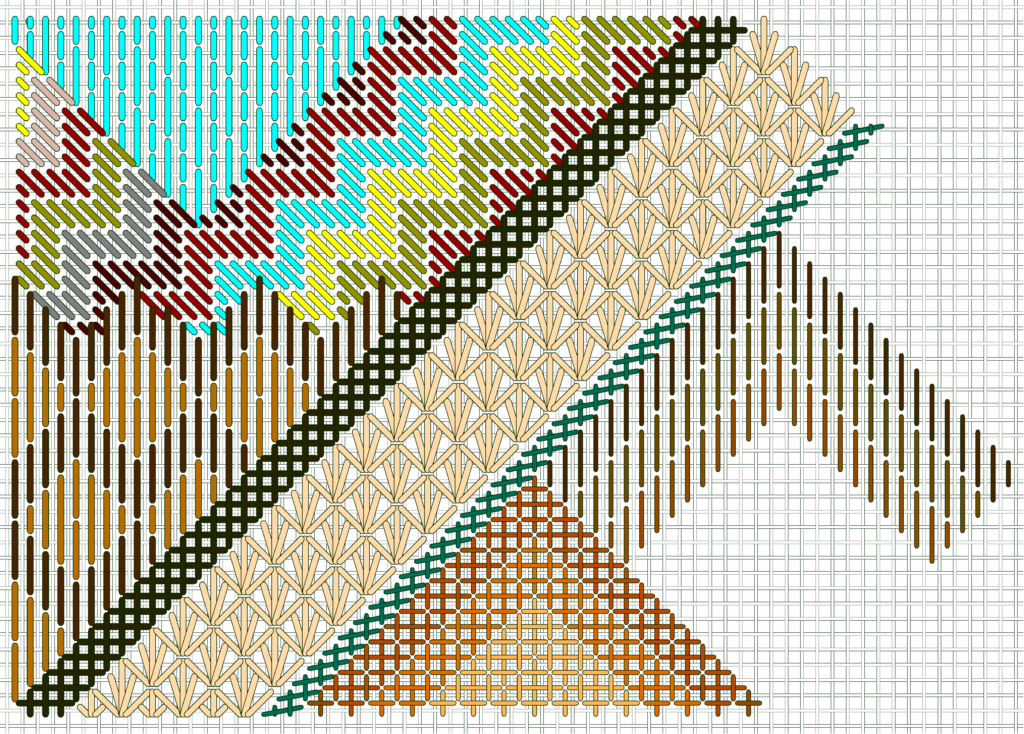
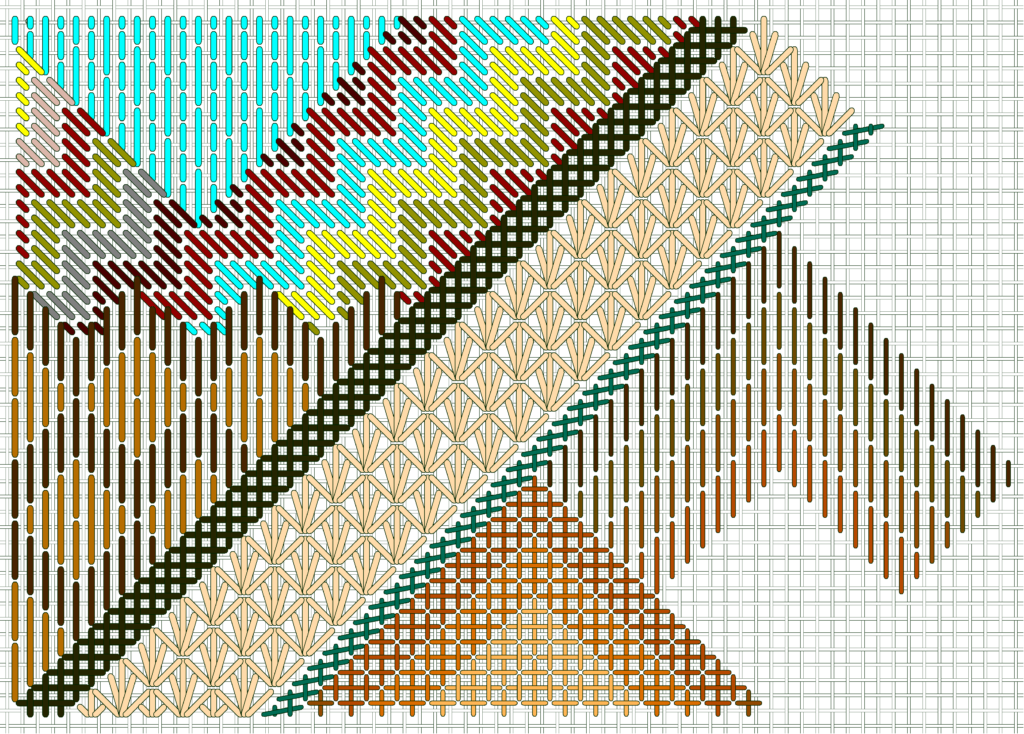
Don’t you love Bargello! It can take several shapes, but here it’s a relatively simple triangle shape, in color gradations from darkest at the top to lightest at the bottom.
Bargello is just straight stitches. Here the straight stitches are over 4 canvas threads (except for the compensated stitches at the edges, which are over 2 canvas threads).
I anchored the threads with loop starts to begin, and weaving through the stitches on the back to end. The instructions specify which colors I used, and I made all of the stitches with 4 strands. I was pretty happy with the coverage, but you may prefer to use more strands.
You may find it takes more strands of floss to provide good coverage for straight stitches; diagonal stitches usually take less for the same coverage. Also, darker colors of floss sometimes seem a bit skimpy. It’s fine to use more strands for darker colors and fewer for lighter colors within the same area if you like. Here I used the same number of strands for all of the colors.
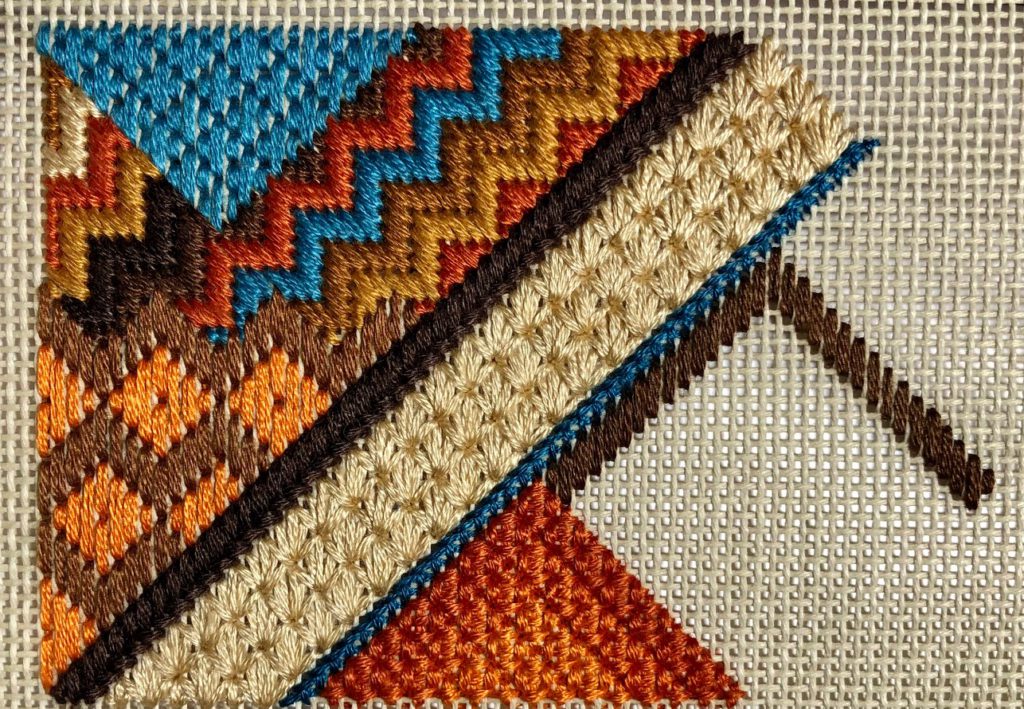
I used the darkest color for the first row. Except for the first two stitches, I brought the needle up in empty holes and down in shared holes, stitching from the bottom to the top. The first two stitches share holes with the upright rice stitches; the remaining stitches come up in empty holes and go down in shared holes along the left edge, but come up in empty holes and go down in empty holes along the right edge.
The next row is stitched just like the first row, except this row is a little shorter. Pay attention to the diagonal edge along the right side!
The next row is shorter still!
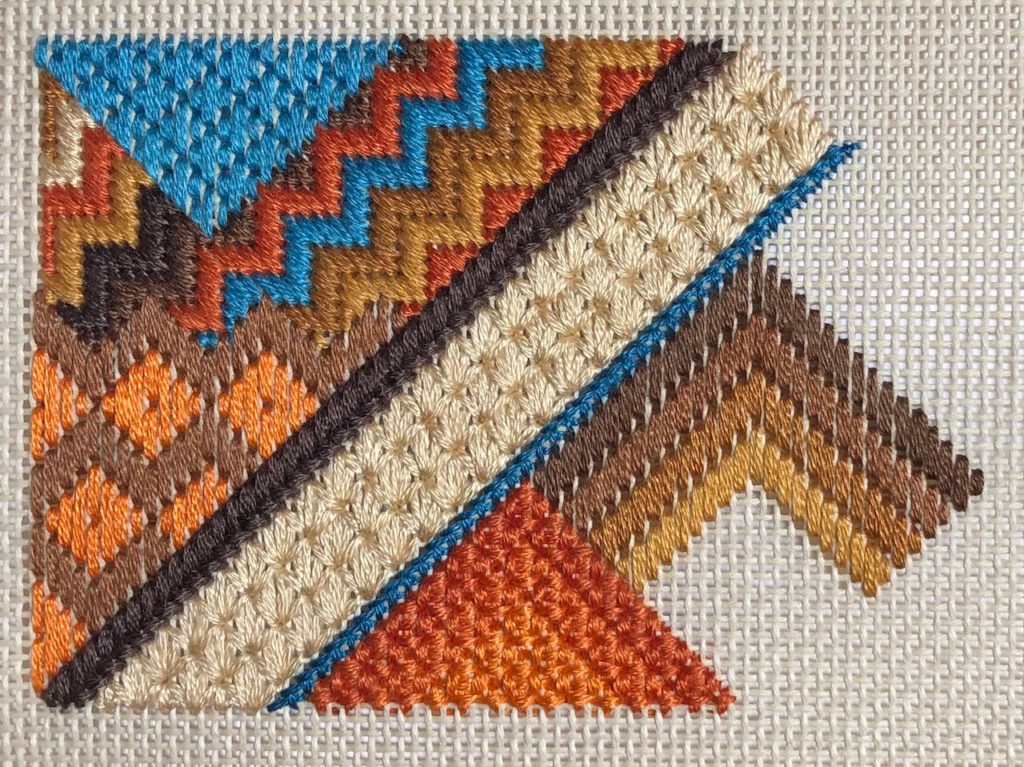
Finish the Bargello area with the lightest shade, and the shortest row.
Next week we’ll do something a little more interesting! But I like Bargello for adding a smooth texture with some color changes to a project.