Click here for Regal Autumn Instructions Part B
I’m having fun with this and hope you are too! For the next part I added really really big sprat’s heads around the center motif.

I like the yellow rayon pearl, makes it shine and kind of looks like a sun motif. Of course, today we aren’t having much sun here in very cold, snowy-sleety western Oklahoma! So having a sunny project to stitch makes it a little brighter.
I used Rainbow Gallery Panache for these sprat’s heads, but you may prefer using pearl cotton. I have stitched sprat’s heads in a wide variety of threads, but for this project I like a round thread; if you decide to substitute I recommend pearl cotton as opposed to a ribbon (like Neon Rays), or multiple strands of floss (but you’ll need to lay them so they are smooth).
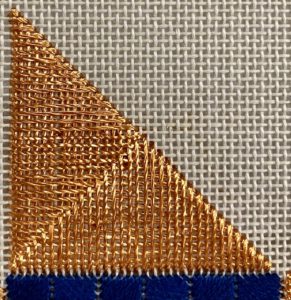
Here’s a close up of the sprat’s head, so you can see the structure of it a little bit better.
I used a very long length of thread so I didn’t have to start or stop as much. These are very long stitches, some covering 2″ on the canvas, so working with shorter lengths mean you’ll need to start and stop a lot. I used pin stitches for starting and stopping because it’s easier for me to work from the front. I made my pin stitches in the shape of a “T” so it would be somewhat flat under the sprat’s head.
I also ended with pin stitches in the shape of “T”. Gently separate the threads on top of the canvas until you can see empty canvas beneath the stitches, make the T stitch, snip off the thread, then gently move the threads back into place.
It will take about 132″ of thread to stitch one sprat’s head, including enough thread for starting and stopping. That’s a lot of thread to manage at one time! If you decide to use shorter lengths, try working with about 72″. As I mentioned, these stitches are extremely long, and if you work with too short a length you’ll find yourself starting and stopping a lot.
Sprat’s heads can be stitched a few different ways, so if you have a way you prefer that will be fine.
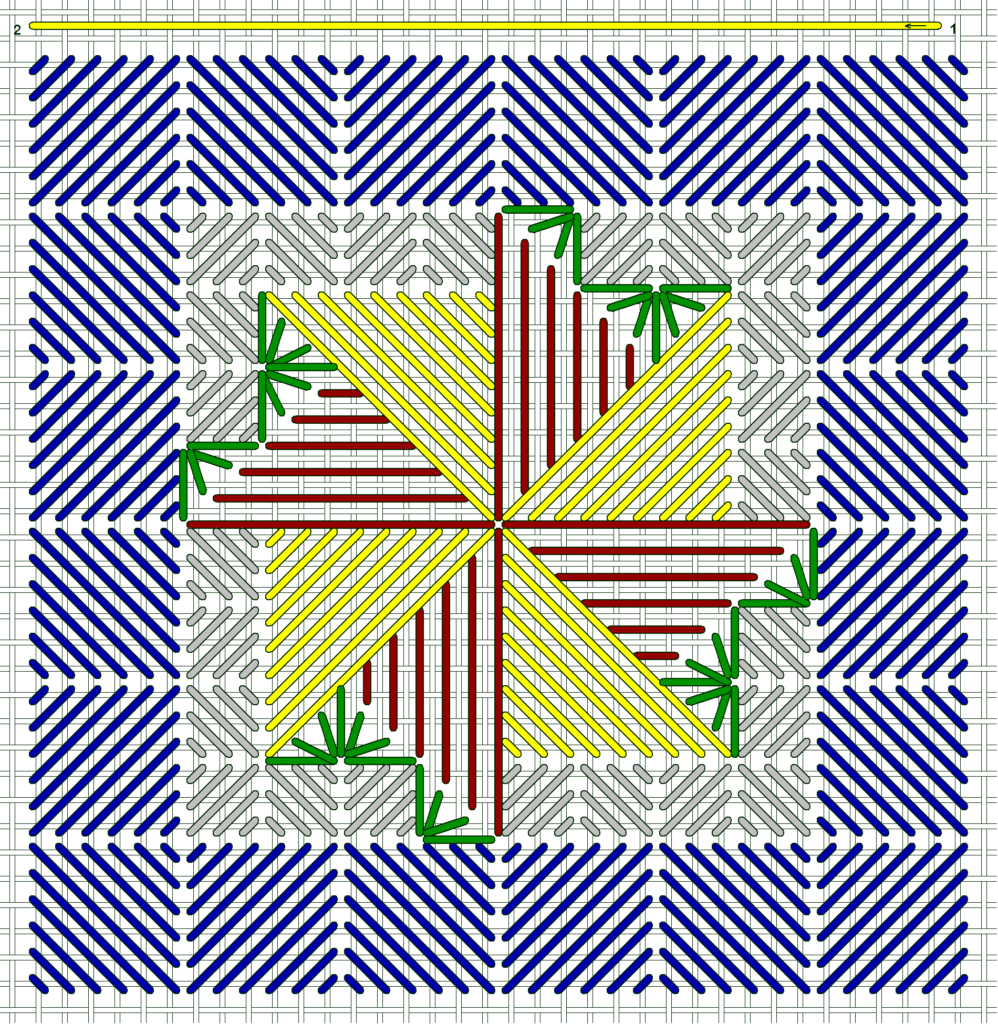
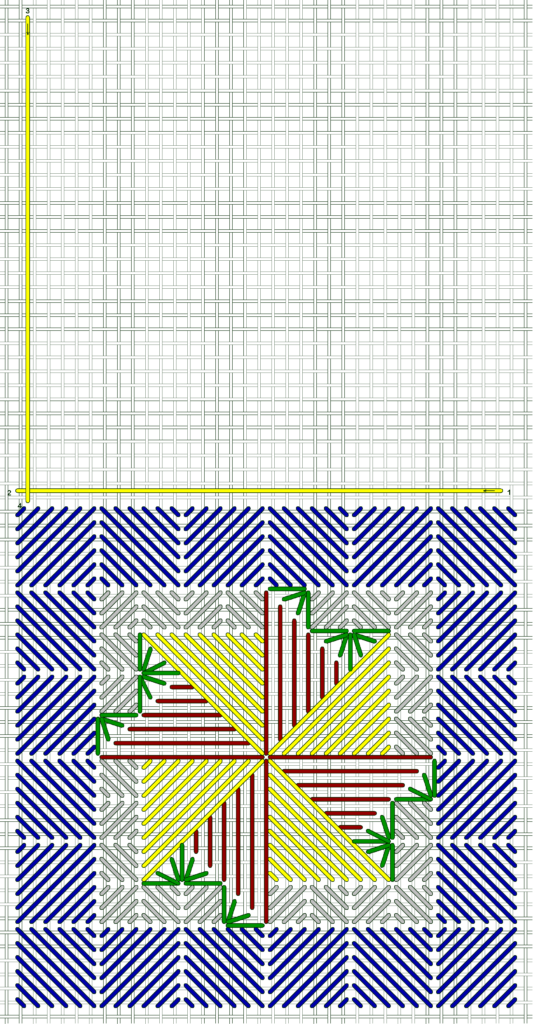
Here are the diagrams for this week’s portion of Regal Autumn:
Begin as shown with the first long stitch.
The second stitch crosses the first stitch as shown. This is the most counting you’ll need to do for this week.
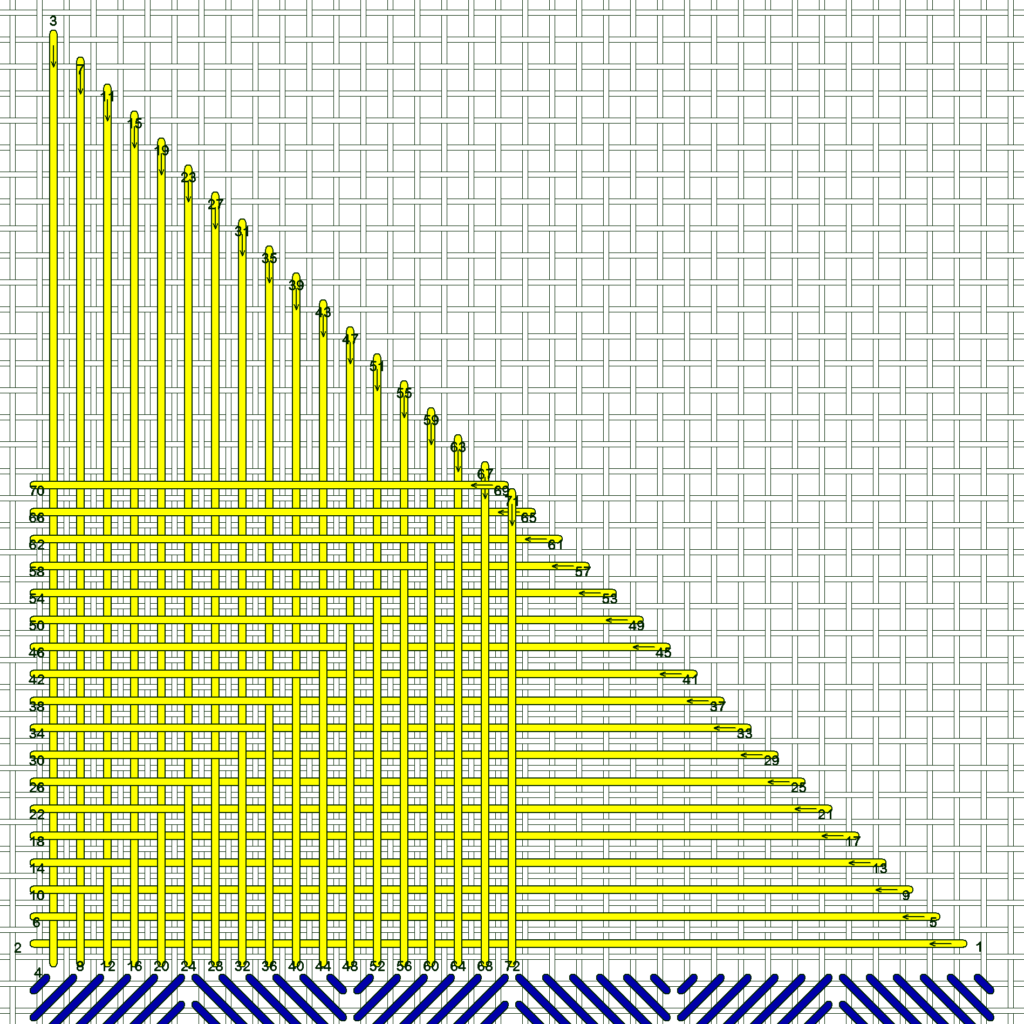
Stitch the stitches of the sprat’s head as shown, alternating sides so you have the crossing in the middle. Check your diagonal line – this is where most people will get off.
You can end the sprat’s head at this point, or continue on as I did.
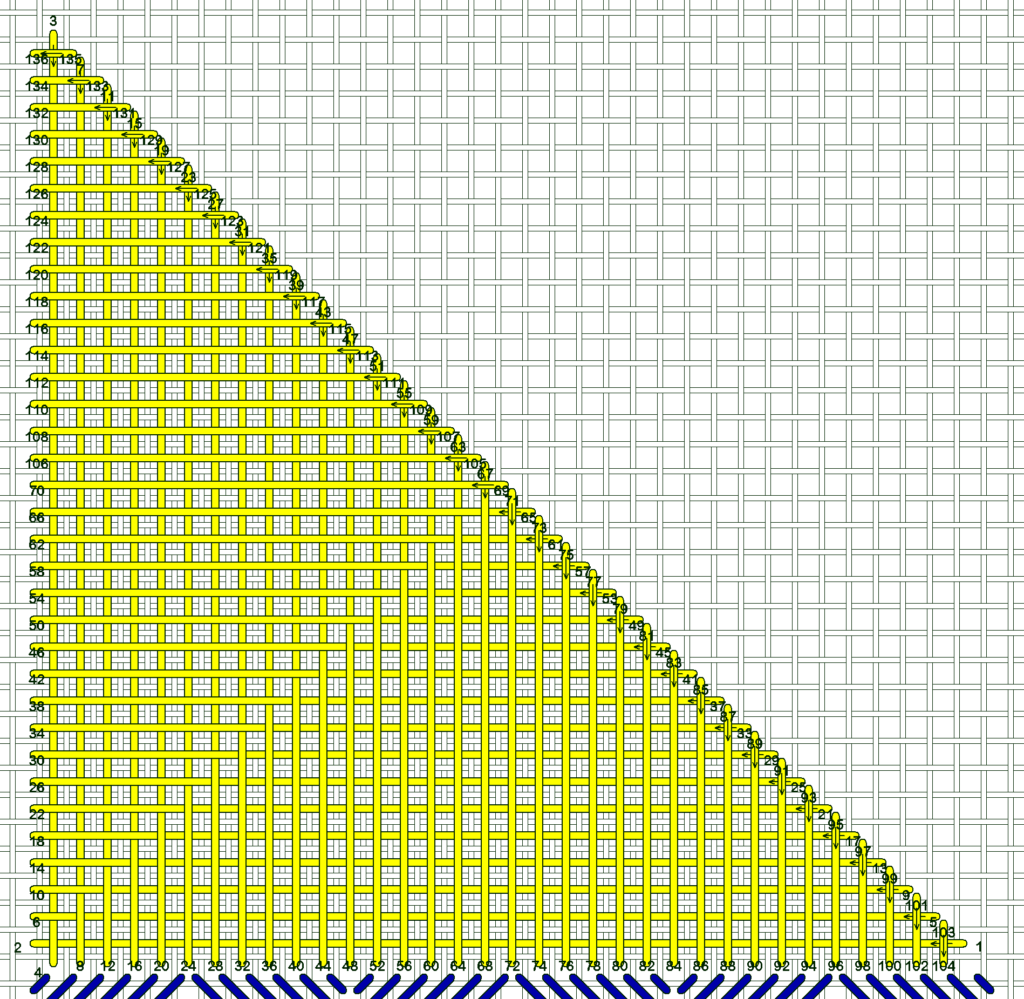
From this point you don’t need to alternate sides, but stitch all of one side then all of the other side.
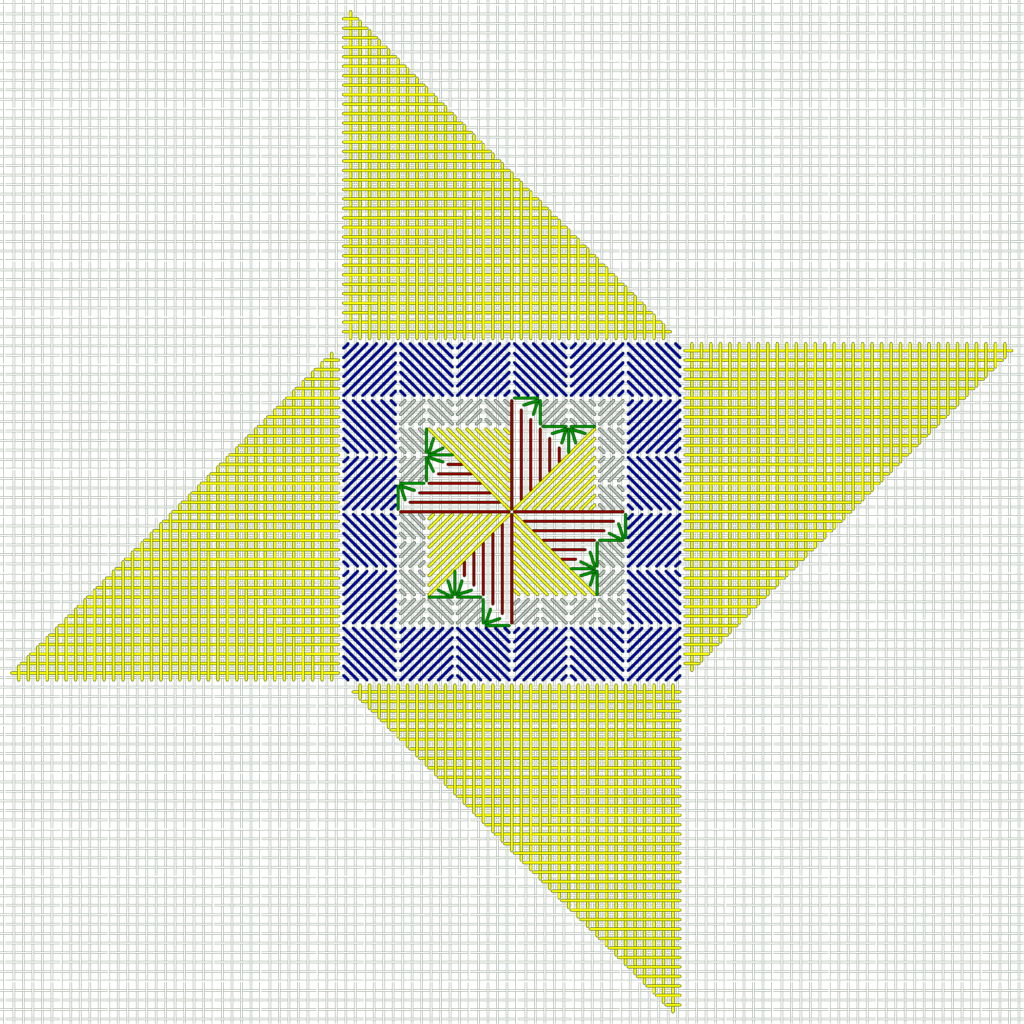
Stitch a sprat’s head on each side of the center motif as shown. They are the same size and shape, just oriented a little differently.
If you find it easier you can turn the canvas so you are always stitching the same way. Just mark the top so you don’t lose the orientation when you turn the canvas back.
That’s it for this week, but that should be enough and you’ll have quite a bit on your canvas when you finish!