One more step and we’re ready to stitch! A well-mounted canvas makes the difference – it’s easier to stitch, and easier to finish, if the canvas is stitched as tightly as you can make it.
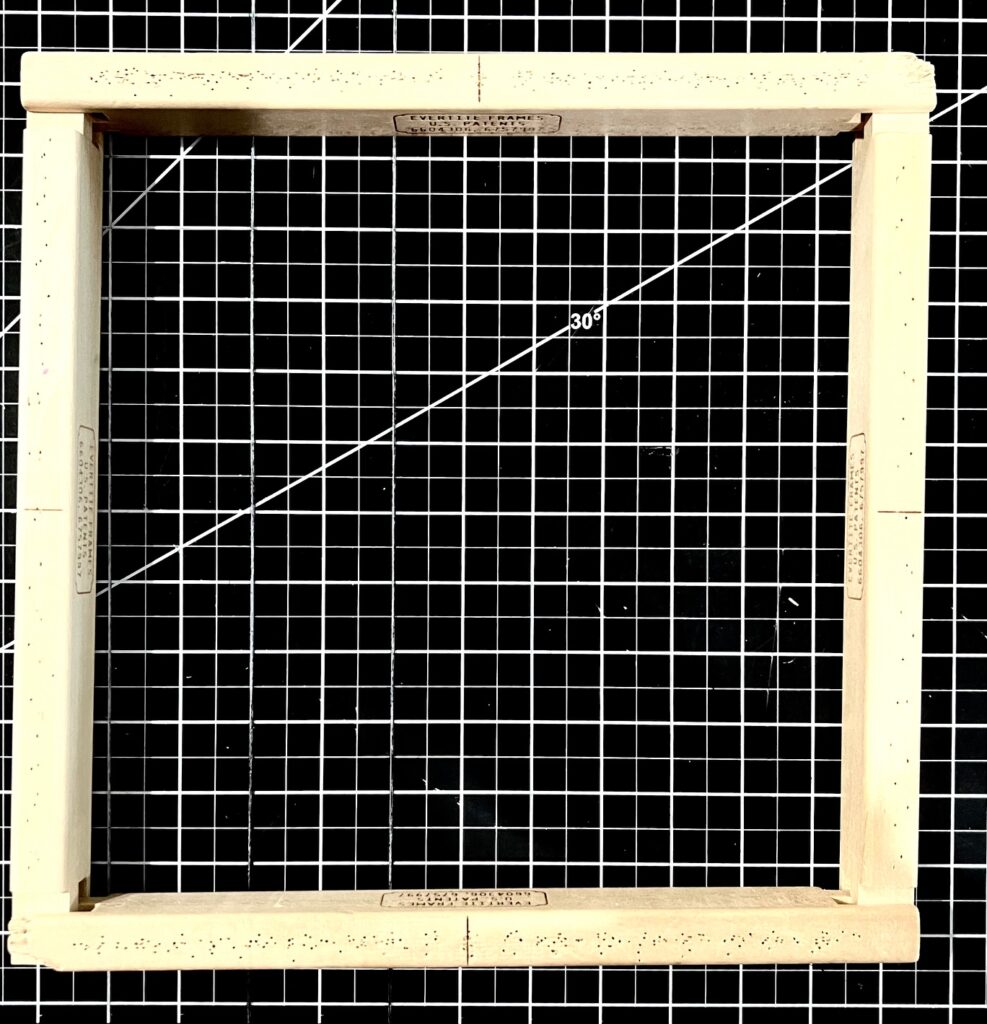
Begin by assembling the stretcher bars into a square. You can see that mine are well-used! I stitch on Evertites, a pricey investment but you can use them over and over.
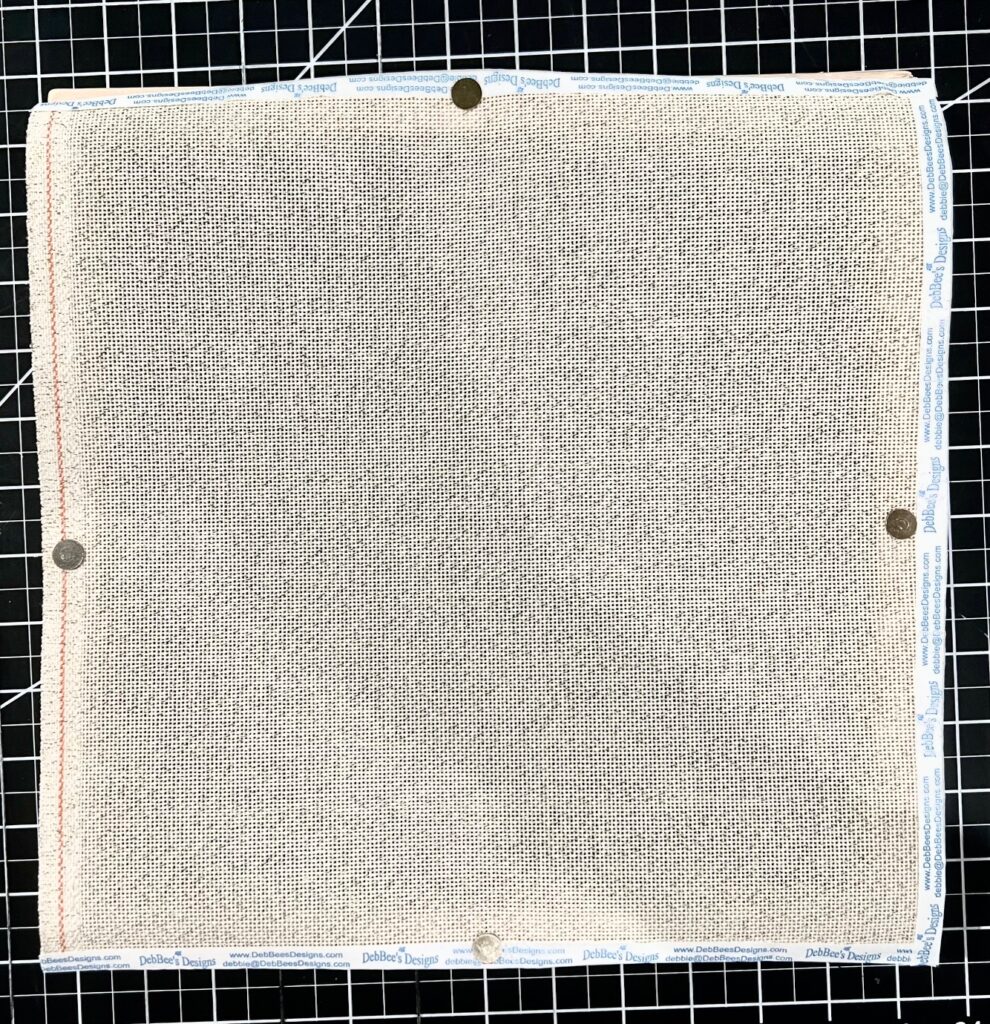
Whether you’re using Evertites or other stretcher bars, begin the same way, by placing the canvas on top of the bars. You can stitch with the canvas under the bars, but you’ll still mount the same way, on top. Place a tack (or staple) in the center of each side.
You’ll notice that I have taped the edges of my canvas, except for the selvedge edge. When I stitch I keep the selvedge on the left to help with the orientation as I stitch.
Taping the edges helps to prevent snags on the raw canvas edge. I use a printed artist’s tape, but you can use regular artist’s tape, painter’s tape or even sew on bias tape. This extra step will make stitching easier!
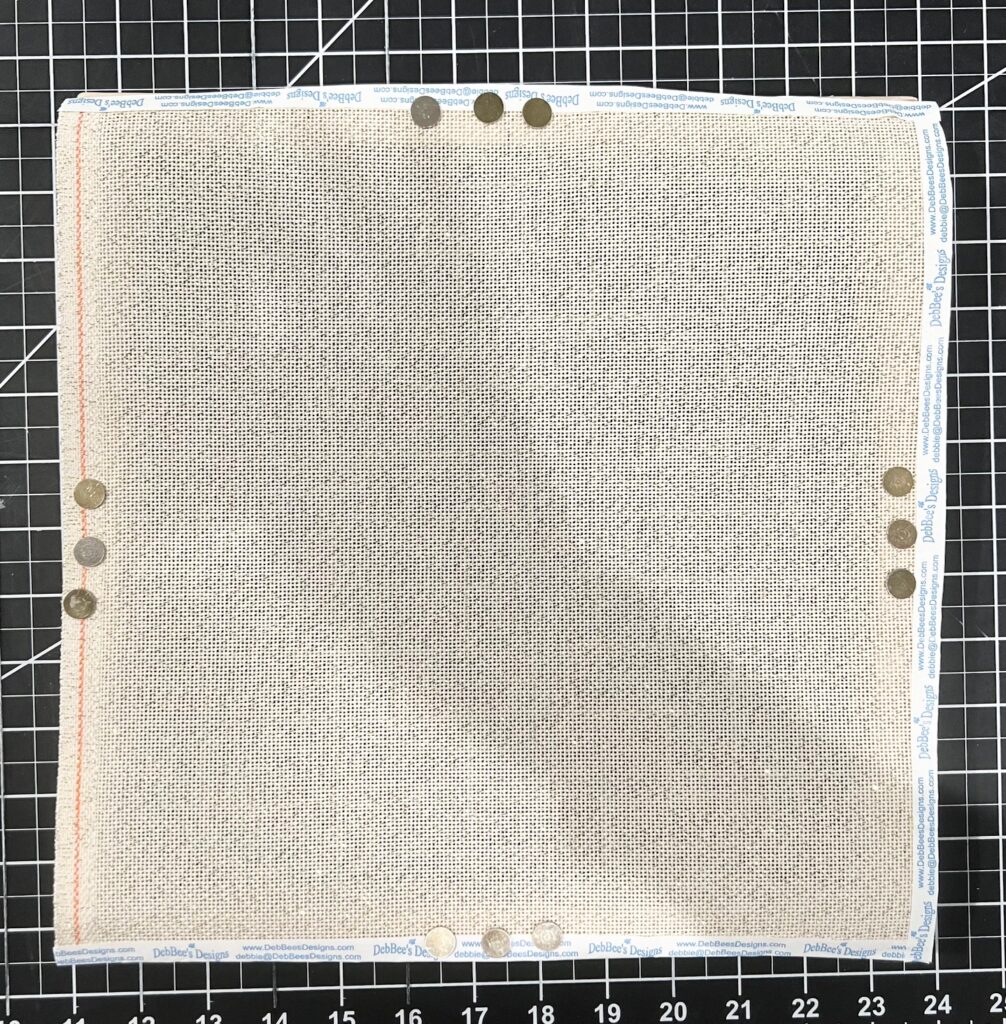
Now place tacks or staples on either side of the center tacks, pulling and stretching the canvas as you work.
It’s tempting to tack all of one side, then all of the next side, but the canvas won’t be tight or straight if you use this method. Instead work out from the center of each side. I place tacks at the top and bottom, then the left and right, and repeat.
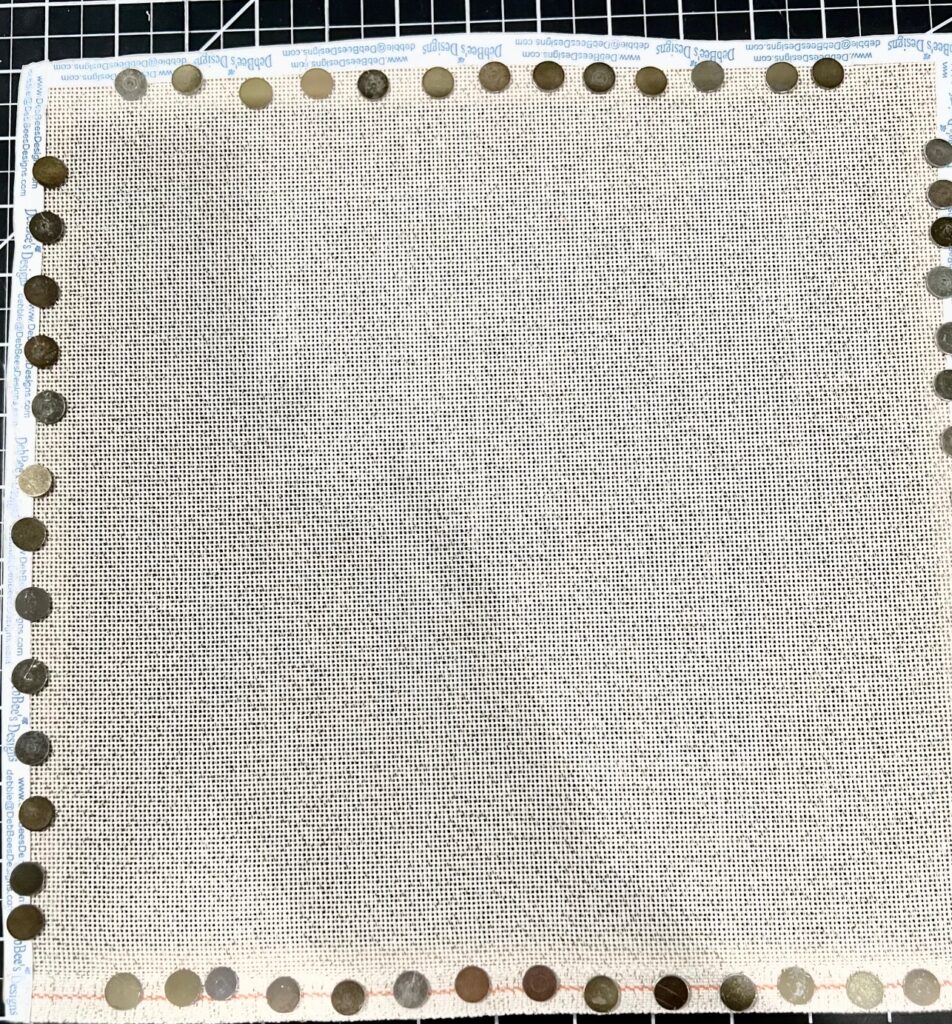
I’ve placed all of the tacks as described above, working top and bottom, then left and right, and repeat, until I have completely tacked the canvas. Always pull as you tack to make the canvas as tight as you can.
See how close together my tacks are? I was told by a canvas finisher to place tacks no more than 1/2′ apart; mine are usually a little closer. This keeps the canvas tight and straight as I stitch, and when I remove it from the bars it lays flat and doesn’t need blocking.
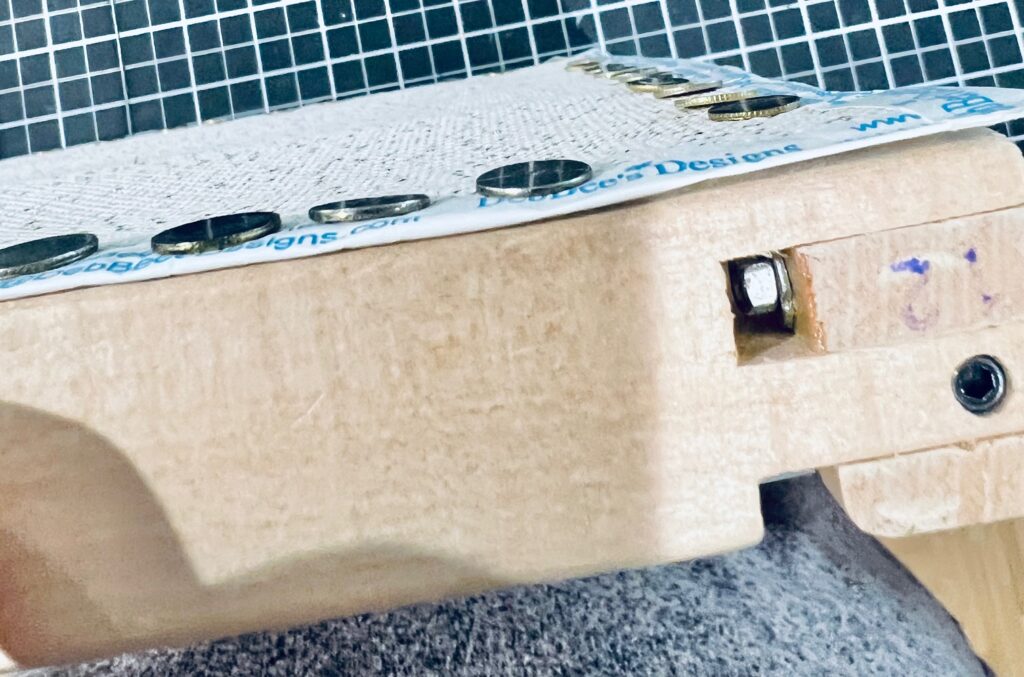
I use Evertites, so I don’t tack at the corners. The corners have to be free to allow the bars to move apart. See the little nut in the hole? That works the magic to make the canvas so tight!
With a hex tool I turn the recessed screw until the little bolt is extended to push the bars apart, making the canvas very tight. And it holds the tightness the whole time I’m stitching.

This is the result of tacking and stretching the canvas – I’m now ready to stitch.
If you don’t have Evertites, you’ll need to tack the corners. But, if you want you take a small hammer and gently tap the inside of the bars to move them apart to tighten the canvas. I’ve tried this and it works, but you have to be very careful not to explode the tacks off the canvas. Tap gently and slowly to move the bars a little apart.
Now I’m ready to stitch – my canvas is mounted, and my threads are all pulled and in the project bag. Next up – first stitches!