Click here for instructions for Areas E and F
Area E – Hungarian Stitches
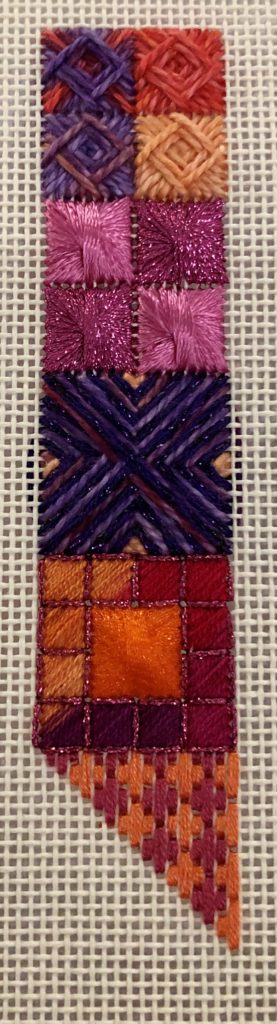
The first area today is a small area, right at the bottom of last week’s area, of hungarian stitches in a harlequin pattern – did you figure we’d get to the harlequin eventually?
I had fun stitching this little area, using two colors of bamboo floss. I believe I mentioned last week how much I enjoy stitching with bamboo floss so I won’t repeat that today. But I will encourage you to get some to try if you haven’t already – it’s a pure delight both in feel as you stitch, and in final results.
Hungarian stitches lend themselves to a harlequin pattern quite readily, since the stitch itself forms a diamond shape. If you aren’t familiar with this pattern, it’s a short stitch, a long stitch, a short stitch, then a skip – short, long, short, skip. The “skip” is for the long stitch of the row below.
If you look closely at the stitches, you’ll see that the long stitches are in vertical rows, and the short stitches are in vertical rows. This characteristic of Hungarian stitch makes it easier to compensate around other areas, by paying attention to where the short and long stitches are in vertical rows.
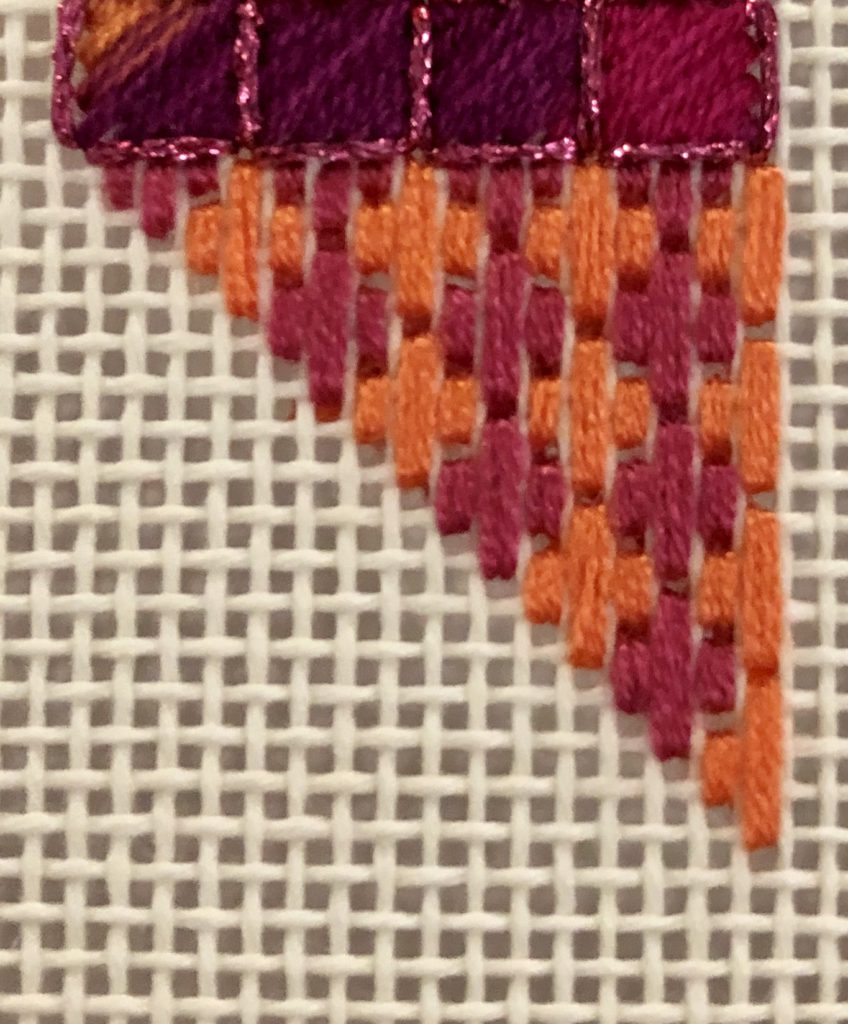
This picture shows the Hungarian stitches a little bit closer. You can see where the stitches share holes with the outlining stitches in the area above. Also, the first row is a compensated row, and the right edge is also compensated. Compensation is just a little alteration to the pattern to complete an area. On the right edge, the last short stitch is eliminated. At the upper edge, the stitches are not as long as for the regular pattern.
All of it together makes a very pleasing pattern, especially when stitched in two colors as here. Stitched in one color it adds texture with less emphasis on pattern; you can still see the diamond pattern, but it’s more subtle, which makes it a wonderful background for a more visually interesting main subject.
Area F – Pavilion Diamonds
Right beside the Hungarian stitches is an area of pavilion diamonds, also in a harlequin patttern.
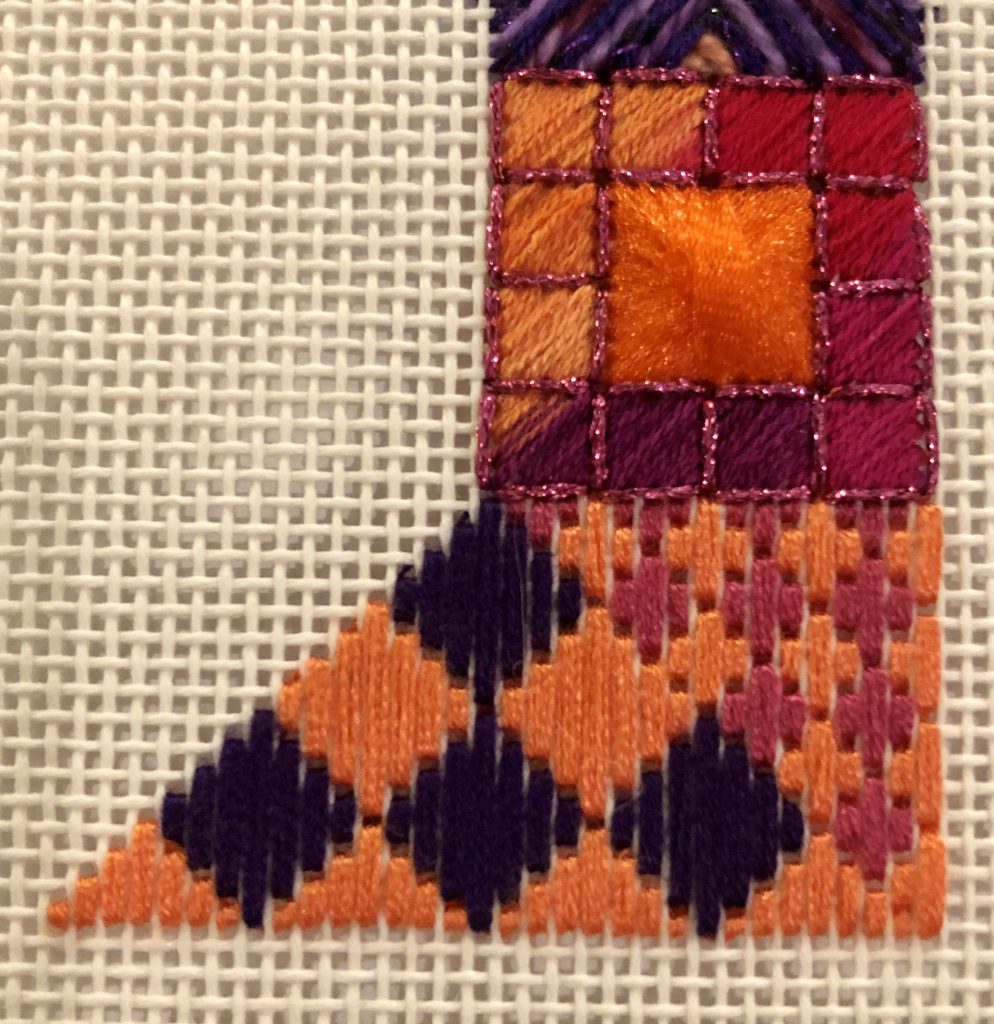
I opted for more color contrast here. The Hungarian stitches are not as high contrast, with the orange and fuchsia, but the pavilion diamonds are, with the dark purple and orange. The shape is larger diamonds than the Hungarian stitches, but very pleasing next to the smaller diamonds.
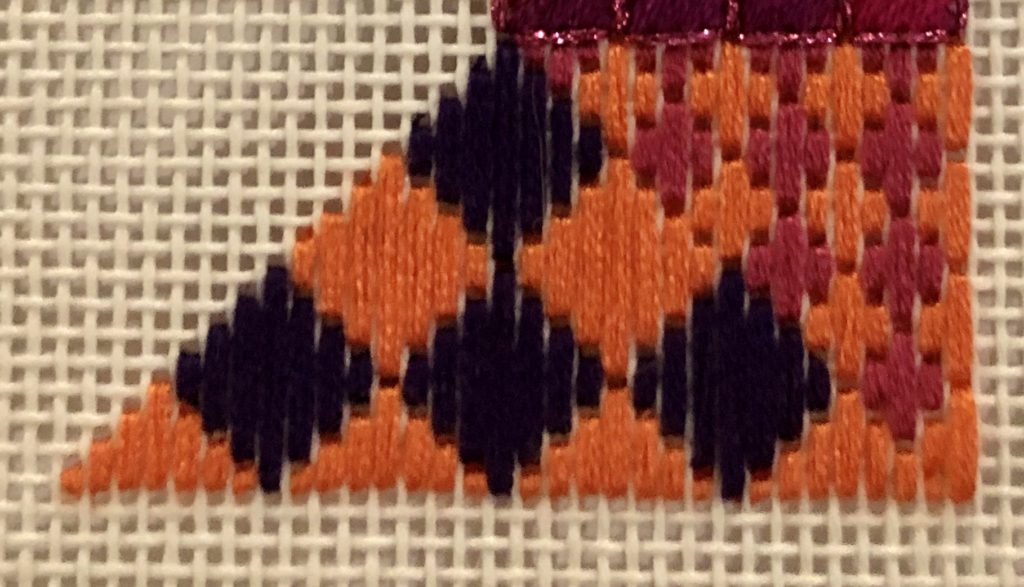
Here’s a little closer view of the pavilion diamonds. You can see where the pavilion diamonds share holes with the Hungarian stitches.
I used 4 strands of floss for both the pavilion diamonds and the Hungarian stitches.
It shouldn’t take very long to stitch these small areas, so you can look forward to next week’s installation!
Diagrams for Areas E and F
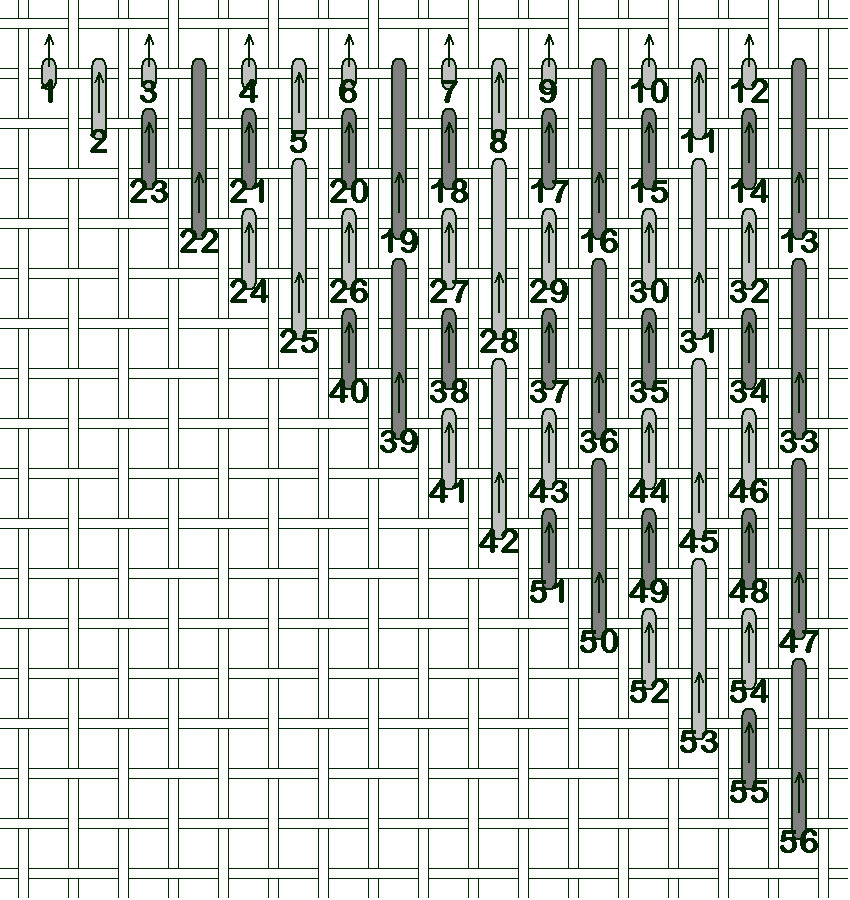
This diagram shows the Hungarian stitches. The lighter color lines indicate one color of floss, and the darker color lines indicate the other color. The areas show the stitch direction, to come up in an empty hole and go down in a shared hole. I worked in horizontal rows: I stitched the first color row, parked the needle, stitched the next color row, parked the needle, stitched the first color, and so on until the area was finished.
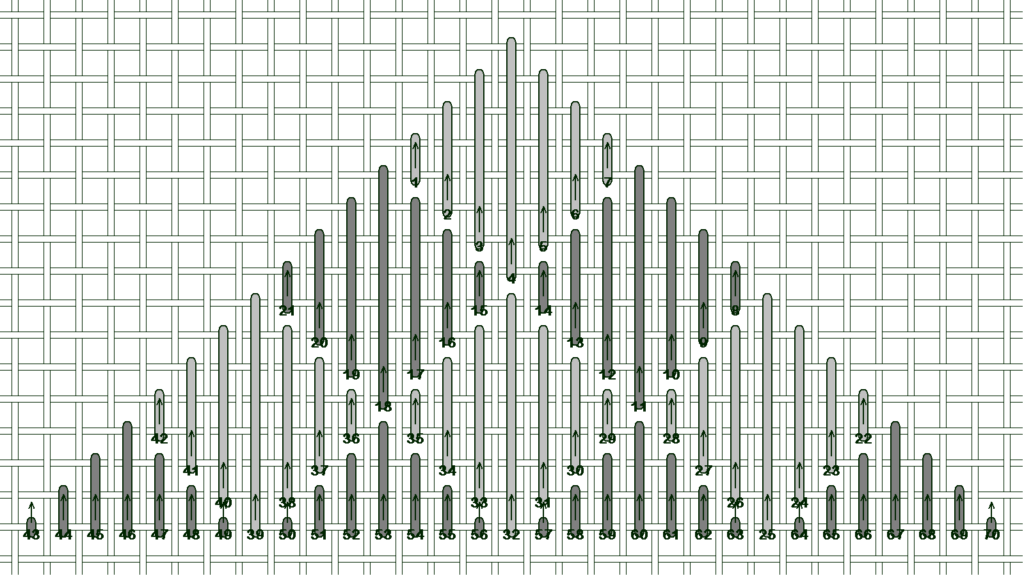
This diagram shows the pavilion diamonds area. I stitched this area also in horizontal rows, first one color, then the next color. I stitched the lighter gray lines with the dark purple and the darker gray lines with the orange. Again, come up in the empty holes and down in shared holes.
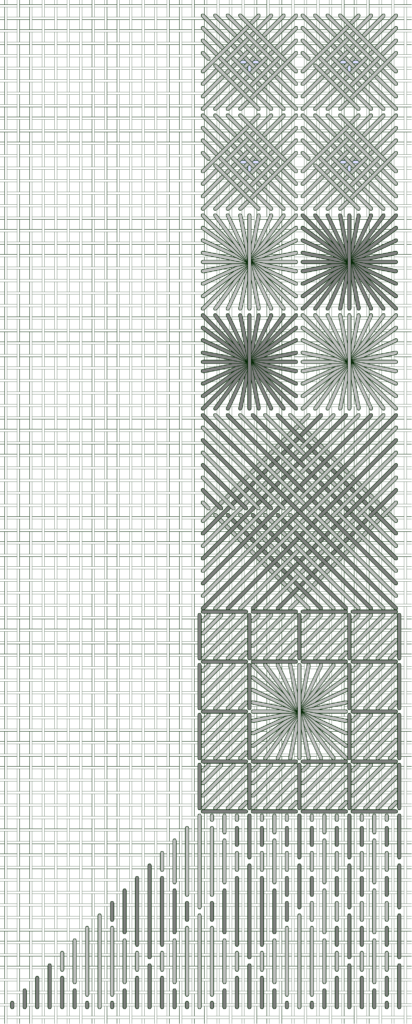
This diagram shows the placement of the Hungarian stitches in Area E and the pavilion diamond stitches in Area F. The entire diagram is what we’ve done so far with Harlequin Dance Redux.
Next week we’ll continue across the bottom edge of the design. I haven’t quite decided on the exact stitches or colors yet, but I’ll let you know next week what I’ve decided!
4 thoughts on “Stitch Along Monday – continuing with Harlequin Dance Redux”
Did I miss something? Is there a PDF instruction for part A of this project?
Thanks!
Hi Tara, I started this project a few weeks ago, and there’s a part of it every Monday starting June 17. One part per week until this week, when I did two areas since they were small and similar. You’ll find a pdf for each part along with pictures and diagrams. Thanks! Debbie
I’m having the same problem. I can’t find the link for the pdf file for part A on June 17th. All the other “Stitch Along Monday” for this project have links to pdf files that work just fine. So right now my downloads staet with page 3 and end with page 17.
Hi Hanna, thanks so much for bringing this to my attention so I could fix it. I checked, the instructions weren’t there, so I’ve added them. I apologize for the inconvenience and will try to do better going forward! Debbie