It’s time to finish the Spring Quilt Block with the last border, a waffle stitch around the entire thing.
Click here for Spring Quilt Block F instructions as a pdf
I’ve had fun with this little project and saved my favorite stitch for last, the waffle stitch. I especially like how the waffle stitches look with the subtle variations in the Gumnut Buds threads, just slight color changes that give it some visual interest.
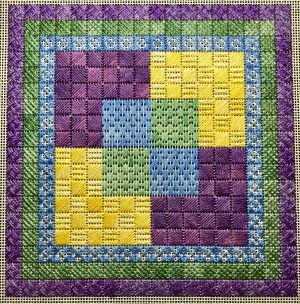
I used pin stitches to begin and end every thread, hiding them under the waffle stitches. Waffle stitches don’t have much thread on the back which makes it difficult to anchor starts and stops, so a pin stitch is perfect for these. As I was stitching around I anchored in the empty canvas next to where I’d be stitching, easy peasy. The difficulty is ending the very last thread under the last waffle stitch. When I need to end under existing stitches, I just move the stitched threads aside a tiny bit until I can see a canvas thread, then I make my pin stitch, clip the thread, and move the stitched threads back in place.
Here’s the diagram for the waffle stitch:
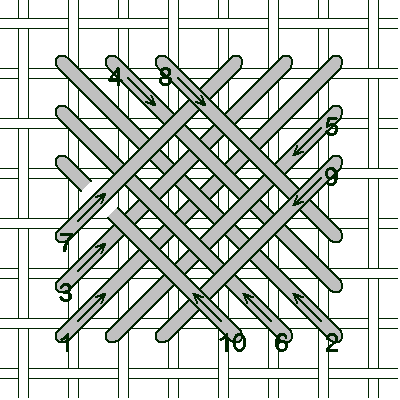
See how the very last stitch slides under the first stitch of the last round? That’s to put a thread on top of every thread all the way around, which gives the waffle stitch a more complete and finished look, not lopsided.
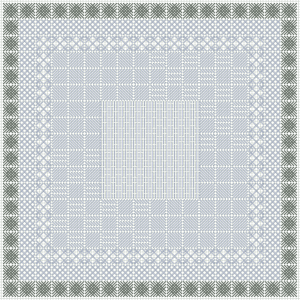
Here’s the final placement diagram:
I hope you’ve enjoyed this project. Before starting the next stitch along, I have some other things to discuss on the blog, but we’ll start the next one soon!
Click here for the completed Spring Quilt Block instructions