Click here for Harlequin Dance Redux Area G instructions
Fun stitching today with some really bright colors! Today’s area is another harlequin pattern, but this time with different textures instead of different colors.
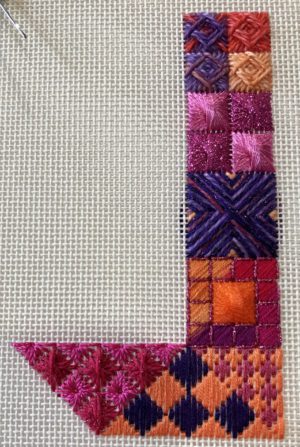
I love the bright fuchsia colors next to the orange and purple area. And I used a different thread this time as well.
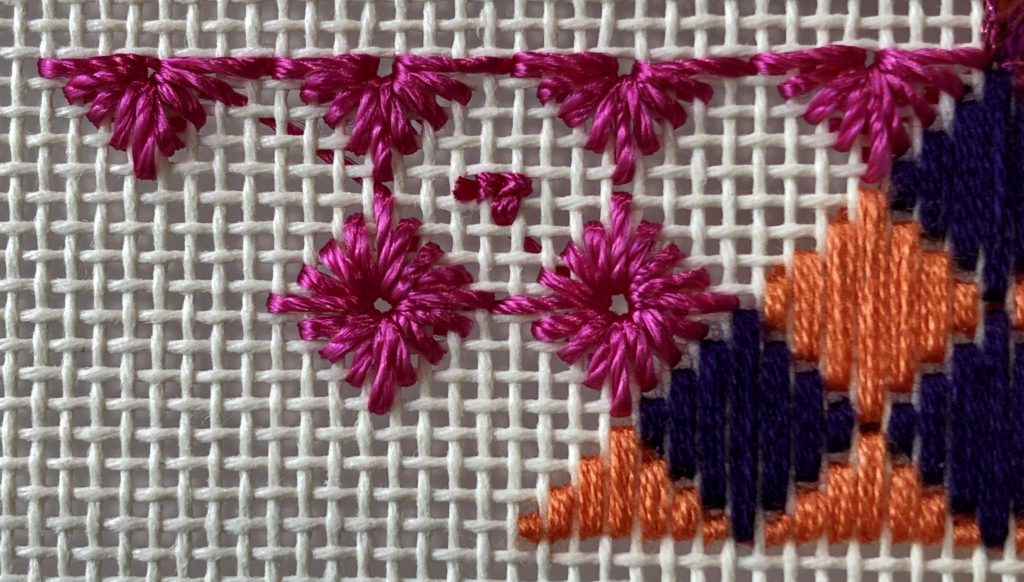
I started this area with half-eyelets and eyelets, stitched with Rainbow Gallery Panache. I know, I know – another rayon thread. But I really love the way it looks, shiny without being metallic. So I use rayons whenever and wherever I can.
The half-eyelets are fairly straight forward. But when you are ready to stitch the full eyelets, you need to alter the stitch order so the carry thread doesn’t go past the hole on the back.
When stitching eyelets, you can either slightly enlarge the hole before stitching, or pull the hole as you stitch. I did a little of both. Before stitching, I took my needle and “wallowed” it around in the central hole a little. I wanted to have a good target for the stitches. I wanted the threads in the stitch to lay evenly around the hole without bunching up on each other, and a slightly larger hole helps with that. Another way to open the hole is to pull a little as you bring the needle up for a stitch. If you pull as you take the needle down, you’ll open holes along the outside edges, which is not desirable. Also, when you pull, hold an even tension, and pull across the canvas, not up and down.
In the picture you can see my pin stitch that I used to end off the thread. I hid the pin stitch to start under one of the first eyelets. The open areas will be covered by the next stitches, so it was fine to put the ending pin stitch there instead of trying to bury it under the existing stitches.
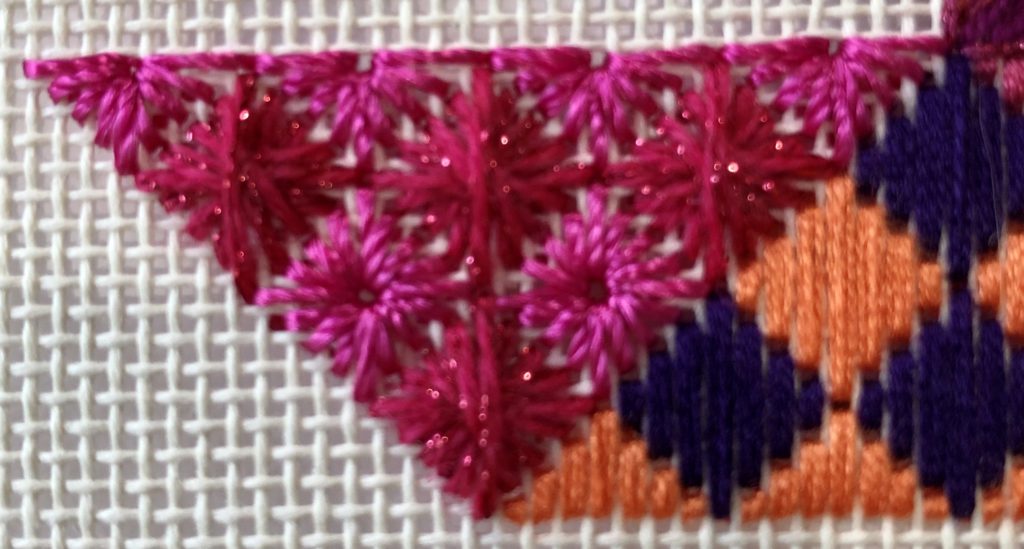
Then I filled the open areas with diamond Rhodes stitches. Rhodes stitches are a great go to stitch, in lots of sizes and shapes, and a nice contrast to the flatness of the eyelets.
And, I used a new thread, well, new to me. Rainbow Gallery’s Glisten, a very nice braided wool and metallic similar to Silk Lame’ Braid or Entice. Fun to stitch with! And I love the color. Lots of fun, wonderful contrast of textures and stitches, and a nice addition to the effect.
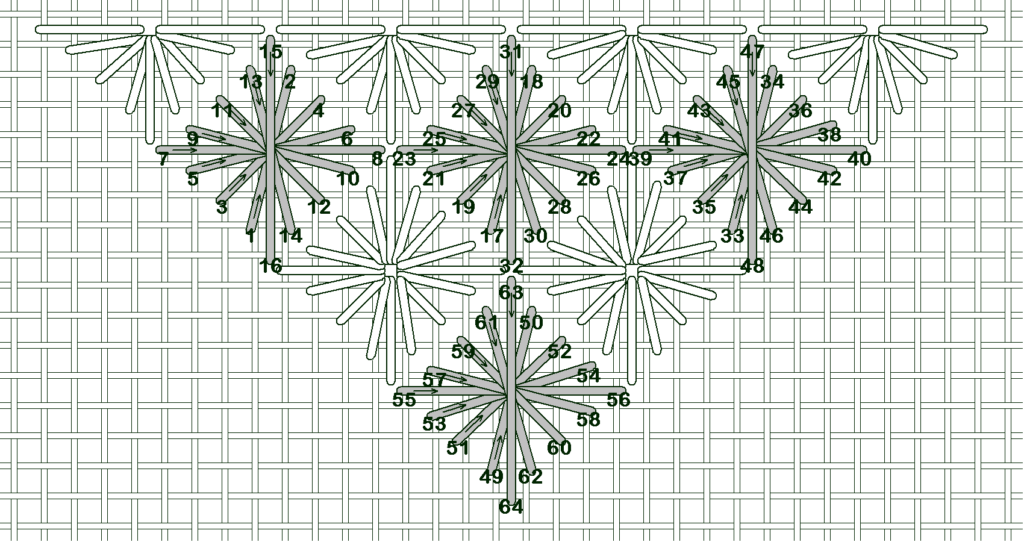
Now for the diagrams for today.
I began with the half-eyelet row, then stitched the full eyelets. I confess I stitched it in a different order – I started close to the existing stitches, rather than away. Either way will be fine.

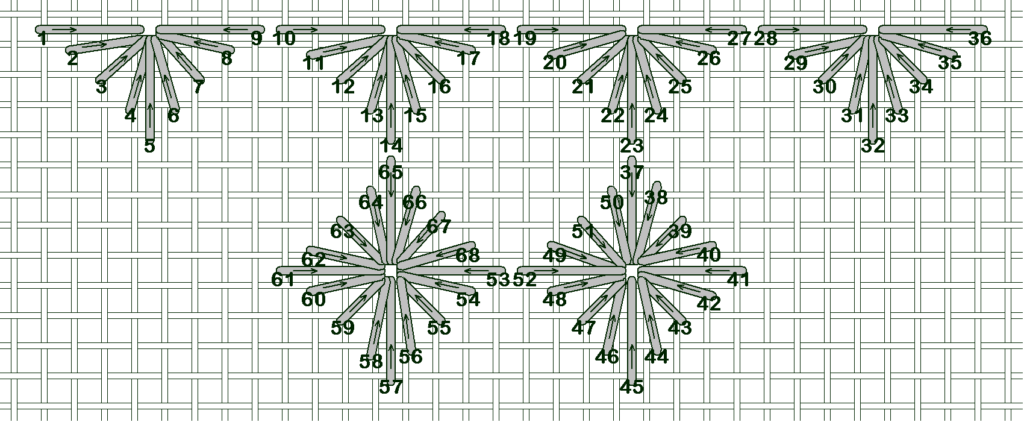
Pay attention to the stitching order. This is deliberate to put even tension on every stitch around the eyelet, and prevent the carry thread showing through from the back. When you stitch the first eyelet, you basically don’t stitch the last quadrant, but skip every other stitch then come back and fill in. This puts in position to stitch the next eyelet with equal tension on the stitches. You can end off with a pin stitch in the open area.
Next I stitched the diamond Rhodes. I stitch them so the final stitch is the long vertical stitch, rather than an oblique stitch.
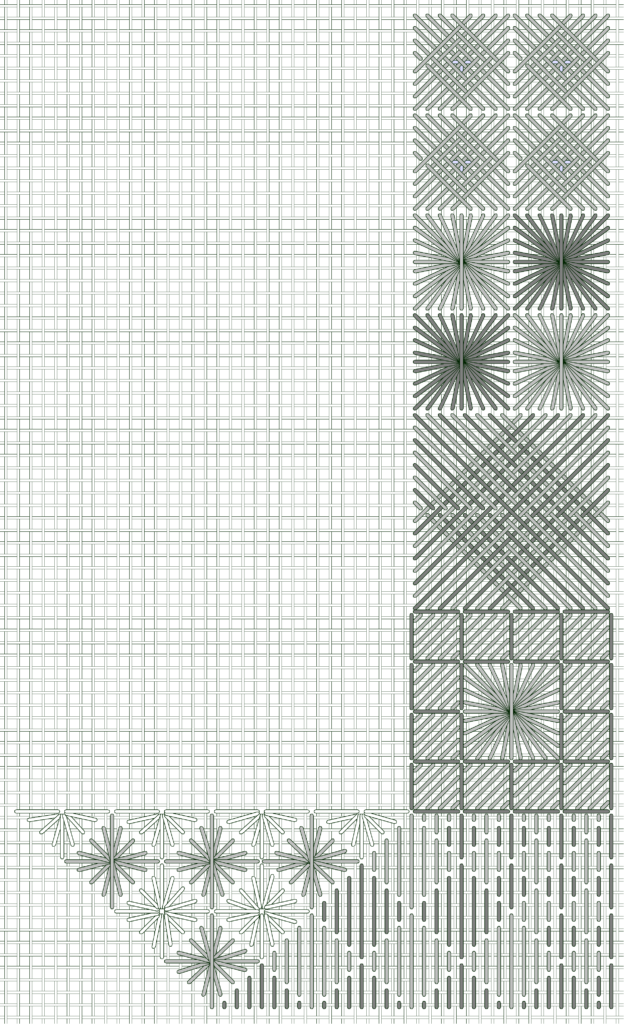
This shows the placement for this area. Area G shares holes along the right edge with the left edge of the pavilion diamonds.
Enjoy – let me know if you have any questions about this or other areas.
2 thoughts on “Eye-popping colors! Harlequin Dance Redux – Monday stitch along”
Debbie, Thank you for the Harlequin Dance Redux blog. You have rekindled my interest in needlepoint. I also love your new website and the fact that you will be teaching online classes. Watched you on Fibertalk, a lot of fun and learning going on. Quick question: What size canvas should I use fot the Harlequiin Dance Redux…10″, 11″. Thank you again for you generous sharing. Colleen Weiss, Ann Arbor, MI.
Hi Colleen, thanks so much! I hope you enjoy stitching again. Harlequin Dance Redux is a small project, so I’m stitching it on a 10″ x 10″ canvas, with 10″ stretcher bars. I allow 3″ on each side of the design; the actual design is 4″ x 4″. You can use smaller or larger canvas as you please, but I recommend 10″ x 10″ canvas as a general rule. Thanks again, Debbie