Click here for On Point Wallet Design Instructions L
The next part of our stitch along is a narrow border of crow’s foot stitches. It took me a bit to figure out exactly the best way to stitch this, but I think I’ve got it!
The crow’s feet are all the same, but alternate direction. This made it tricky to stitch, but I hope I explain it well enough that you don’t have any trouble with it.
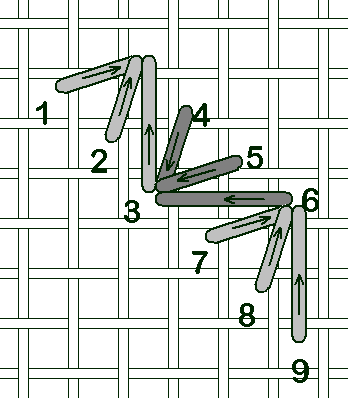
In this diagram, I’m showing the stitch in different colors to emphasize the directions to make the stitches as you work this band. The long straight stitch that ends one crow’s foot becomes the first stitch of the next crow’s foot.
It’s easier to stitch this if the stitches end in a shared hole. Don’t pull the hole open to make it an eyelet. You don’t want holes along the edges of the band. But since it’s only 2 strands of floss, the holes shouldn’t be too crowded.
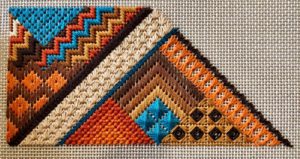
This diagram shows the entire placement of the crow’s foot band. It shouldn’t take too long to stitch, and I think is a nice counterpart to some of the larger stitches.

That’s all for this installment, more next week!