Click here for Regal Autumn Instructions Part C
I hope you’re ready for the next steps in Regal Autumn. This week we’re adding pavilion diamonds, a satin stitch pattern, to the giant sprat’s heads.
I used 4 strands of floss, and anchored with a loop start. If you need help with loop starts, you can refer to my videos in Square 1, or read the instructions. A loop start is a great way to anchor multiple strands of thread, so long as it’s an even number (2, 4, 6, etc.). Done properly it’s virtually invisible and quite secure, as you’d know if you ever had to “unstitch” a loop start. A loop start works best when made over a single canvas thread, then covered with the stitches in the pattern.
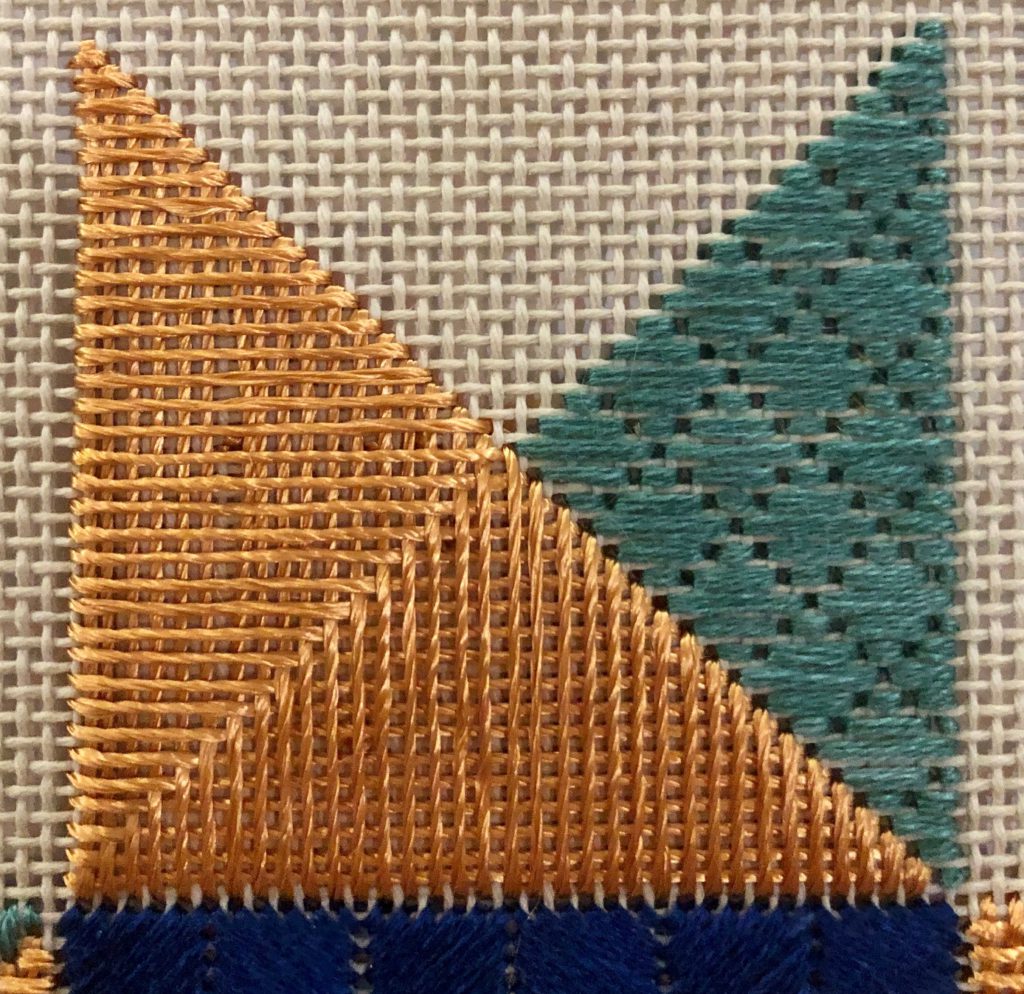
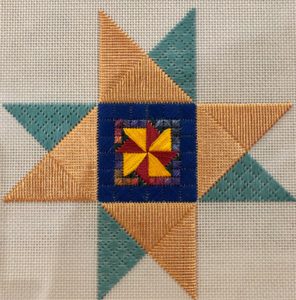
Here’s a close up view of the pavilion diamonds pattern, shown beside the giant sprat’s head for context. The pavilion diamonds are right beside the giant sprat’s heads, sharing holes.
As you stitch the pavilion diamonds you can either stitch them without turning the canvas, or turn the canvas as you stitch so you’re always stitching the same orientation (just be sure you mark the top of the canvas so you’ll know which way is up).
I used a medium green rather than a richer green, because I didn’t want to pull too much focus from the giant sprat’s heads and the center motif. You may use a darker emerald green if you prefer, or whatever colors you’re using if you’ve changed the palette.
Here are the diagrams for today, just one stitch pattern, but it may take a little bit to stitch and lay the threads so it’s enough for the week.
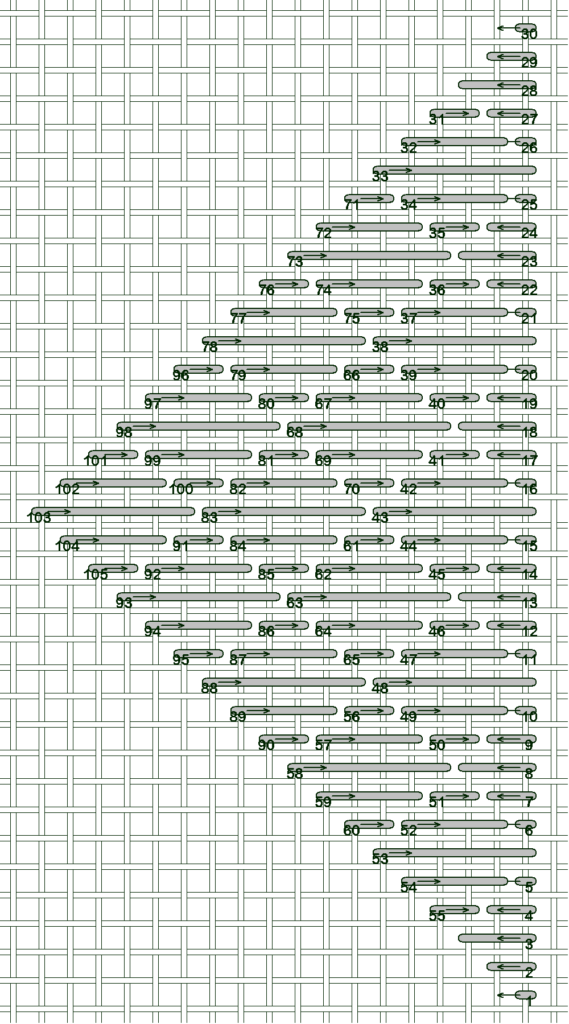
I started stitching closest to the center motif, and stitched up the row of partial diamonds, then down the next row. I worked in vertical rows until everything was finished.
When you’re satin stitching, try to always bring the needle up in an empty hole, and take the needle down in a shared hole. Where the pavilion diamonds pattern touches the giant sprat’s heads you’ll have to bring the needle up in shared holes, but if you stitch in the direction shown by the arrows in the diagram for the most part you’ll bring the needle up in an empty hole.
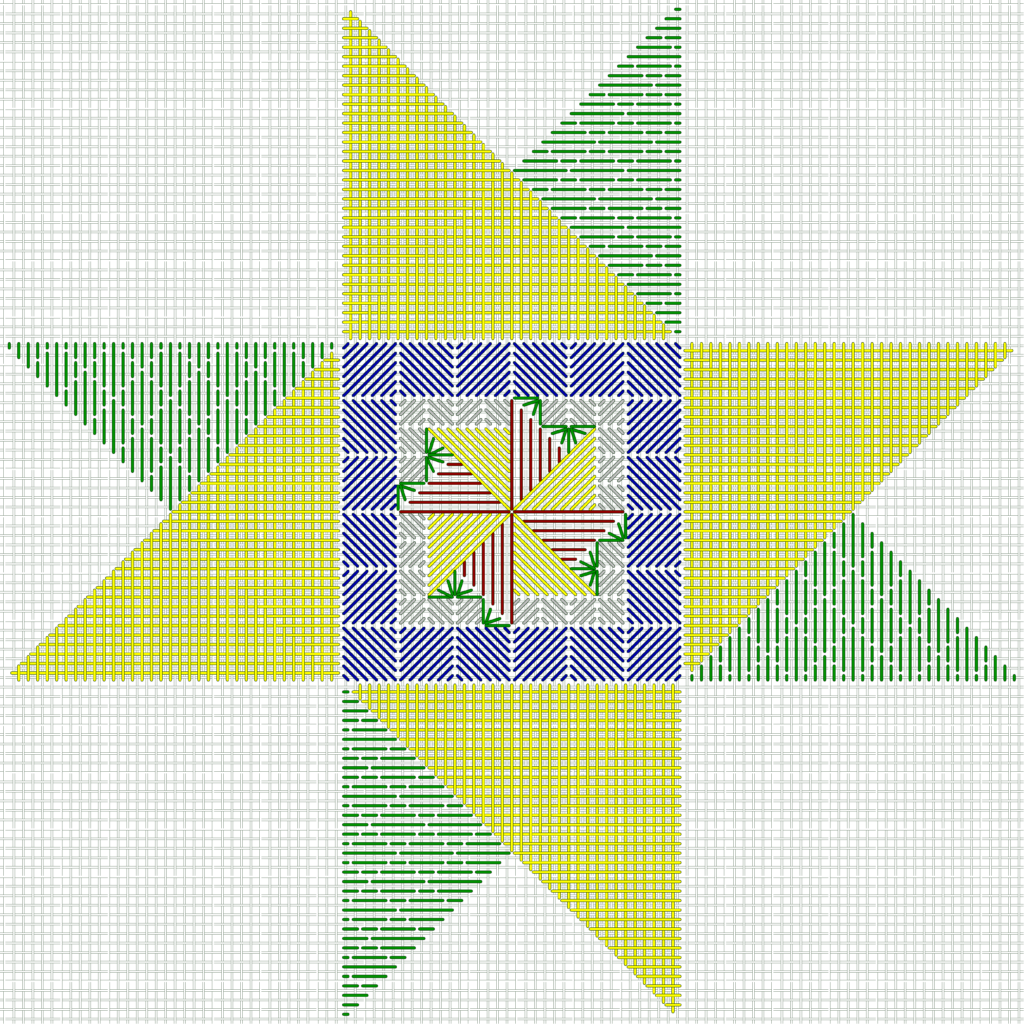
Here’s the completed design so far. Enlarge as needed to see the detail as you stitch.
I apologize for being a day late, and hope to be on time next week!