Click here for On Point Wallet Instructions Area B
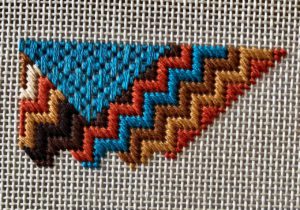
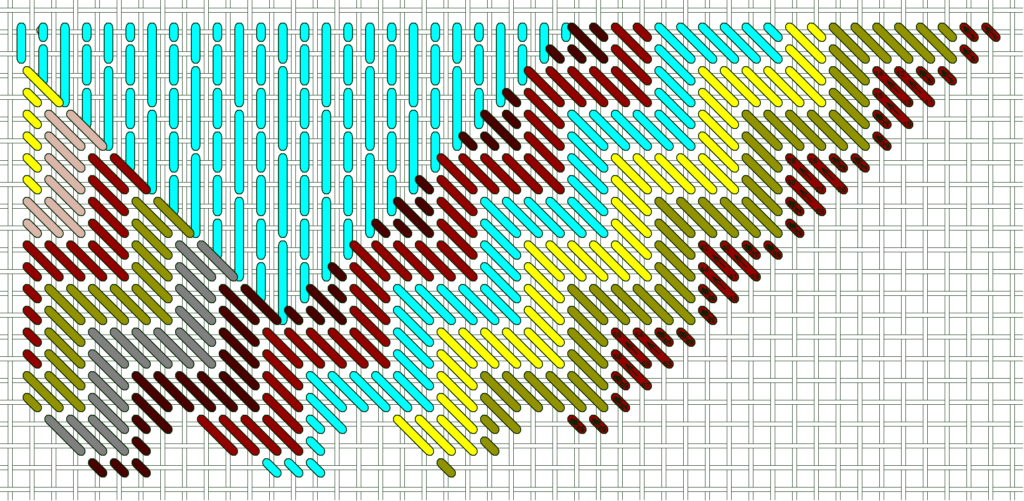
The next area in my stitch along design is filled with byzantine stitches. These are diagonal stitches, over 2 canvas threads long (except for the compensated stitches where it meets another area). I really like this pattern! I went a little crazy with the colors, but it looks great in two colors, three colors or as many as you choose.
To stitch this, I used 4 strands of floss, and anchored all of my starting stitches with a loop start. I ended all of my stitches by running through the stitches on back of the canvas.
And here’s a little something I’ve been doing as I stitch: after stitching a row or two, I lightly rub the stitches with my finger. This flattens out the stitches a bit, and smooths the satin stitches, but it also reveals if anything is loose or not well anchored. This will live in my purse when finished, and I don’t want anything coming undone. So I’m checking it as I go along.
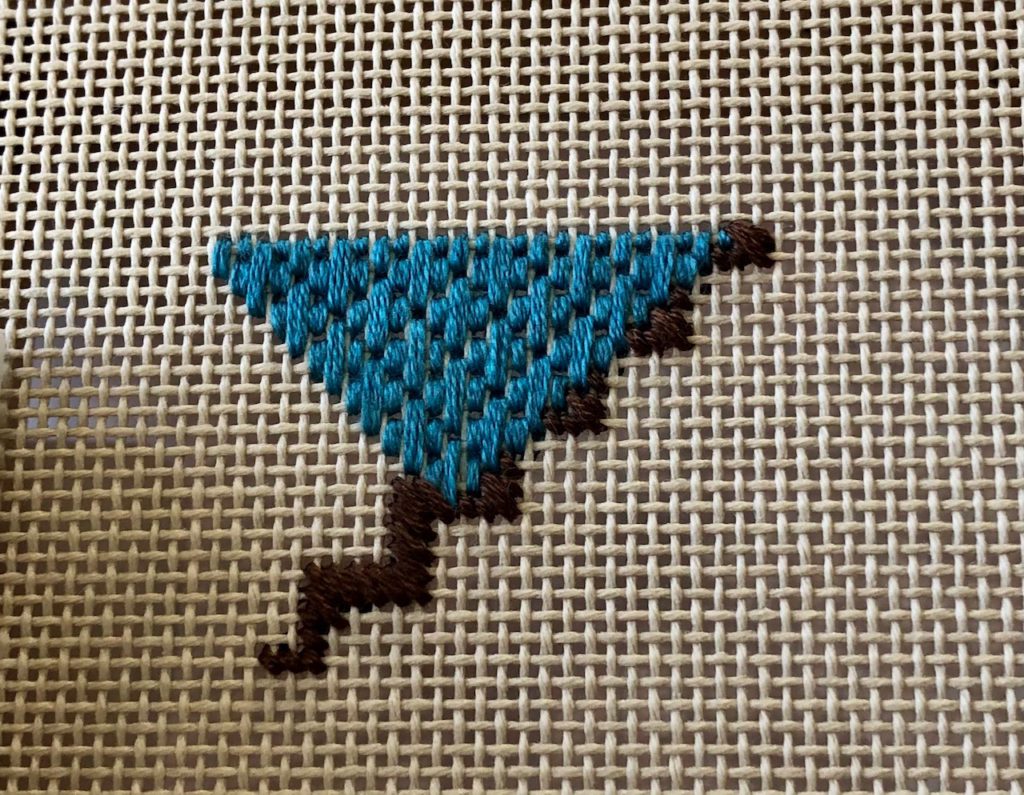
I started with a compensated row, which is not usually a great idea. It’s better to establish the pattern before tackling the compensation, to give you a better idea of how much to compensate and where. But in this case, it was easier to count, and I’ve got it graphed for you in the diagrams.
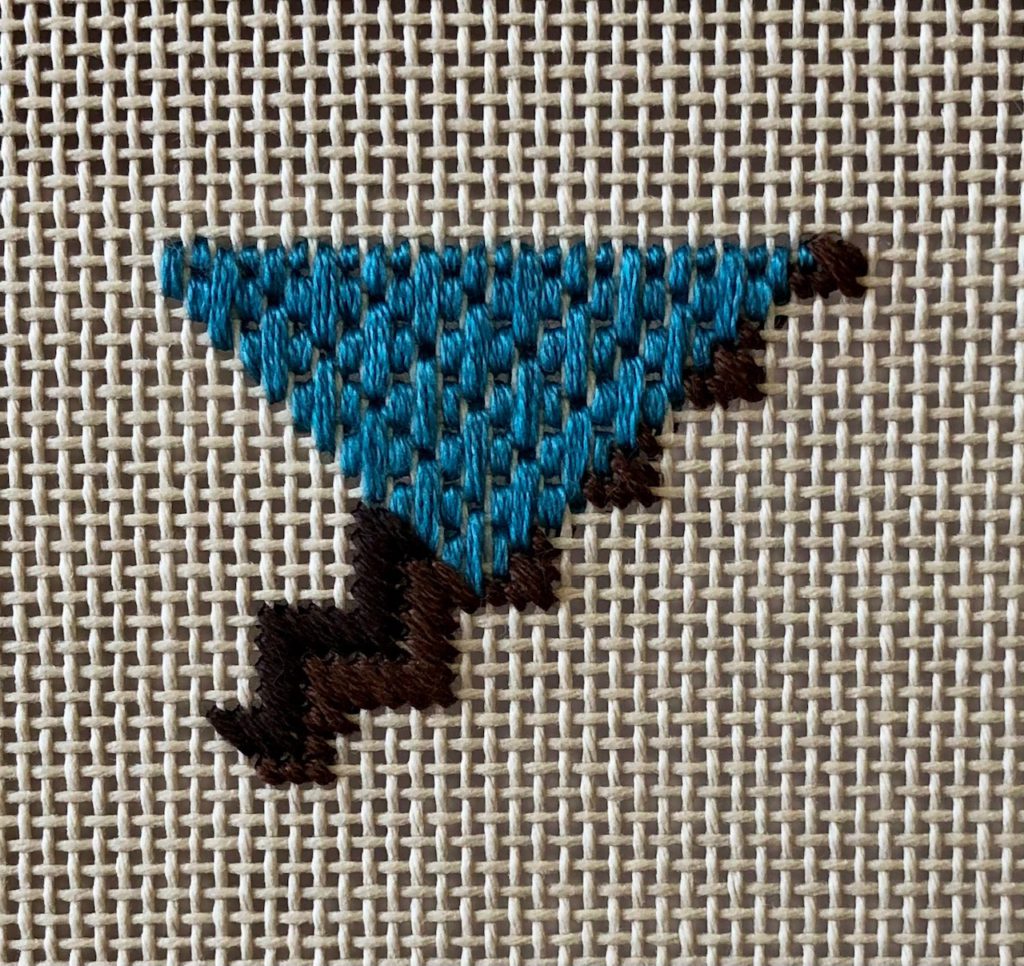
You’ll notice as you stitch that some of the stitches end under some of the Hungarian stitches. You don’t have to do this, but I wanted it to cover the canvas better than leaving any gaps. It’s not difficult, just a little fiddly, and only for a few stitches.
I stitched all of the stitches to the left of the Hungarian stitch, after the first row, before tackling the rows on the right side of the Hungarian area.
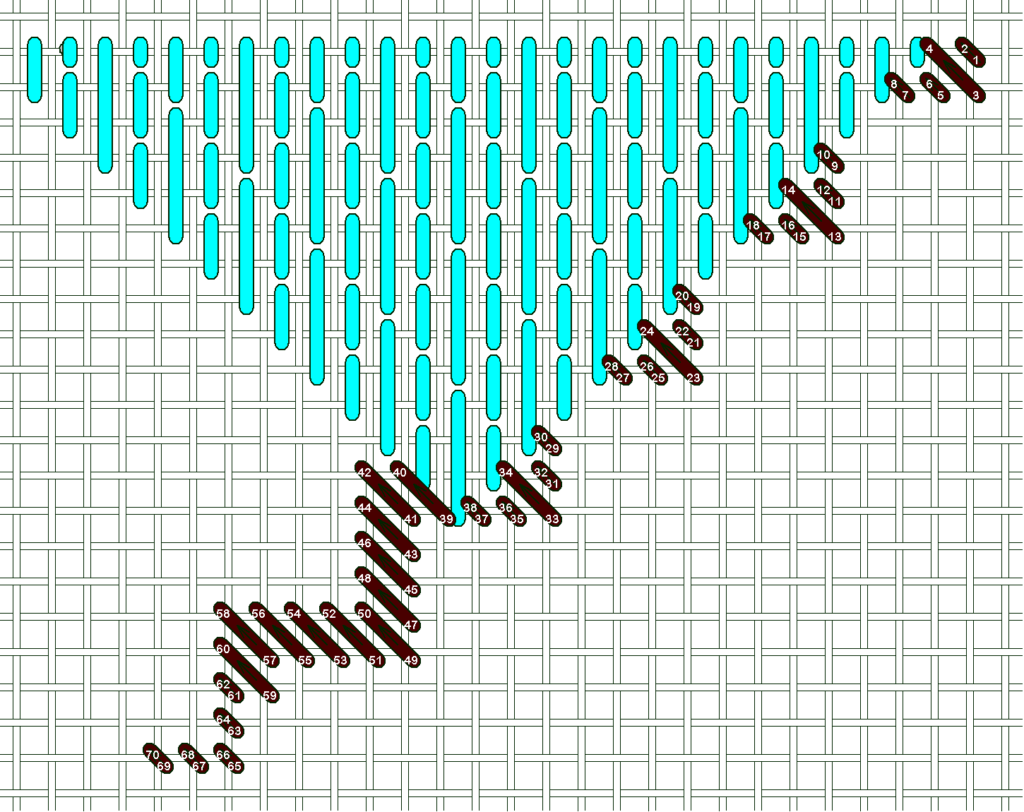
I won’t show every row in photographs, but I did graph every single row, to make sure there wasn’t any confusion.
The basic byzantine pattern is 5 vertical stitches, then 5 horizontal stitches, all the same length diagonally over two canvas threads. It helps to know the basic pattern when stitching, to be able to stitch without having to constantly check the diagrams.
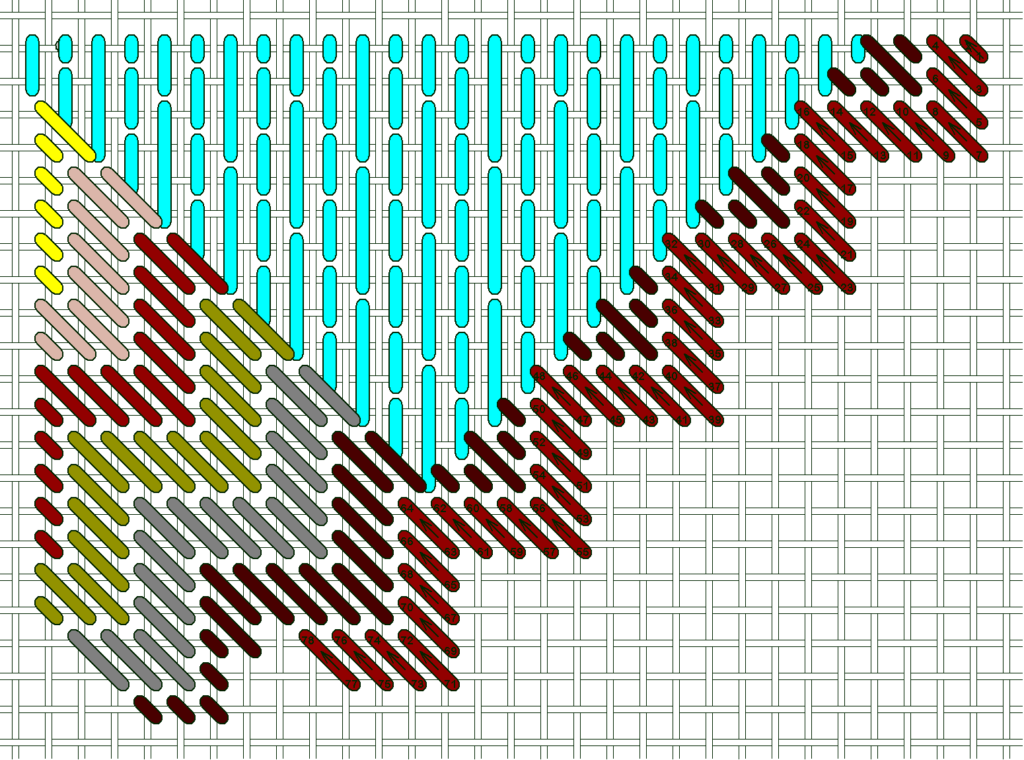
The edges of the byzantine stitches look very ragged and uneven. Don’t worry about this – remember that more will be revealed next week. I’ve diagrammed exactly what needs to be stitched with each thread. Remember that you can use different colors and threads than the ones I’m using.
Now for the diagrams. Each color change has its own diagram, to avoid confusion. The thread tables are in the instructions, so be sure to take a look when stitching. And, the colors in the diagrams are pretty hideous. They are NOT representative of the colors I’m using, just colors I used for the diagrams to differentiate between each row.
First row 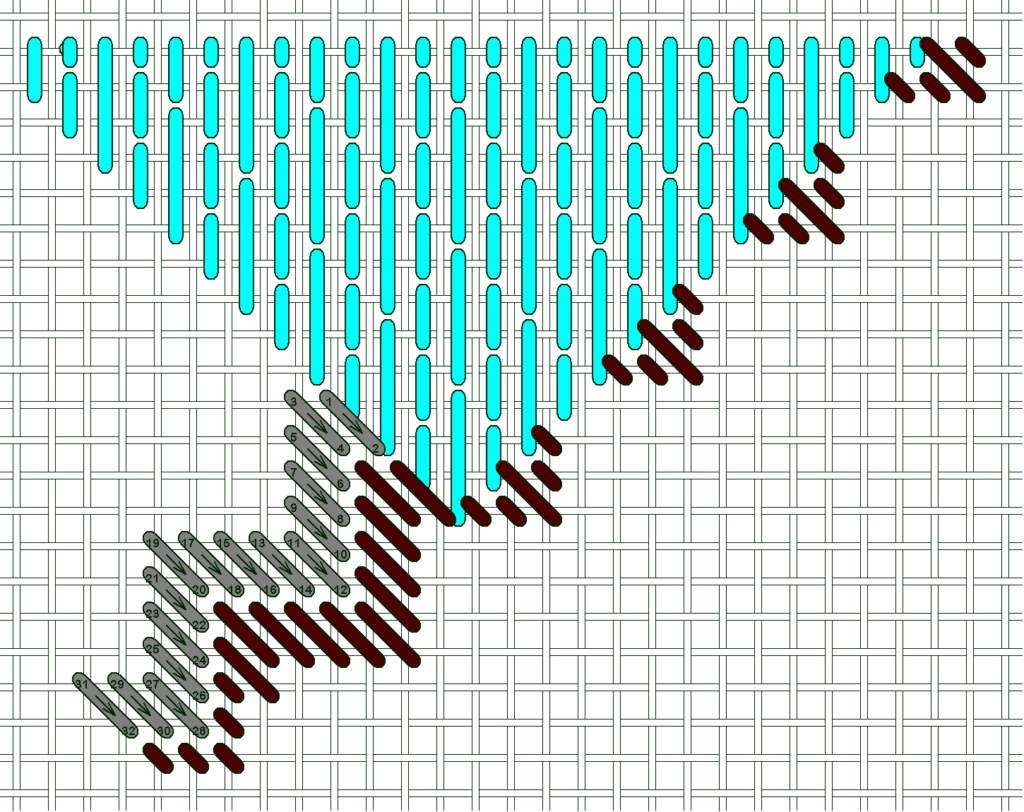
Second row
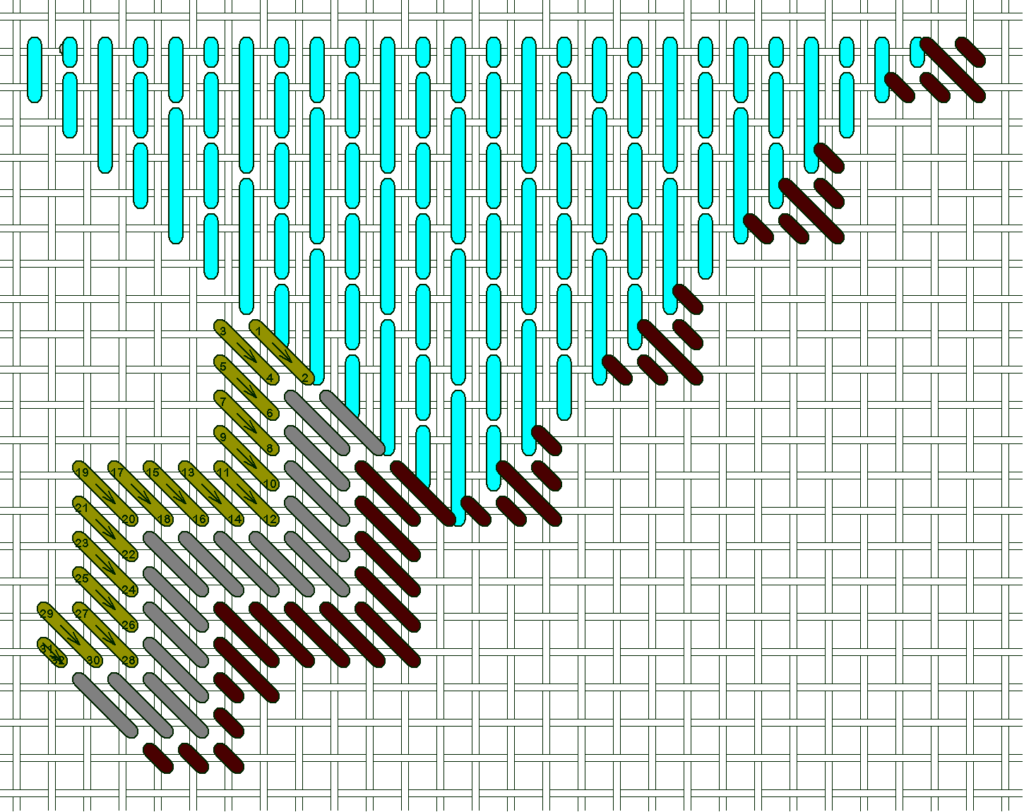
Third row 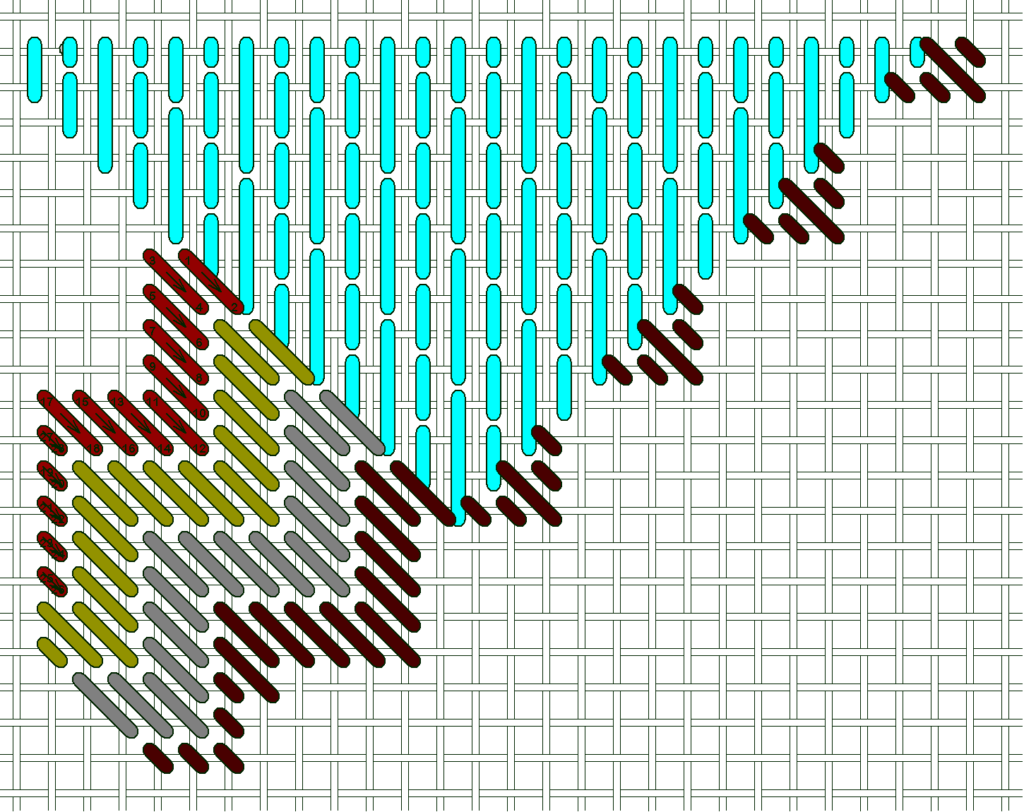
Fourth row
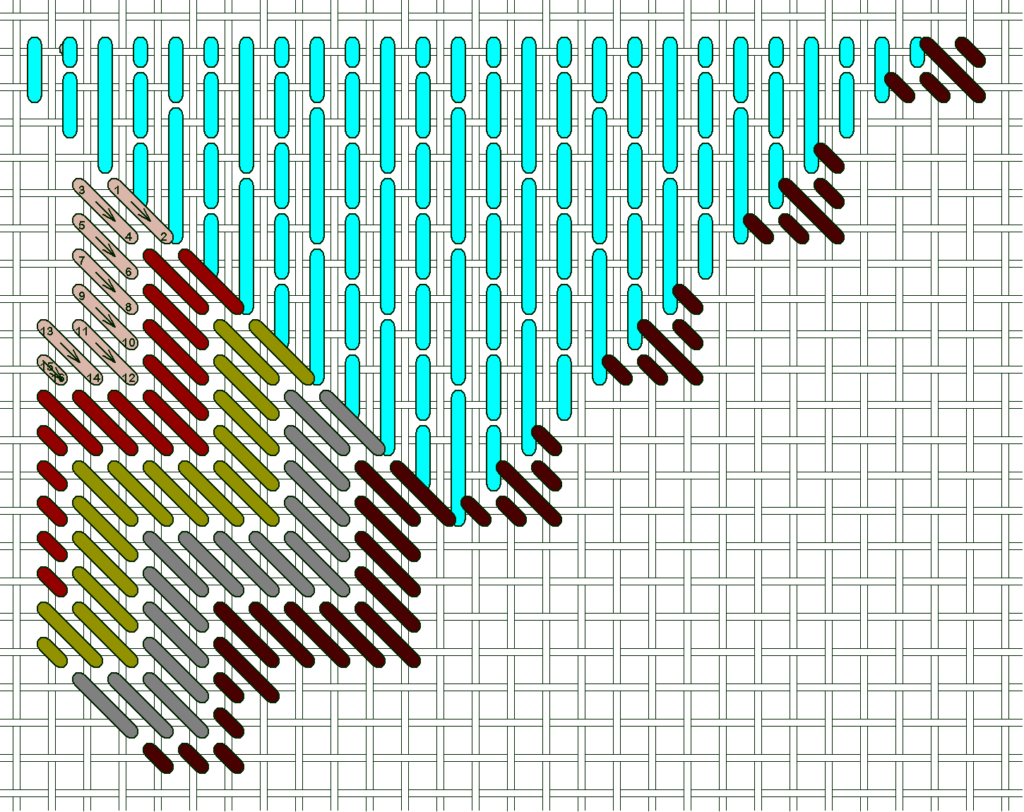
Fifth row 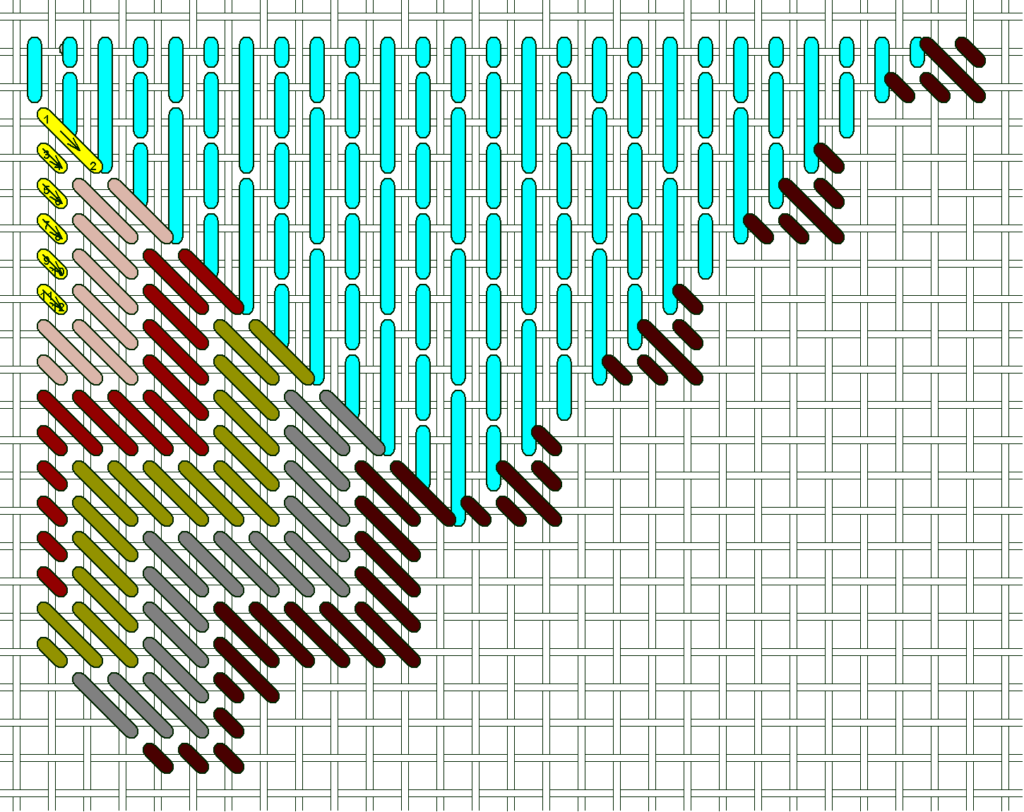
Sixth row
Seventh row 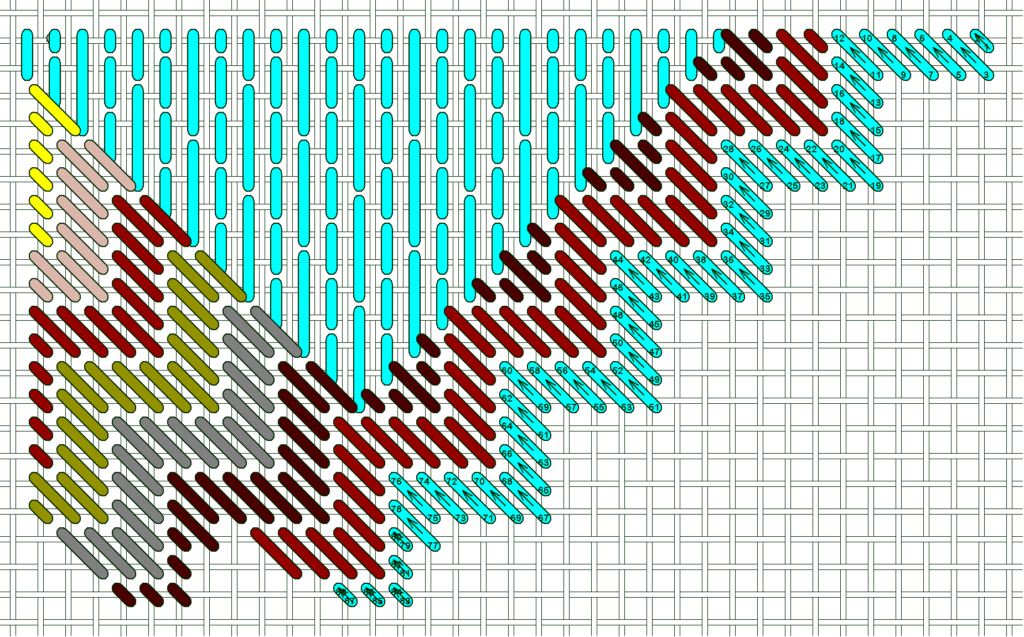
Eighth row
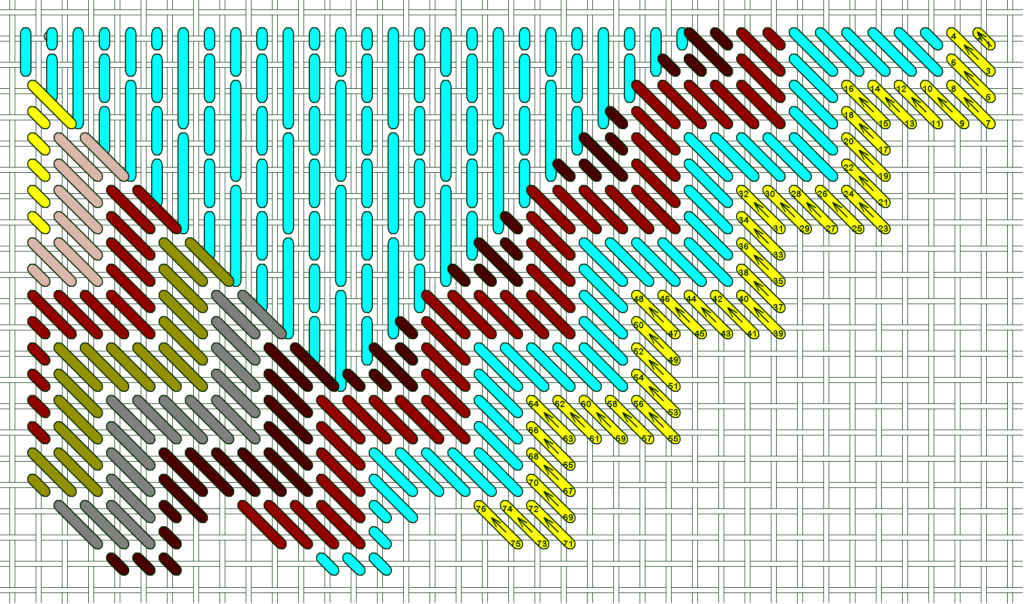
Ninth row 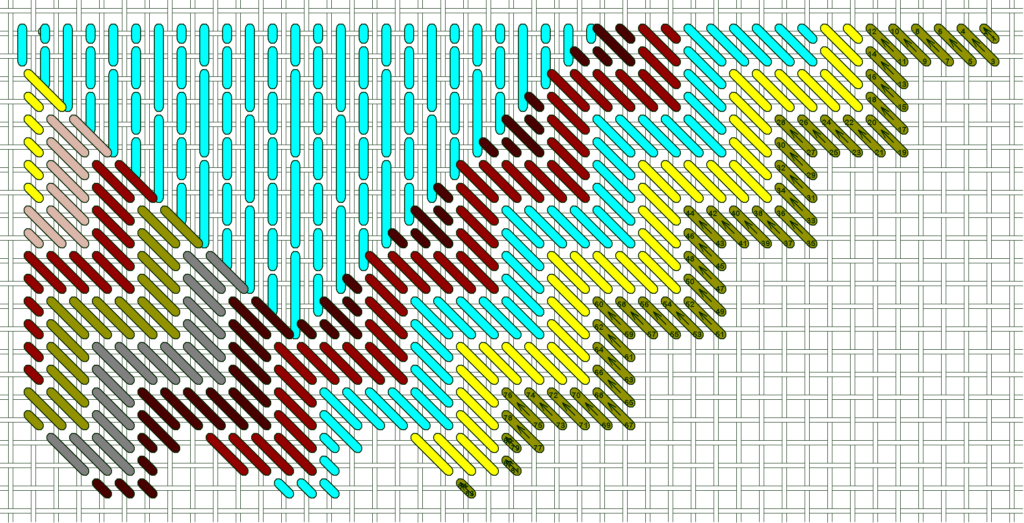
Tenth row
Next week we’ll do something that doesn’t involve as many color changes. This area was a little bit tedious, due to having to start and stop so many times, but I’m happy with the way it looks.