Click here for Harlequin Dance Redux Area K instructions
A lot of counted canvas designs are composed of geometric shapes. Today we’re stitching triangles. I think it’s always helpful to keep in mind the shape you are stitching, to make sure your end points don’t stray away from the shape.
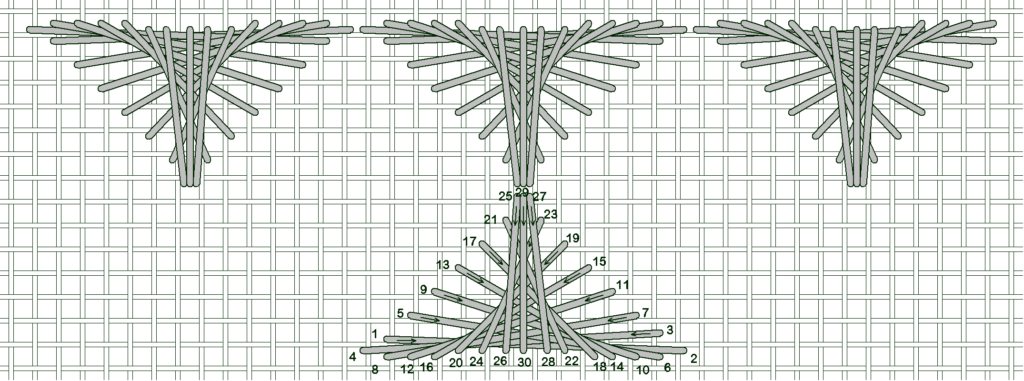
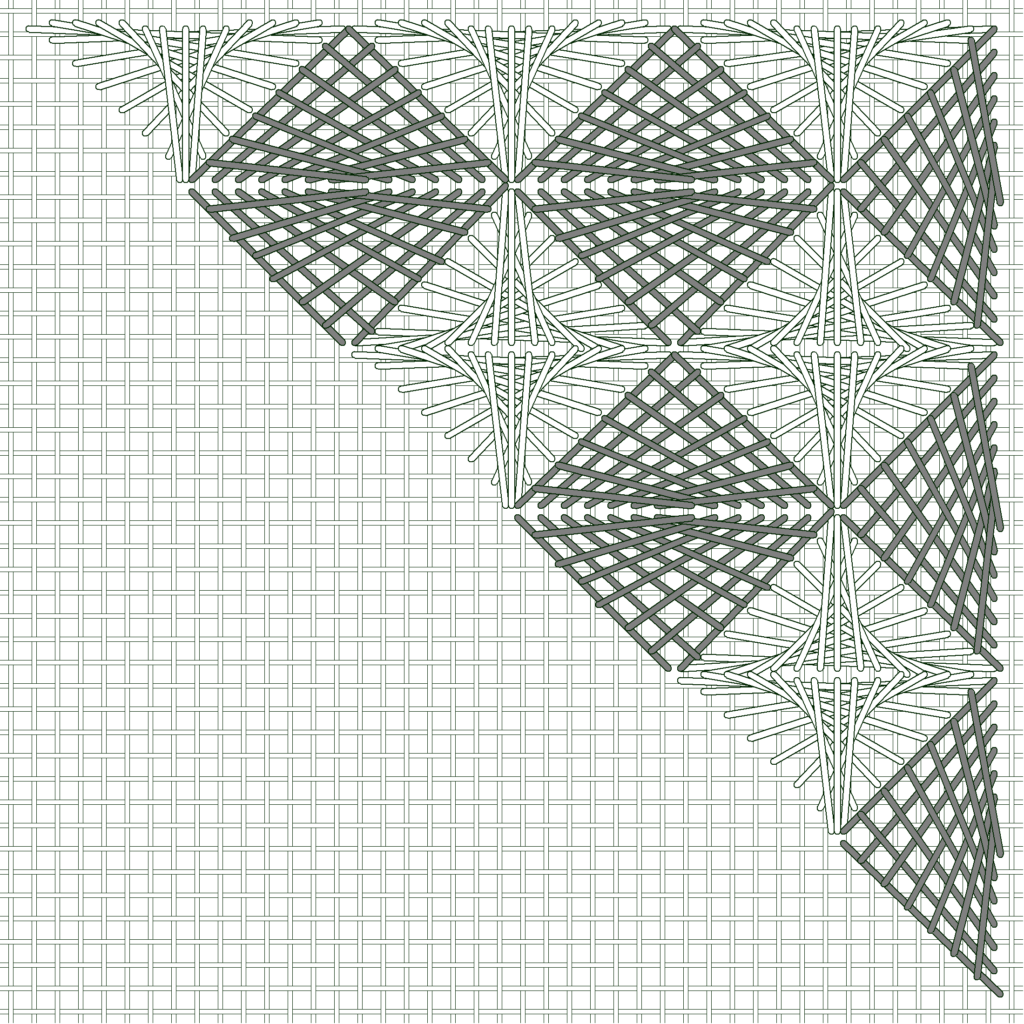
We’re back at the top of the design, stitching next to the first waffle stitches, a series of large triangles.
I like large motifs because they stitch up pretty quickly, and have a large visual impact. Today’s triangles accomplish that, Amadeus stitches and sprat’s heads.
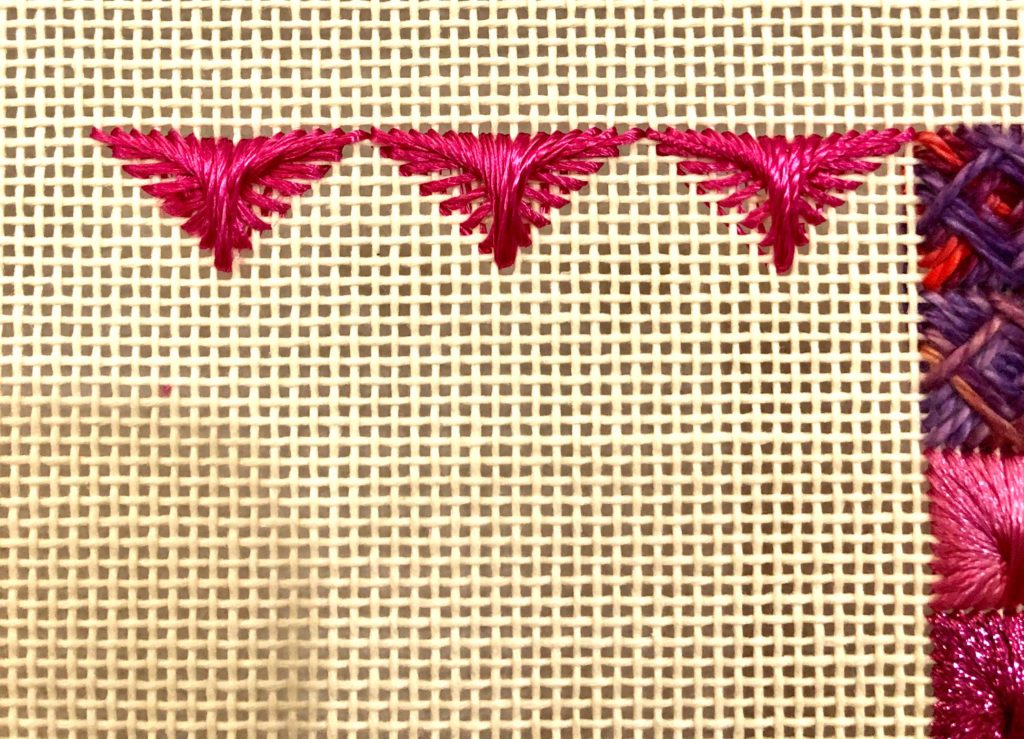
I started off with a row of Amadeus stitches across the top edge. These Amadeus stitches share holes with each other at the tops. I used Rainbow Gallery Patina, a lovely thread that is still available in some colors. Unfortunately, the color I had in my stash has been discontinued, but I think Panache would work well. Of course, if you don’t have a rayon pearl in the right color, and want to stitch all of the Amadeus stitches with the same thread, it will work just as well.
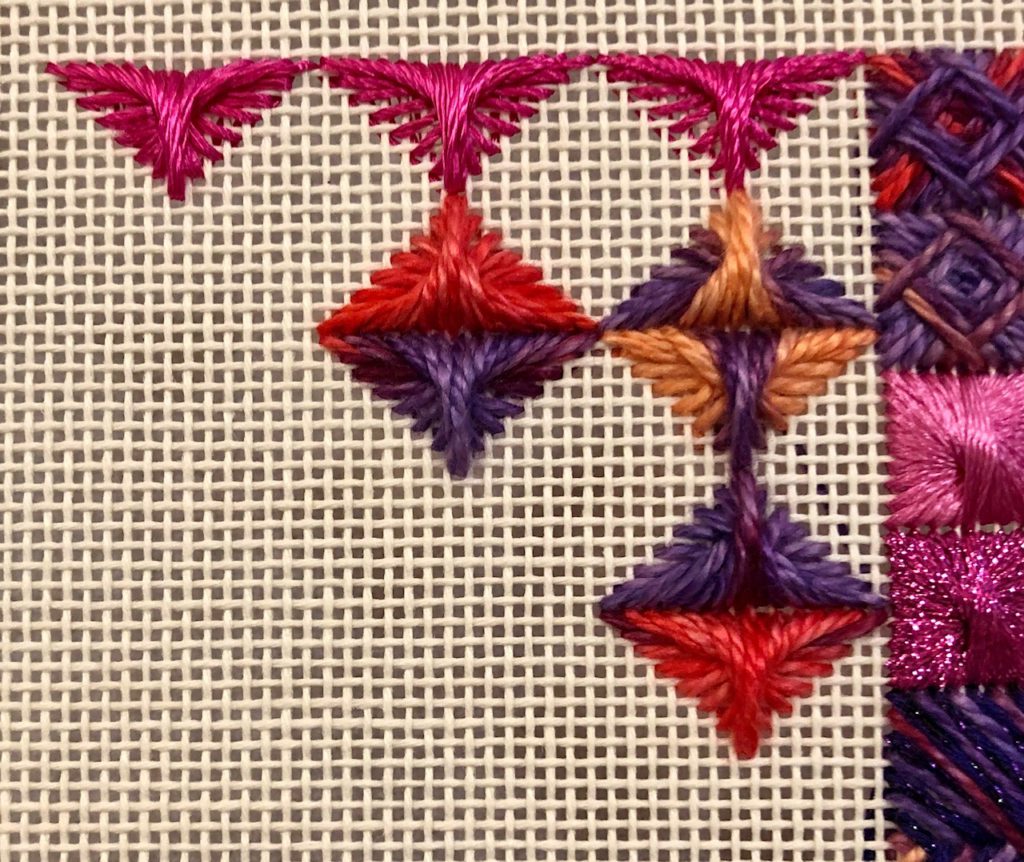
I switched to the overdyed thread for the rest of the Amadeus stitches. These are stitched in pairs, back to back, and the two triangles together form a diamond shape. I especially like the way the overdyed color changes fell for the inner Amadeus pair; the colors reversed and make an interesting effect. I’m pretty sure I didn’t plan it that way, but it’s a happy accident!

In the spaces between the Amadeus stitches I stitched sprat’s head triangles, again back to back to form a pair. I had to alter the orientation for the one by itself at the edge that shares with the waffle stitches. Working out the compensation for to stitch it in the same order as the others would have required a lot of brain energy, and I just wanted to stitch!
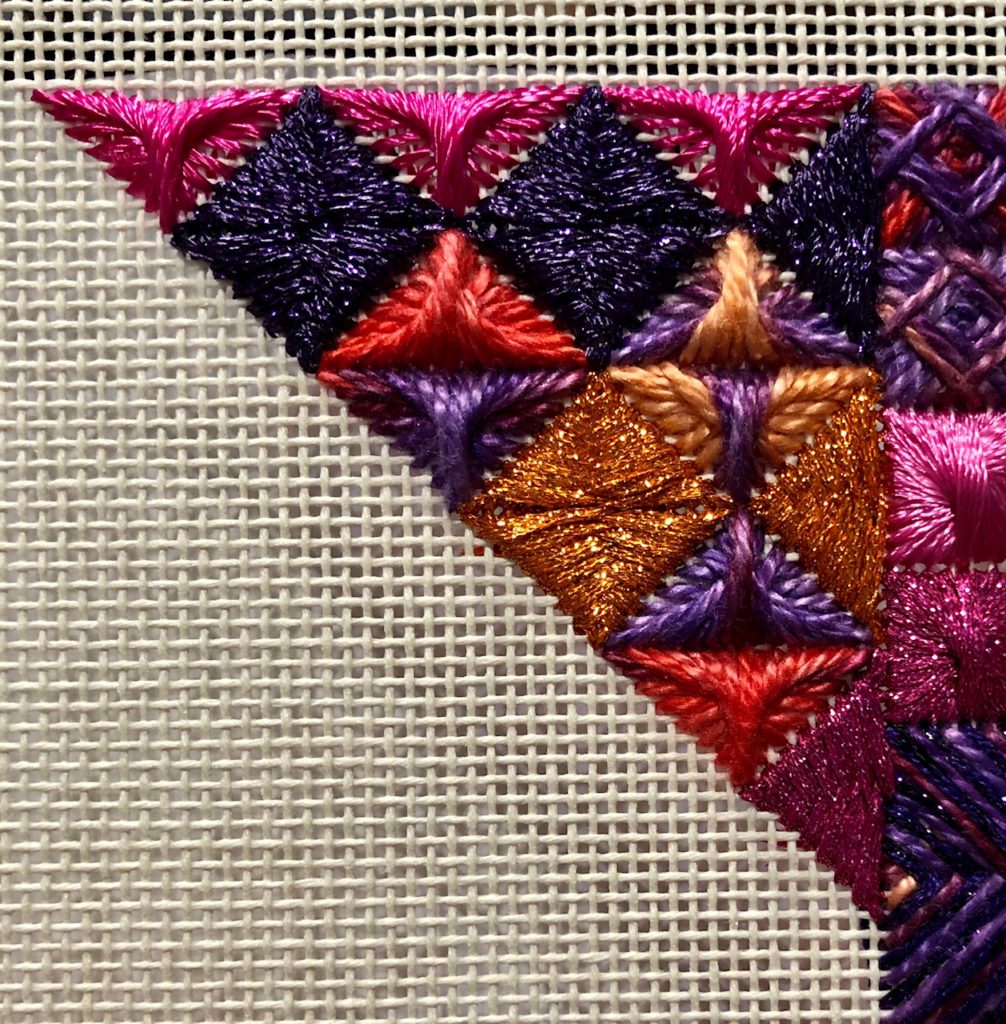
I used two different colors to stitch the remaining sprat’s head pairs, orange in the middle and the last one in pink.
Overall, I’m pretty happy with how the project is developing. All of these stitches are a change from the original Area K, and I think I like it better!
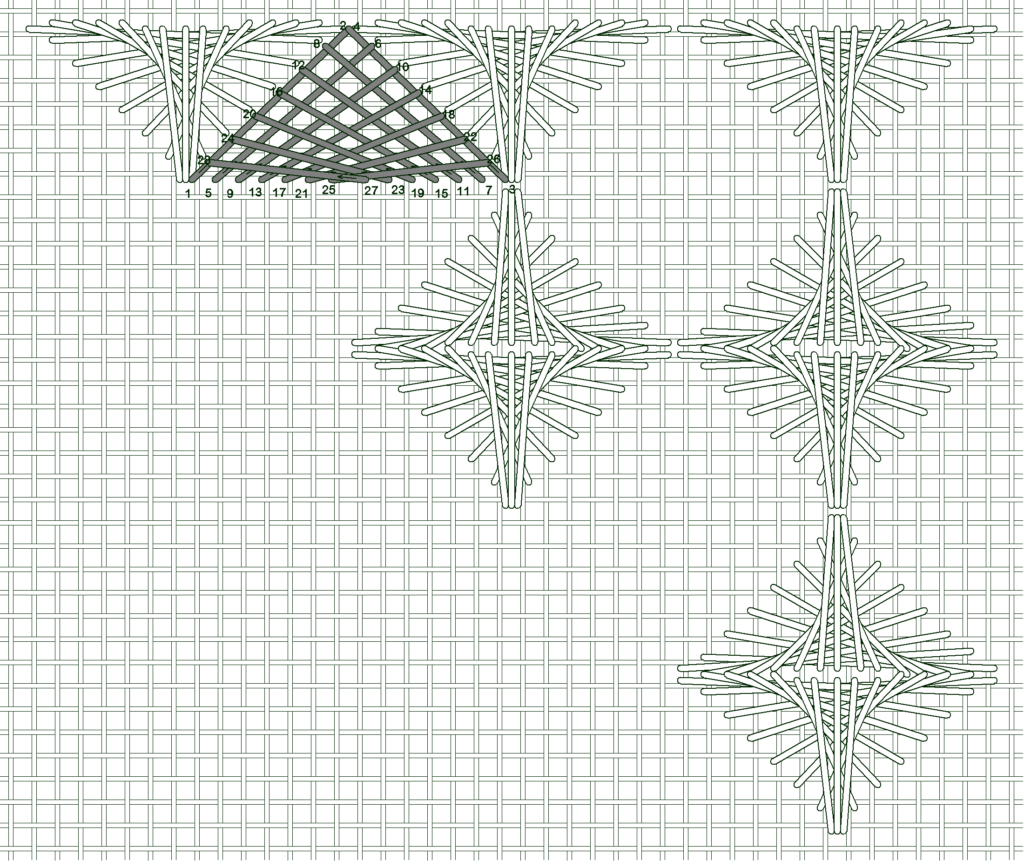
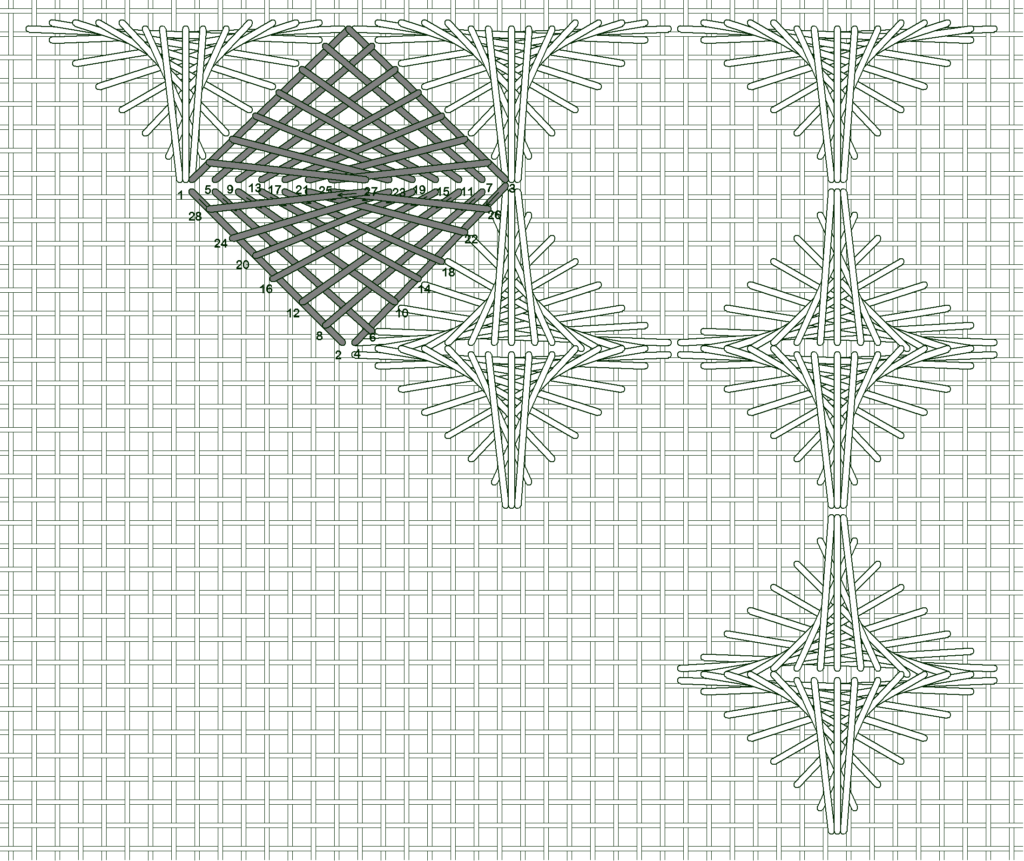
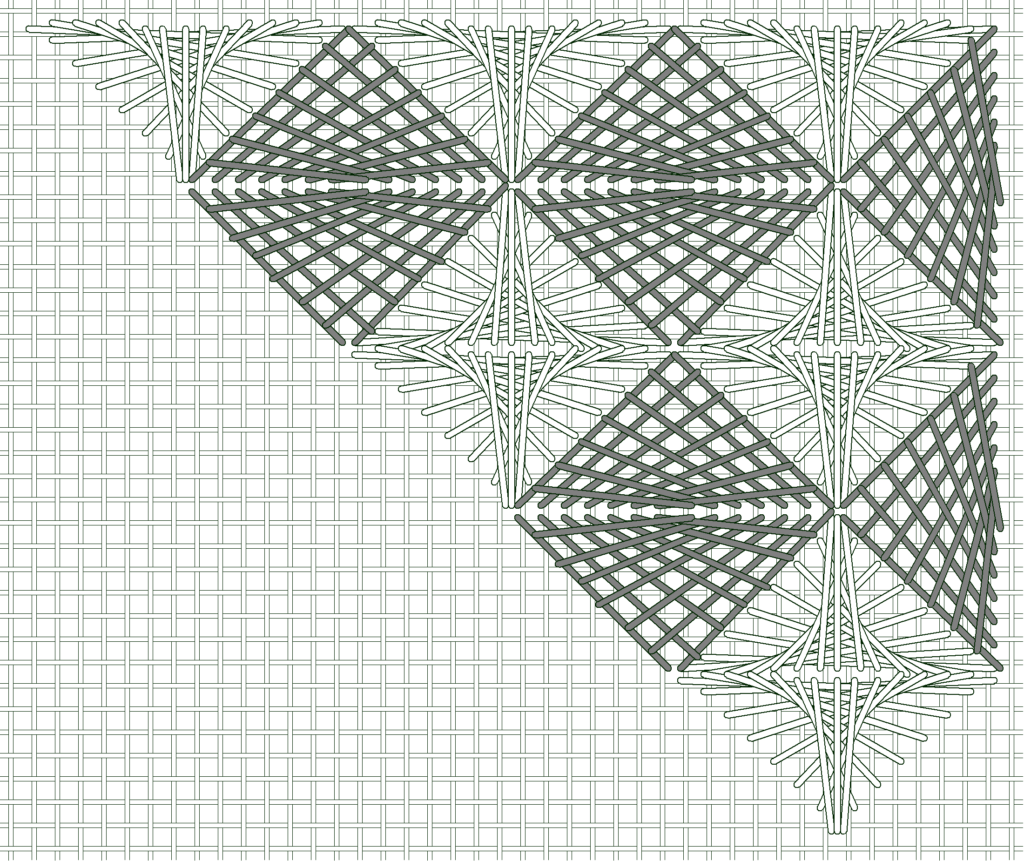
Here are the diagrams for today. Not a lot of instruction here, but it’s all explained in the pdf at the top of the page.
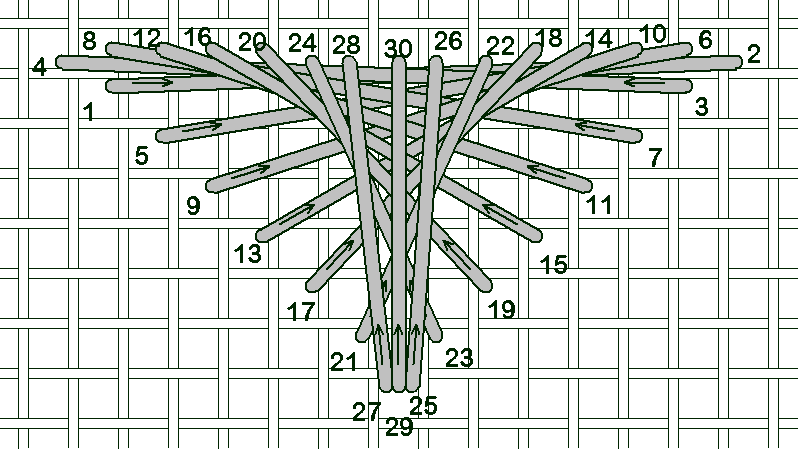
This is the basic Amadeus stitch. I used the rayon pearl to stitch 3 of these in a row, sharing holes at the longest tips.
I changed to the overdyed cotton to stitch the next series of Amadeus stitches. These share holes at the points, and are stacked to share holes along the long straight side.
I used the metalized ribbon to stitch a series of sprat’s heads between the Amadeus stitches. These sprat’s head stitches share holes with the Amadeus stitches along the slanted sides of the triangles, and along the straight sides with each other, two sprat’s heads back to back to make a diamond shape.
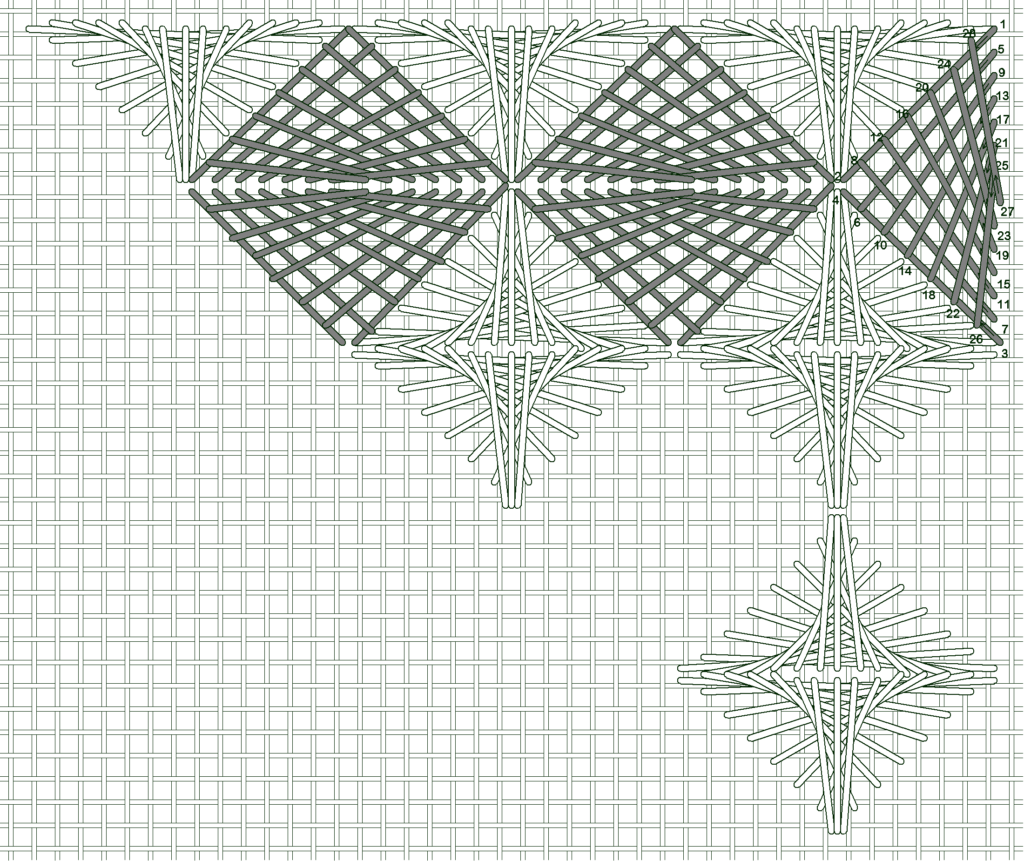
I used the orange metalized ribbon to stitch the next row of sprat’s heads.
I used the pink metalized ribbon to stitch the last sprat’s head to complete Area K.
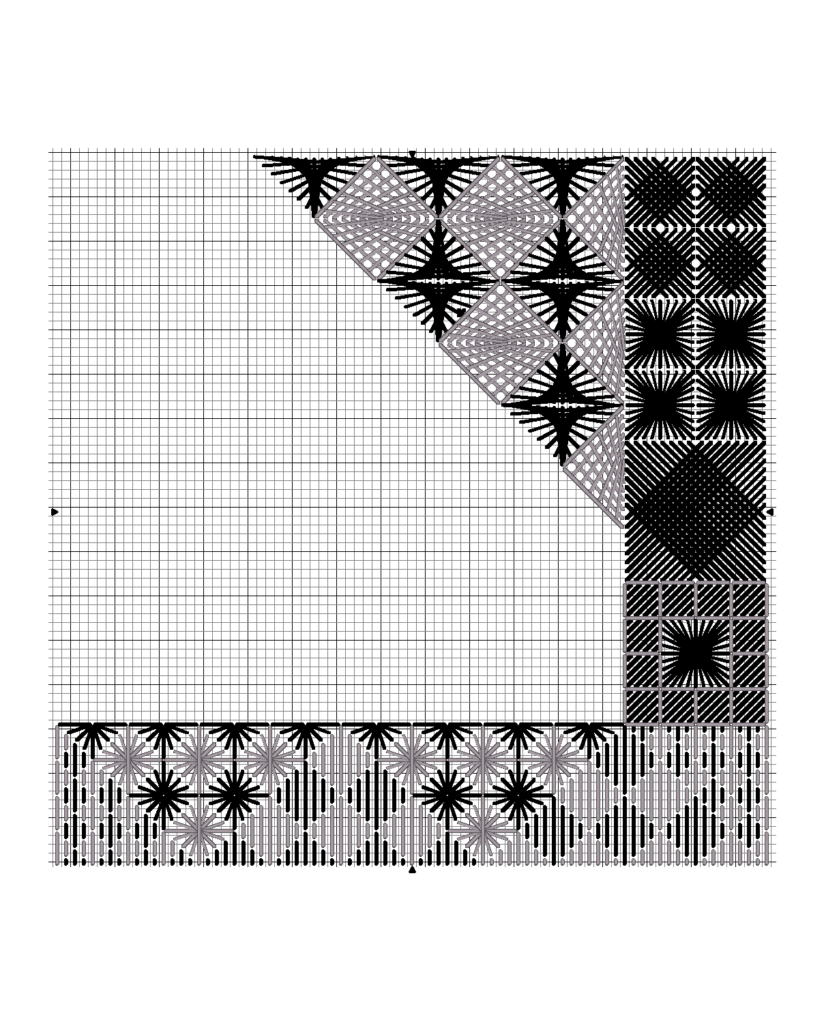
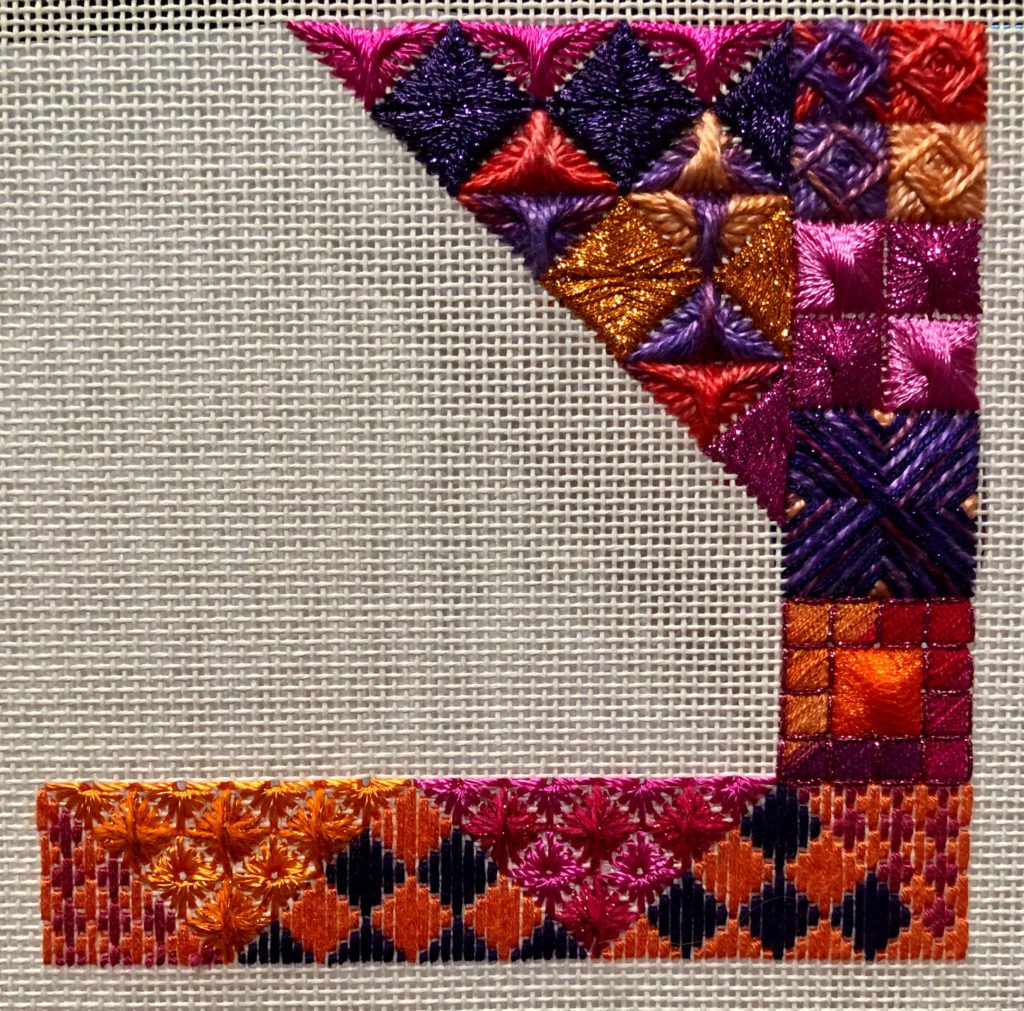
This is the entire project so far, showing Area K at the top next to the first stitches along the right side.
Next week I have in mind to do some layering of stitches! And hopefully I’ll be on time with it!